Showing posts with label skill level: beginner. Show all posts

My Perfect T-Shirt

Probably more than a decade ago, I bought a cute striped shirt with cut-on sleeves. I wore it all the time (still do) and eventually decided I needed to make myself a pattern. I sewed myself one and wore that one all the time. So I guess it was time to make two more. 
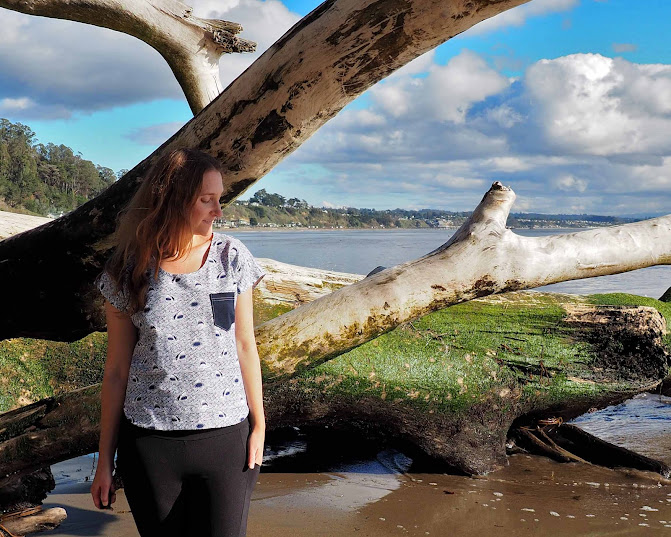

Pattern: self drafted t-shirt with cut-on sleeves 
Cost: sponsored

One of the best parts about making your own t-shirt is picking out a fun fabric. As opposed to a coat or a special occasion dress, I feel like I can be a little bit more playful with a t-shirt. Modes4U, who specializes in cute prints, was nice enough to send me a yard each from two brands I'm obsessed with: a Dear Stella shark knit and an Art Gallery coral stripe knit

How great is this shark print!?! Fun fact: that ocean behind me is VERY sharky. 
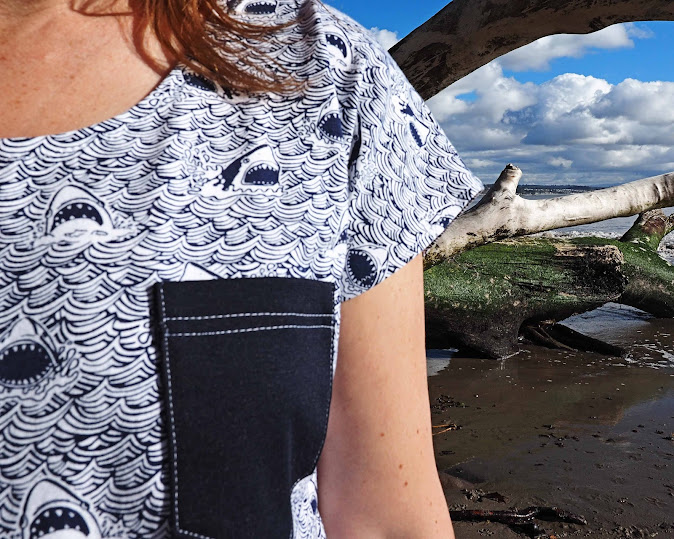

This top has some nice features that I think make it a favorite. For one, the cut-on sleeves are easy to wear and make it very fast to sew. I also make it with a hem facing that gives the top a nice weight and prevents any curling hems. The hems of the sleeves and neckline are serged to give them a bit of weight, too, and then just folded under and stitched with a zig-zag stitch. 

I've always loved Art Gallery knits because they have a nice weight without being too bulky, and they're buttery soft. The Dear Stella print has a bit less stretch and feels more like a traditional t-shirt weight, which also works well for this top. 
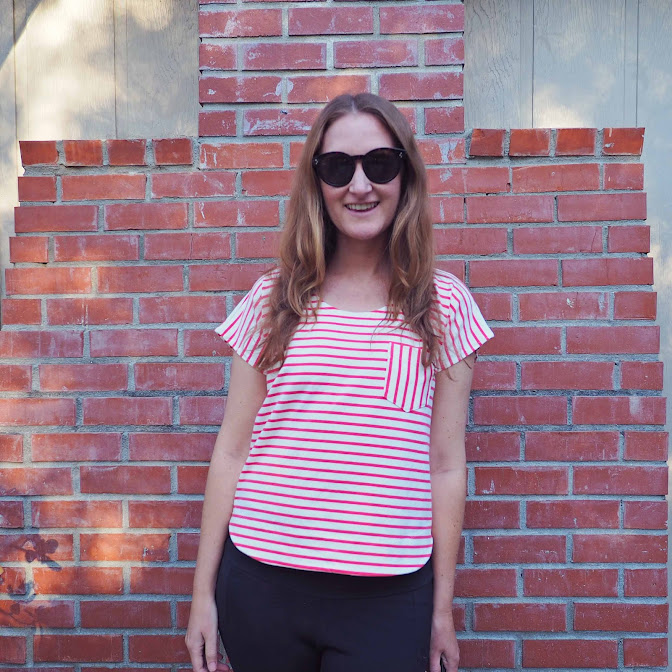
If you'd like to make your own, this is probably the most common shirt pattern I've seen on the internet, so choose your favorite pattern brand and see if they make one. And check out the Modes4U knits to get yourself something fun. 

Happy holidays everyone!
Custom Printed Sweatshirt

Not sure if working remotely is causing a slow backslide of my fashion sense, but I am all about this sweatshirt.

Pattern: McCall's Misses'/Men's Tops and Hoodies #6614 
Fabric: 2 yds Drake Sweatshirt fleece in heather grey from Stonemountain
Cost: $30

The text says "seamstress for the band," the lyric from Elton John's Tiny Dancer and, in my opinion, a great graphic tagline for a sweatshirt. I think I saw it on a ready-to-wear jacket and just couldn't get the idea out of my head. For this project, I borrowed my officemate's Silhouette Portrait machine and bought some heat transfer vinyl and went to town. I think the knife on the Silhouette needed to be replaced though because after a good start I ended up needing to cut out the rest of my design by hand. Despite my troubles, I have always wanted some sort of Silhouette or Cricut machine and now I think I may have to do it because I'm addicted. It is just small enough that I think I may be able to justify it in our cramped space.


The sweatshirt is McCalls 6614, a unisex pattern for raglan sweatshirts and zip-ups that I've had on hand for a while. I ditched the princess seams and just cut the zip-up on the fold for this simple look. The sleeves also have darts at the shoulder, which is a nice touch. My only complaint is that this pattern is definitely sized for a man - both the sleeves and the body were loooong. Luckily, that is easily fixed. I probably could have also found matching ribbing for the cuffs and collar but this is just in the same fabric.

Of course, with a little extra left over I got carried away and, before I knew it, the dog had one, too.

Hers features another song lyric, this time from Jay-Z: "99 problems."


I have been very interested in fabric design and printing lately. I just designed my own Oakland-themed pattern and had it printed on sports lycra from Spoonflower. It is AMAZING. I am fascinated by being able to design something all my own, from fabric through sewing. In fact, I have an extra special fabric print coming up next week to show you!


My New Everyday Tee

You know it's a good one when you make yourself a casual everyday tee and you wear it EVERY DAY. I mean, I made it when I was working from home so I didn't need that much variety, but this simple shirt has been a real winner.

Pattern: Tessuti's Free Mandy Boat Tee
Fabric: 1.5 yds ponte
Cost: $10

This pattern is Tessuti's free Many Boat Tee, which evolved from their other free pattern, the aptly named Fave Top. It is a really simple one-size-fits-most drop shoulder top, with fitted sleeves that balance the volume of the body very nicely. 

This is actually my second version of the top. I wore the first all over Europe this summer but was getting rather sick of the light lavender color, which doesn't really mix as well with my wardrobe. The black goes with everything and is now why I find myself wearing it ALL THE TIME. 


This version is cut from a black ponte, the same fabric as I used to make my basic black dress. However, after making the dress I only had enough fabric for the body, so I cut the arms from remnants of our Halloween costume fabric. Surprisingly, you'd never notice even though they are slightly different weights and materials. Black for the win!

I am loving this pattern so much right now that I have actually done a pattern hack with some really nice wool sweater knit for the Britex blog. Details on how I combined this pattern with the Style Arc's Dee Knit top on their blog, so check it out because the twist is a lot of fun. 


I am super into sewing basics right now and am wearing them all the time. 

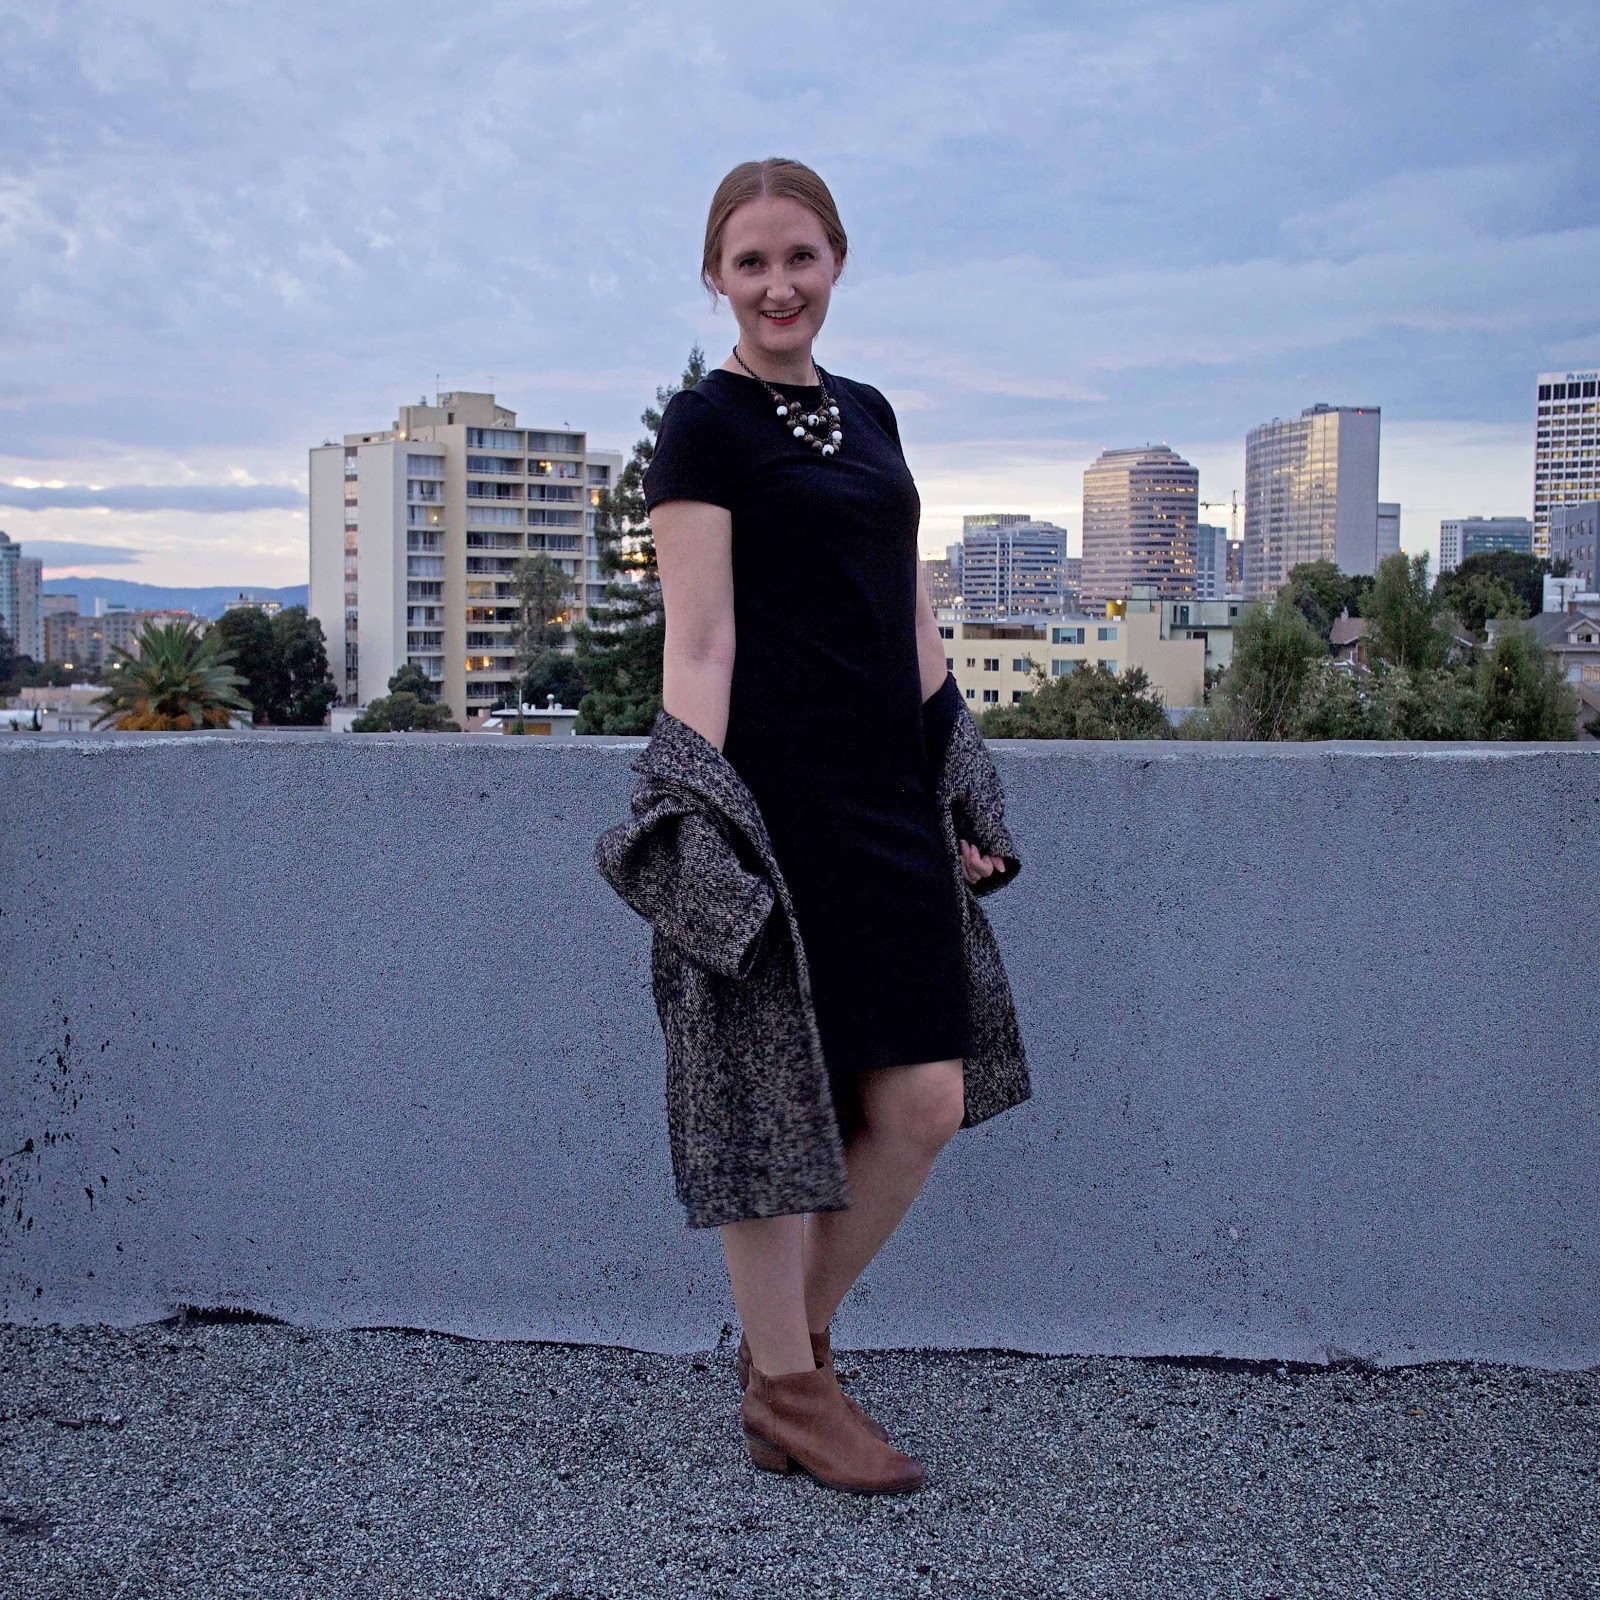
This Dress is Not the Star

Some of my favorite blogs are full of pretty dresses. The details! The fit! The colors! Worn to the grocery store or a fabulous party, they are the star of the show. But sometimes you need a dress that takes a back seat. That plays support for your favorite coat, or bright shoes, or sparkly necklace. For me, this is that dress.

Pattern: basic t-shirt block 
Fabric: 1.5 yds synthetic blend ponte
Cost: $5

The dress is drafted from my basic t-shirt block. Since my t-shirt pattern ends at the widest part of my hips, all I needed to do to make it into a dress was extend it straight down to my desired length. The end result is fitted but not too tight, just like my favorite t-shirts. Made up in a stable black ponte, it is perfect for work or a night out under my favorite accessories.

The other great thing about a simple t-shirt dress is that the whole thing took just a few hours to make. In fact, I sat down to cut out a top when I realized I could squeeze the dress out of the same fabric, too. A couple of seams later and I was wearing it out to a movie that afternoon! It is very rewarding to get such a functional garment with so little effort. I guess it is my LBD.


So why even blog about such a simple garment? Just a little reminder to myself that I can get a lot wear out of such a simple, easy piece. And another stretchy win for holiday parties and eating!

More Hudson Pants

Pattern: True Bias's Hudson Pants
Fabric: French terry
Cost: $8


 It's no secret that I love the Hudson Pants pattern. I have made myself a pair, made the men's version, and even made a chambray version. If I had kids I'd have probably made them a pair.
At this rate, I've made one a year since they came out in 2014.

As pajamas, I wore my original pair regularly. Nightly. After more than two years the fabric was starting to run bare, so I decided I needed to replace them. I don't love having to remake something when I've already made a perfectly good one, but luckily this patterns is so fast and has just enough fun details to make it interesting.


The French terry I used had less stretch than my last version, which was more of a jersey knit. I was surprised that they fit a bit more snug, but I think now they look more similar to other versions I've seen online. They also loosen up after a couple of wears. 

They have already become a fast favorite. In the six months since I've made them, they've been with me to the desert, to Christmas, and countless study sessions on my couch. They are the perfect pajamas!


Slouchy Tee and Rooftop Views

Pattern: Tessuti's Mandy Boat Tee
Fabric: 1 1/2 yds rayon? blend
Cost: free from Bay Area Sewists fabric swap


Welcome to the rooftop series, where I discover that my roof has great lighting, a nice view and is perfectly hidden from the public for blogging selfies! You may see all my photos up here from now on...   I'm also done with finals for the semester, got all my credits sorted out to graduate in May, and looking forward to sharing more sewing projects with you during the winter break. I didn't get a ton of sewing done this semester, but I did sneak in a project here and there.

This one is the Tessuti Mandy Boat Tee, a popular pattern featuring an oversized, boxy shape and drop shoulders. I reduced the width slightly (although it is still quite oversized), shortened it (perhaps too much?), narrowed the neck opening, and added sleeve bands for easy sewing. The fabric is a soft knit, possibly rayon blend, that I got at a fabric swap with the Bay Area Sewists. It was originally white, but I threw it in a dark blue dye bath with some other things. Clearly the dye didn't take very well and I ended up with this lavender color. Still works for me though!


Overall this is a very easy, quick sew. The result is definitely very slouchy, but a fun shape to try. My hems could also probably use some work as they're a bit wavy, but I was happy to bang out this quick project. 

Currently I've got a lot Christmas-sewing related projects going on, including a bomber jacket for Mr. Made and my first sock-knitting project. What a joy to be creating again!

Some New Sewing

Pattern: BurdaStyle's Retro Top 07/2013 #130
Fabric: 1 yd scuba knit
Cost: $4


I haven't had as much time to sew this semester as I'd have liked, although I have been getting lots of knitting done in class. With the election results rolling in last week, I have also become incredibly sad for the tone our country has set towards minorities, the disabled, immigrants, and women. 2016 has been a rough year. Before returning to the 24 hour news cycle and listening to the helicopters circle relentlessly overhead, I took some time for self care. Mr. Made and I slept in, walked the dog, and ate breakfast by the lake. We talked about our hopes and dreams for ourselves and our country. Call me optimistic, but I truly believe that most Americans want the same great things that I do. 

I also took some time for sewing again. It was comforting to escape to the sewing world and see everyone's great projects on social media, and even more so to put my hands to work building something new. I have been working on my pants block, and have made two iterations that I hope to show off soon. 

Today I'm sharing a bit of an older project, BurdaStyle Retro Top 07/2013 #130. It's much like Grainline's Scout Tee that I've made and loved, but with bust darts for better shaping. I also tried a swayback adjustment at the back, but realized I didn't really need it for a loose fitting shirt like this. The result is some wonkiness at the back, which I hope to fix next time. I also lengthened the sleeves slightly, but I think they could be widened as well. 

This pictures is also a peak at the jeans/pants block I'm working on. They are the first draft, and still need a wedge taken out of center front, the back rise shortened a bit, and a knock-knee adjustment, but they're getting there!

Oh, and I did make Beatrix a Halloween costume this year. She was Amelia Earhart, with extra emphasis on the Ear! Mr. Made and I goofed around in his studio getting some nice shots. What a life saver she's been for all the stress. 


Hope everyone is taking care of themselves and doing more sewing than I am!

A Summer Tee is Born

Pattern: Marilla Walker's Maya Top
Fabric: gauze-y knit
Cost: free from Bay Area Sewists pattern swap

On a week night when I am tired of working, I set my computer aside and pull out my fabric. No wool or complicated patterns tonight. I reach for a crinkly knit gauze that will be easy to sew, and a trusted pattern for a boxy tee. I don't have enough fabric, so I shift it around on the living room floor, and finally just reach for my scissors and start cutting. This is the type of garment you sew as you go. I move to my machine without a plan for seam finishes or detailing. I sew each seam, try on and continue, letting the fabric decide what it wants to be. I press and hack and mould, and after two hours of sewing a new wardrobe piece is formed. I slip it on again and imagine it with jeans and some bright shoes as the weather warms up. There is nothing like sewing to brighten my mood and ease the tensions of a long day.


Men's Hudson Pants

Pattern: True Bias's Men's Hudson Pants
Fabric: 2 yds French Terry
Cost: $15


Around the house, I wear my True Bias Hudson Pants just about every night. They are probably my most worn me-made garment ever by sheer virtue of their comfiness and ease of wear, and the fact that you can wear the same jammies over and over again, and no one will see.

I asked Mr. Made if he would like a pair. He said no. So of course I signed right up to test the Men's Hudson pants and make him a pair. I figured he doesn't know what he's missing.

Now, he doesn't read this blog, so I am going to let you in on a little secret: his loungewear is far from cute. We're talking plaid fleece with an all-over dog paw print, or grey sweatpants that hit just above the ankle as if he's outgrown them. So although no one will ever see his pajamas, I decided his were getting a makeover anyway. As a bonus, I figured he might be able to wear these to the climbing gym, another area in his wardrobe that is lacking.


Like the Women's Hudson Pants, the Men's Pants are easy to cut out and sew. The tester version of the pattern was just 25 pages to print out (compare to some Burda patterns which are 60+), and is comprised of only a few pattern pieces. I had the whole thing cut out and nearly sewn up in one short evening.

The sizing is a nice range, too, going two whole sizes below Mr. Made's size, which is impressive because many of the Big 4 patterns are all too big for him. While Kelli has released a kids' version of the Hudson pants, it seems that the men's pattern would work well for teens as well because the sizing extends all the way down to a 28" waist. It's really nice to get such a wide range in a pattern. 

Unfortunately for me, the one area I didn't plan out was the length. The pattern comes with inseam measurements, but silly me didn't stop to think that if his store-bought pants were too short, then the pattern might be as well. While I haven't had an issue with other jeans patterns, it isn't uncommon for store-bought clothes to be a bit short on him. Kelli has extended the length of the pattern by about an inch from this tester version, and for mine Mr. Made requested a good four inches (he wanted them extra long). To achieve this, I created diagonal knee patches for a sort of motorcycle look. It's subtle, and doesn't look like a total mistake, and he is now very happy with the length (although I think they're a touch too long). 

As with the women's pants, one of the fun parts of this pattern is the ability to add contrasting colors. It works nicely on a men's pattern, too, because it gives it a touch of style without getting too frilly. On these, I did the cuffs, waistband, and pocket using the wrong side of the fabric.

Shortly after finishing these, the weather turned cold and Mr. Made got sick. These were all he wore. We also received his favorite catalog in the mail that featured a similar pair of trendy sweatpants, so I think I've won him over. The best part is, made up in different fabrics few people would be able to spot that we're virtually wearing the same pants. 

With gift-giving season coming up, this would be a very easy and quick pattern for the man or teenager in your life!

P.S. Your eyes do not deceive you: This post is full of animal photo bombs. 

Dog Days Hat

Pattern: Mimi and Tara's free Dog Cap pattern
Fabric: remnants of wool, canvas and cotton woven
Cost: free


Between studying and working this year, I've managed to grab bits of time to sew. Sometimes it's enough to make a full blouse, other times it's just an hour or two to have some fun. In this case, I stole away a couple of hours and decided that something hilarious was on the sewing agenda. And so Beatrix got a new hat.

Whether it's creating Halloween costumes with large googly eyes or cutting out a miniature A's logo, I find whimsical things like this fun and, frankly, good for the soul. There's something so silly and simple-hearted about playing dress up. So why not give the dog a hat for our favorite team?

This pattern is made using a free multi-size hat pattern from Mimi and Tara, a dog clothing pattern maker. The shaping is achieved with a dart at center back and is held to the head with elastic straps going under the chin and on both sides of the ears. I added interfacing to the brim to give it shape, but it could use a bit more starch or better support as the fabric there is just cotton shirting.

The pattern suggests lining the hat, so of course I immediately thought, "Make it reversible!" It didn't take much more work to cut out my other favorite team's logo. Both logos are cut from fabric backed with interfacing and were appliquéd to the hat fabric before assembling the hat. I finished the raw edges of the hat at the front, and then used fold over elastic to finish the raw edges along the sides and back, which extends to become the straps.


She has already worn it out to the bar a few nights, sporting whichever team was playing. I think she loves the attention. And I get a huge kick out of very silly things.

Happy hump day everyone!

Dog Dress

Pattern:  self-drafted
Fabric: remnant ponte
Cost: free (scraps)


Do I have more serious/useful/important things to sew? Yes. But sometimes you're tired, your house is under construction, and you just need something light. Something fun. Something that results in your dog wearing a dress. Yeah...


This dress is mostly just a series of almost-rectangles sewn, gathered, and buttoned together. The body is a trapezoid sewn into a tube to accommodate her proportions, and the skirt is the same shape but I had accidentally made it too small to be the body, so it became the gathered skirt. I told you I was tired!

The most tricky thing about making a dog dress was actually how to handle the under side of the skirt, or the part which runs along her belly. Since dogs stand horizontally, I knew a skirt would hang funny there (and could possibly get peed on), so you'll notice that this skirt is more of a butt ruffle as I eliminated the belly portion entirely. This seems to be a fairly common treatment for a dog dress (some inspiration here). 

I cut the straps to measure, which was a bit of a challenge on a very sleepy puppy (she usually puts herself to bed around 8, and evenings are prime sewing time for me). As a result, the length was fine but the functionality was lacking - you can see in the picture above that they tend to slip off her shoulders. To remedy this, I later attached a cross strap between the two straps at her chest, much like the H-strap on lederhosen. This seems to have resolved the issue.


If you came here for a dose of cuteness, I hope you got your fill. For serious sewing, I hope to be back soon!

P.S. Looks like she got her little self featured on Kollabora's Weekly 6

The Maya Dress

Pattern: Marilla Walker's new Maya Dress/Top
Fabric: 2 yds woven cotton 
Cost: fabric from Melizza via Kestrel's Spring Sewing Swap

Who loves a new pattern! I do! I do! This is a brand new pattern from Marilla Walker, entitled the Maya Dress/Top. It's a kimono-sleeved dress or top pattern that is designed to hang well from the shoulders and have a wide fit from the bust down, much like a traditional Guatemalan Huipil of Marilla's Central American mother and family.

It was this last fact that truly had me intrigued. Long-time followers (all four of you) know that I feel a deep connection to Central America, having grown up speaking Spanish and traveling when I could in the region. In 2009 I tried my hand at refashioning traditional Mexican dresses while living in Mexico City, and many years before that I actually had a simple Huipil made for me in Guatemala. While there are certainly many ways to customize this pattern, I love the regional and deeply personal inspiration!

When Marilla called for pattern testers, I jumped at the chance. I've been a follower of her classic, fun style, and have recently enjoyed her makes such as completely hand sewn jeans (!!), beautiful hand-printed fabric, and now this chic dress/top pattern! The garment truly reflects her casual, well-dressed style, and can be made as either an easy dress or top, with or without the button placket. I was totally in!


The basis of this dress is a fabric from the wonderful Melizza at Pincushion Treats, who was my partner for Kestrel's Spring Sewing Swap (incidentally, she also just made a wonderful Latin-inspired dress). Something about the crisp whiteness and embroidered details of this fabric just seemed perfect for the pattern. I took advantage of the topstitching at the facings, placket and hem to add contrasting blue thread. The lines aren't perfect and look slightly "handmade" but in this case I really like that aspect - it lends a sort of folksy vibe to the dress.


I plan on making this up as a top several more times - it is so helpful to have a kimono-sleeve pattern because it uses such little fabric and is very quick to make. I'm sure you've noticed, but I tend to wear a lot of these! The only thing I would do differently next time is to make it narrower at the neckline to better fit my narrow shoulders. If you aren't as big of a fan of the loose drape, you could do the same.


I don't know if B will be appearing in all of my pics from now on, but she certainly is a good model! Here she is the first time she met her BFF Hannah at the park, right in the middle of our shoot :)

Cat Pillows

Pattern: envelope pillow case (I like this tutorial)
Fabric: design by me, printed with Spoonflower
Cost: $38 for four pillows

Well, I'm baaack! After a month of studying, no sewing (no fun!), and 645 ignored posts in my blog reader, I'm happy to make a triumphant return to the sewing blog world. 

My first project back ticks the boxes for both selfless and social sewing: cat pillows for one of my bffs and my entry into Miss Crayola Creepy's Cat Lady Sewing Challenge. Who says you can't participate if you don't own cat?!

For my friend's birthday, she requested pillows of her beloved feline, Lucifer "Lucy" Chao. We were inspired by these animal pillows we saw in a shop in Austin, and so I made some up for her featuring pop-art renditions of Lucy. Each pillow has a different image on the front, and a coordinating color on the back. 

The images themselves are actually not that difficult to make. I played around in Photoshop until I found a technique that worked for me, and here's what I ended up with:


Step 1: Select photo
Step 2: Erase the background: Add layer mask - paint in black to erase/white to undo
Step 3: Desaturate: Image - Adjustments - Desaturate
Step 4: Add artistic effect: Filter - Sketch - Photocopy Effect (adjust as desired; may need to adjust contrast on original image)
Step 5: Cut out white pixels: Use the Magic Wand to select and cut out white pixels in image
Step 6: Color: Color fill layer - Choose desired line color - Make clipping mask
Step 7: Fill: Create a new layer behind the lines, paint in with desired fill color
Step 8: Add artistic effect: Filter - Sketch - Halftone Pattern Effect (adjust as desired)
Finish: Can be printed and ironed onto a pillow, or sent to Spoonflower

A zoomed in version of the final product:


I had Mr. Made blow up my images in Illustrator (complete with cutting lines), and sent it off to Spoonflower. While I had heard a lot about the service, this was my first time using Spoonflower and I have to say that I'm impressed! For $18.75 including shipping, they printed up my exact images on a yard of fabric and had it mailed to me in under two weeks. The cotton was a bit more sheer than I had expected, but the colors were true and bright. Of course, the yardage isn't cheaper than most fabrics you can get in a fabric shop, but for a special-occasion custom print I was very happy. Including custom fabric printing, coordinating fabric, and the pillow inside each cover, the total cost for each came to less than $10 per cushion.

The pillow cases themselves are just an envelope design, meaning no zip closures (similar to this tutorial). I used the selvages so I didn't have to hem around the opening, and they came together in under an hour. 

Of course, I couldn't leave our new puppy Beatrix out of the fun (I am most definitely a crazy dog lady now). With three images for my friend, there was space for one more of B. Ours is in a black and white style that more closely fits our decor, with a black backing. I can't tell if B likes it or is just confused!


Related Posts Plugin for WordPress, Blogger...