Showing posts with label pattern: MadeIt Patterns. Show all posts

Shoulder pads??

I am not quite old enough to have worn shoulder pads the last time around. To me, they remind me of my mom's old 80s blouses or the polyester shirts we'd turn our noses up at in thrift stores. Shoulder pads were the first thing I'd rip out of vintage finds, and it actually took me years to learn to put them IN blazers to give shape to a garment. 

So imagine my surprise to see them popping up in garments and sewing patterns all over. And I'm even more surprised to say I gave them a TRY. I can't say they worked out in every instance, but it's fun to experiment with something out of my comfort zone.


Pattern: Grasser Knit Jumper 810
Fabric: 2 yds knit
Cost: $12

First up is the Grasser jumper. This is a new-to-me pattern company from Russia and what drew me to it was a wide selection of really interesting patterns. This jumper in particular had such a different construction and shape that I was really excited to give it a try. 

The instructions are complete and include some pictures, but the translation is a bit off and the sleeve construction involved some trial and error on my part. But in the end, it all came together mostly as designed. The shoulders are supported with "roll fabric;" I used some light quilt batting to give it the extra shape. 


I did make some updates to the pattern before cutting it out. One, it's cut from a stable jersey rather than a thicker sweater material, so my version has less structure than the pattern. Because of this, the sleeves collapse a little rather than holding their shape, but I don't mind. And while I kept the sleeves the same, I updated the main body by eliminating the princess seams and changing the neckline to a regular crew neck. I got this idea from a few people on Instagram who had done the same and I find it works well on this less-structured version. Sometimes putting too many seams in jersey is just asking for wonky seams. 


It is admittedly not the easiest shirt to wear. It doesn't fit easily under sweaters, and is a bit of a new shape for me. But I actually like it more than I thought I would and have been wearing it a good bit. 


Next up is the MadeIt Patterns Eight Tee. This is part of their No Frills line, which is the same style and fit as their regular patterns but without detailed, step-by-step instructions. I found the information to be more than adequate, with full sizing information, technical drawings, fabric recommendations, and one page of instructions with a few illustrations for the more involved steps. 


Pattern: MadeIt Patterns Eight Tee
Fabric: 1 yd jersey
Cost: free - remnant

This top and the Just Patterns Claudia Tee have been really popular on Instagram this past month. I chose the MadeIt version because I liked the shoulder/sleeve construction - it folds under to create the shoulder line in a really unique way.  The top can be made with or without shoulder pads and, despite the name of this post, I chose to make it without. Even without the pads, it gives an exaggerated shoulder line for the same look. 
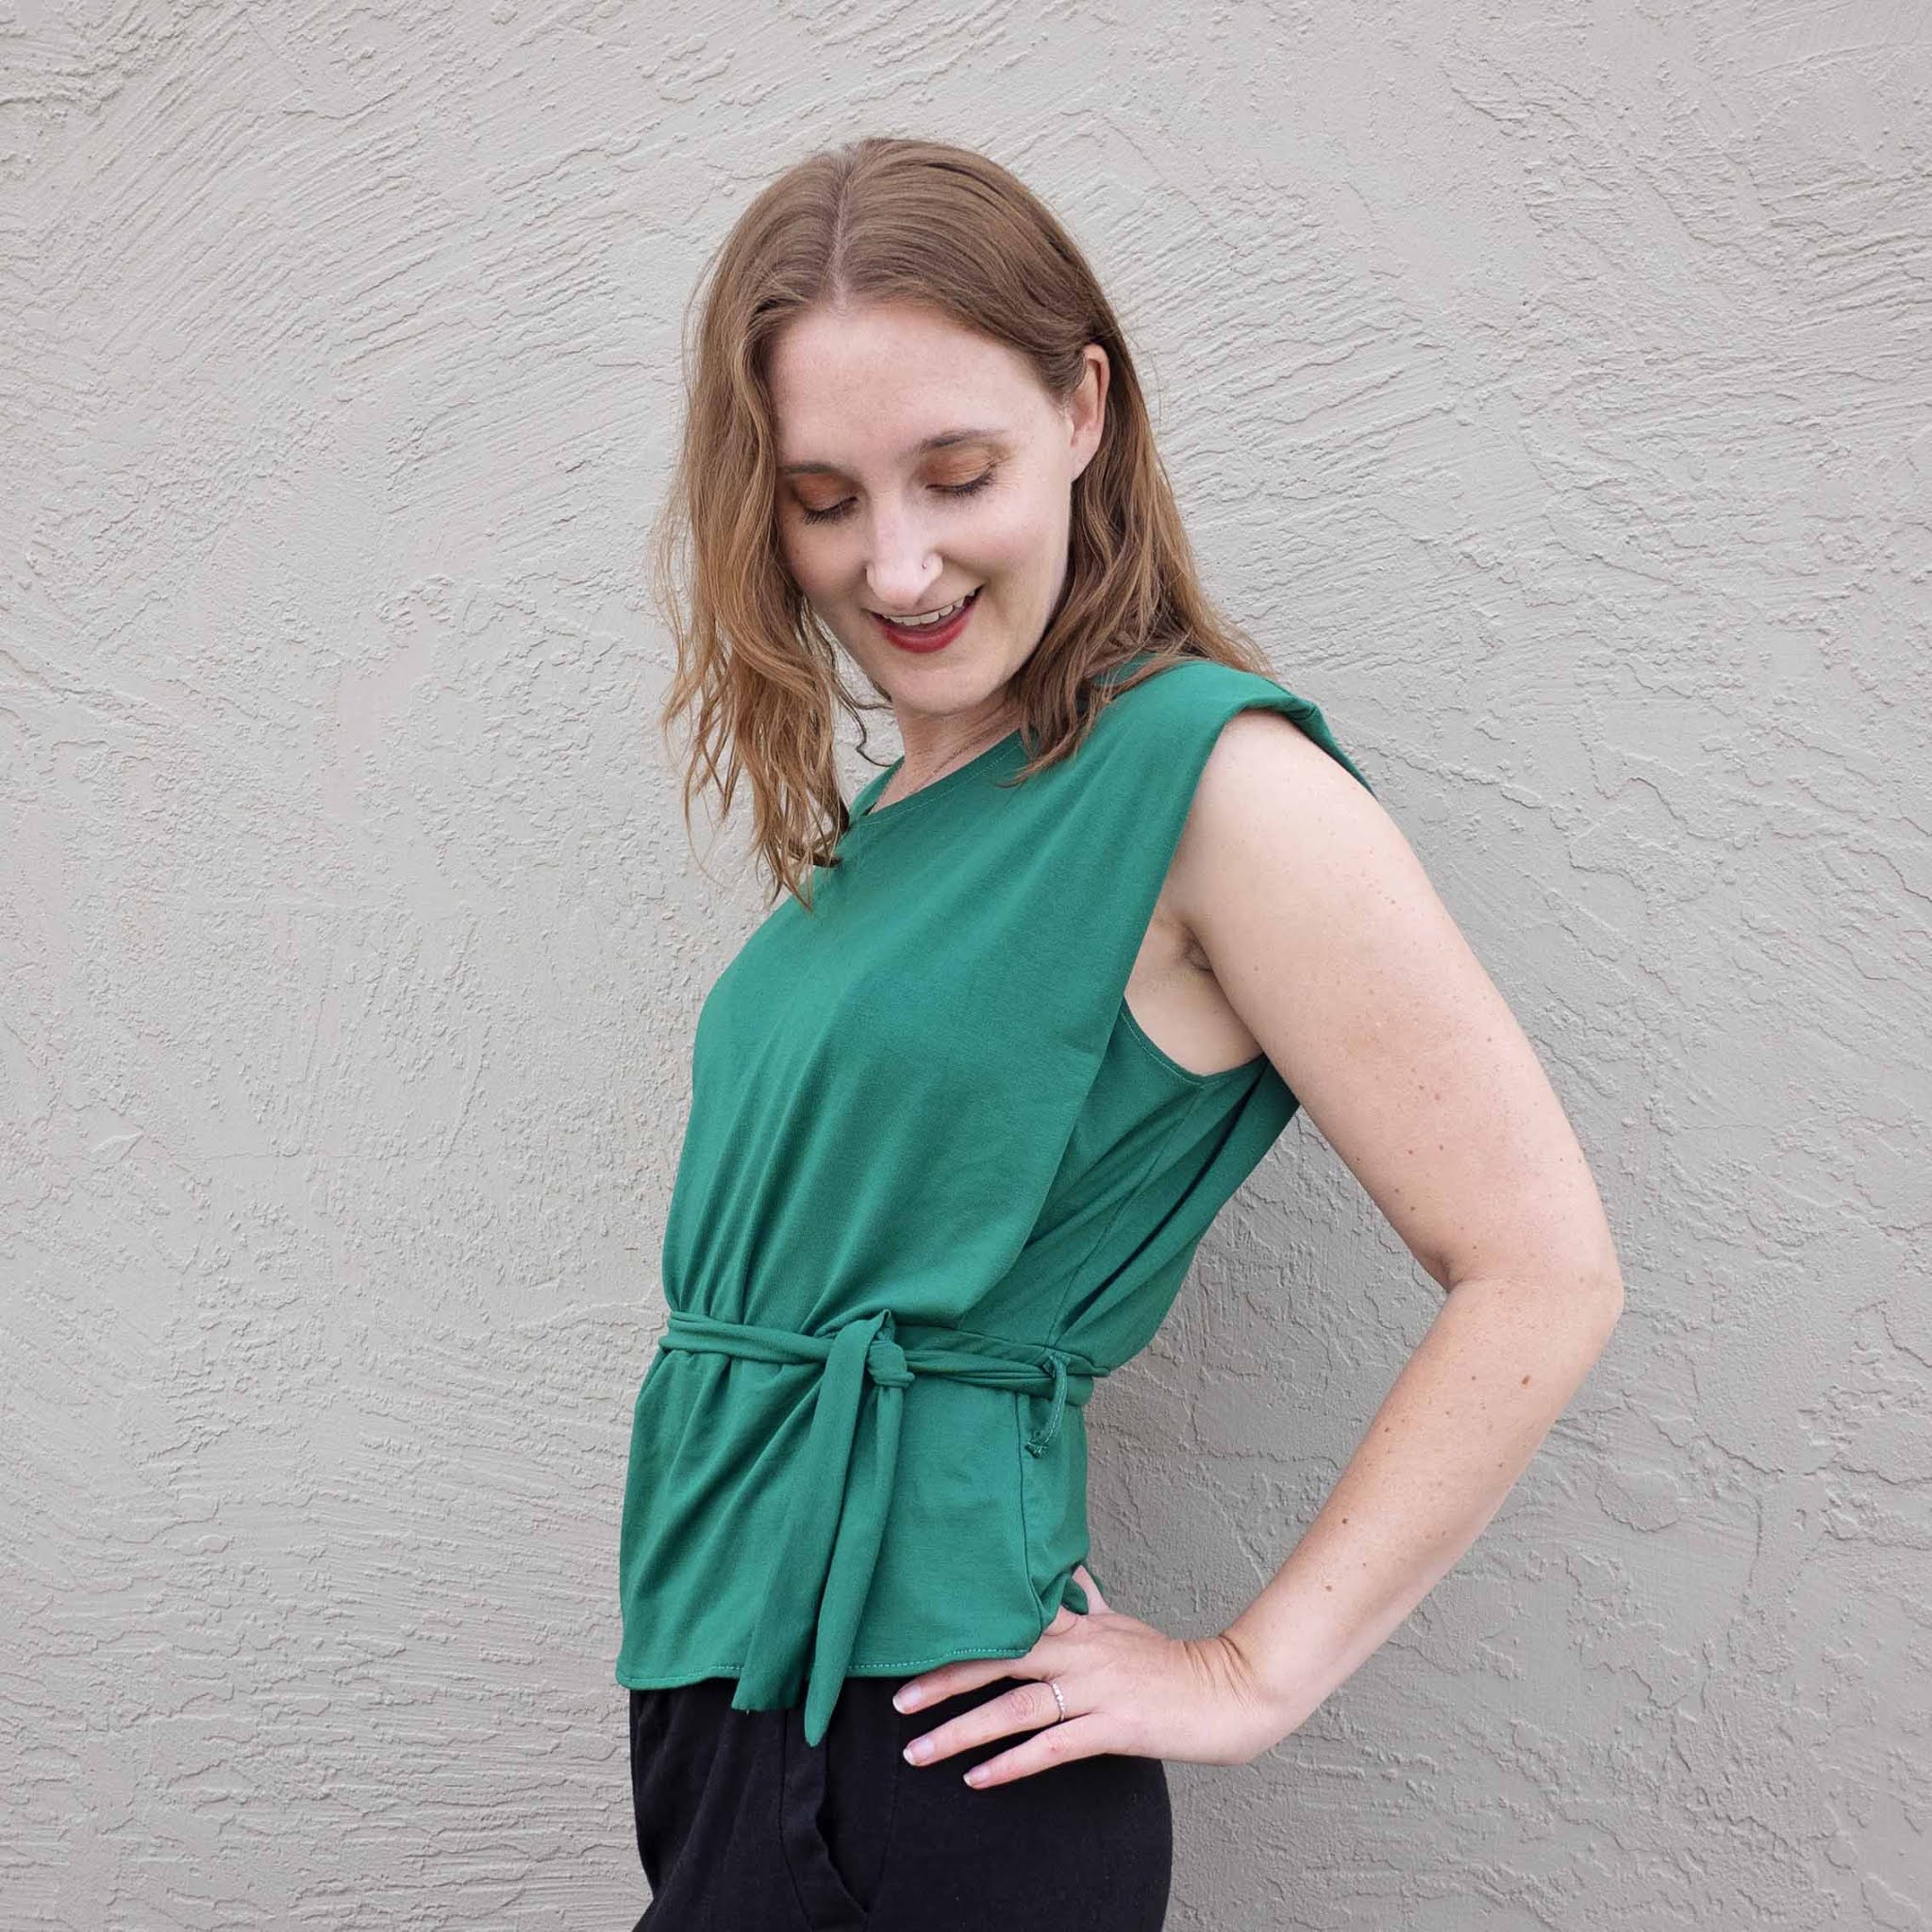
While the original shirt has a very boxy construction, I wanted something with a more exaggerated shape - wide shoulders and a nipped-in waist. To do this, I cut the shirt off at the waistline and added a narrower band. I then pleated the top into the band at the side seams. I also experimented with adding a waist tie. Mijke from SewItCurly did a similar alteration, but by sewing the shoulder "pleats" together rather than adding a hemband. 

I'm not yet sure how I feel about this top. It's definitely interesting, but I'm not sure I like the silhouette on me. Perhaps the original silhouette would have been better, but with my small shoulders I do feel like I'm swimming in it a bit. 

Either way both of these tops were really fun to experiment with and I'm glad I tried a new trend.  I've also been playing with wide-leg pants, another trend I've seen popping up, but I'm NOT ready for the return of low-rise jeans. 

Spring Sweatshirt

Are there stages to quarantine sewing? My trajectory has been like this: finishing up the projects I was working on for events I won’t be able to go to, followed by making all the fancy/weird things I've always wanted to make but didn’t have time for, and, finally, coming to terms with reality and just making loungewear. What’s next? I’m worried I may be reaching the bottom of my list and actually make menswear! Ha!

Pattern: MadeIt Patterns Glide Jacket
Fabric: 2 yds french terry
Cost: free gift/scraps

For this project, I wanted something cozy to wear at home. I have a similar store-bought sweatshirt with black accents that I've had forever, but it's always been a bit cropped and bit tight. My mom had given me this french terry and I had a coordinating black zipper, so I decided to see if there was a pattern that caught my eye. I wanted something with some interesting details and re-discovered the MadeIt Patterns Glide Jacket. I like the interesting seaming at the front as well as the triangle cut-out openings at the side hem and the way the front wraps around to the back. The collar variation was the final selling point - I love a good collar.

To transform this into a more fitted, unlined sweatshirt, I had to make a few modifications. First, I recut the armhole and new sleeves to be cut-on. This is more fitted than the drop-sleeve in the pattern. As I was sewing, I also did some fitting at the waist by nipping in the diagonal side seam there. The fit at my hips was spot on though. The result is a nice fit that's still good for layering. 

Because I wasn't using a lining, I topstitched the neckline facing down in the back and then hand-tacked it to the pocket bag in the front to keep it in place. In the back, I cut the hem facing in black and sewed it to the outside of the jacket for some contrast. I omitted the pocket zips because it's quarantine and I'm hoarding those for something else. However, if I were to make this again, I think I would make the entire diagonal front piece into a pocket bag. As it is right now, there's the outer piece, the pocket and bag, and then the front/hem facings. This makes sense for a lined jacket, but I could have simplified for a sweatshirt. It also would have given me roomier pockets. These are a bit on the small side.

MadeIt Patterns was another new-to-me indie pattern company. I've been following Olu on Instagram and like the creative take she has on everyday clothes, like the hug hoodie. Unlike some other patterns I've tried recently, I found both the drafting and instructions for the pattern to be pretty good. There is lots of detail in there for newer sewers and really takes you through EVERY. STEP. Their measurements seemed accurate and there were good pattern markings, etc. I'm a little confused about why some pieces had a separate facing and some had a cut-on facing, but I didn't follow the instructions or fully read them so I guess I'll never know. I also found that I had to even out the back hem because it sloped down, but again didn't follow the pattern construction so there may have been a reason.

Above is a shot from the side so you can get a sense of how the front piece wraps around to the back. It's hard to see my black hem facing against the color of my pants, but you can also see the cool hem notch detail near the pockets. I used an extra stretchy fabric for the cuffs as I almost always end up wearing long-sleeved garments pushed up around my elbows.

I'm hoping this will be a nice staple in my temporary stay-at-home and permanent work-from-home life. The collar elevates it a bit from a normal sweatshirt, so I think it will pass muster on video calls. It has already done well on dog walks and lounging around the house.

Related Posts Plugin for WordPress, Blogger...