Showing posts with label garment: sweater. Show all posts

Fall Sweater

I'd like to tell you that I carefully planned this fall sweater, that it effortlessly slid off my needles just in time for the weather to turn in late September. The reality is that I've been knitting this in fits and starts for at least two years now and any relationship with the seasons is purely coincidental. That said, this really is the perfect fall sweater.  

Pattern: adapted from Brooklyn Tweed's Hugo Cabled Pullover
Yarn: Knit Pick's CotLin in Linen and remnant yarn in mustard
Cost: $50

The color blocking, too, is a matter of coincidence. I had several skeins of a cotton yarn in a beautiful mustard color gifted to me from my knitting aunt. I loved the color but struggled with figuring out how to use it. There wasn't enough for a full sweater, and I don't have a good track record for wearing knit tops or shrugs. So I concocted the idea of making a color-blocked version using KnitPick's CotLin, a cotton-linen blend, in a similar weight. Originally I toyed with the idea of using three colors in total, but the third one that I ordered ended up being too lemony and didn't look good with the other two. So a two-toned pattern it was.

Rather than a clean transition between the two colors, I interwove them for a good ten rows, increasing the density of the color the more I went. It's a nice little touch. Ideally, the color transition would have matched across the sleeves and chest, but I'm embracing the quirkiness.


The stitch pattern is based on Brooklyn Tweed's Hugo Cabled Pullover, which I knit in full for my husband several years ago. With the different colors and neckline, however, no one would ever guess that we have matching sweaters.


My biggest challenge, the reason the colors don't quite match up across the chest and sleeves, and probably what caused the most delay in knitting, were the sleeves. I always struggle with this part. Always. At first I knit them too tight, and then I knit the cap too long. And it was especially arduous to undo all that colorwork.

The main problem comes in that I am perfectly happy to knit up a rectangular body for my sweaters in whatever gauge looks good. I then have to struggle to find instructions that match my project when it's time to make the cap of the sleeves. I'm sure expert knitters have some sort of formula or resources for this, but I'm purely experimental. For this project, I loosely followed the Brooklyn Tweed instructions since I was already borrowing their stitch pattern, and then made some modifications with trial and error to fit my yarn. The sleeves might now be a bit too wide now, but I'm calling them good enough.


Speaking of wide, I am pleased with the ease of this sweater. In addition to being bad at sleeves, I am always knitting my sweaters to be very fitted. See my last sweaters here, here, and here. For this one, I definitely wanted a more relaxed sweater that fit easily over my clothes as a layering piece. This one turned out much more like a sweater I would want to wear in my everyday life. And in the cotton and linen yarn, it is comfortable to wear and breathable.


I took it out for its first wear today and it really is the perfect sweater for fall. It kept me warm in the mornings and evenings but let enough air pass through so I didn't get too hot. I also got a few compliments, which is always nice. 

Next up, I've started to undo my fitted Kollabora sweater to knit up a Georgetown Sweater. Believe it or not, this will be my first cardigan. At my knitting speed, you'll probably see it appear on this space circa 2020 ;)

The Kollabora Sweater

Pattern: Shibui Knits's Mix No. 1
Yarn: Lamana's Como Wool in Pine
Cost: free!


This is the sweater that was made from the yarn that was won from the contest that was made from the pattern that Kollabora gave me. And let's just say it's been a long time coming...

It all started several years ago when the online crafting community Kollabora was brand new and sent me a couple of knitting patterns to try out. I am a slow knitter, and so unfortunately not much came of it. Then, last year, I entered a photo featuring a certain bulldog in a hand-knit sweater into Kollabora's Christmas contest and won some yarn. Finally, this past year I combined said pattern and said yarn into the sweater you see before you today. Whew! It wasn't fast, but I finally have a finished garment to show off!


The pattern is a top-down raglan pullover. Pretty basic, but fun to try a new-to-me technique. About halfway through I panicked that I had picked such a basic stitch such as stockinette to make my rather plain sweater, but I ended up finishing it as-is because it made for an easy classroom knitting project. Don't worry, I am quenching my thirst for all things cable and color in my next sweater.

I like the top-down style because you get all the annoying shaping out of the way before you start, but as a knit-as-you-go type person it was a bit challenging to cast on without really knowing whether it was going to fit me or not. In the end my gauge was good and it all worked out well, although it's definitely quite fitted.


I love the look of Kollabora's website. It is clean and fresh and so much easier to use than some of my other favorite web haunts. However, it doesn't seem to have as much user engagement. While there are plenty of people posting projects, there's not as much comments or discussion as on other sites. I have this weird theory that the clunkier the website (I'm looking at you Pattern Review and GOMI), the more active the community. This could be because those sites are older (and thus more outdated looking but with more users), but I also think there is something to be said for a site that isn't overly polished. It's the rough edges that almost gives people permission to jump in and make it their own, like a cozy cottage where you can spread out your stuff rather than a new mansion where everything is too nice to touch. That said, I think sites like Instagram achieve both, so who knows.

Rambling aside, these photos were taken during our pre-Christmas vacation to Joshua Tree. We found ourselves in this beautiful little dried up river bed one afternoon - perfect for a hike and a photo-op.


I just started on the sleeves of another sweater, which I will hopefully finish up in lecture this semester. The more I knit, the more I realize that quality yarn and a good pattern are the key to knitting beautiful sweaters. This one is definitely a winner!

The 3 Year Sweater

Pattern: self-drafted (aka made up)
Yarn: Knit Pick's Wool of the Andes Worsted Weight in Blue Ink
Cost: free - leftovers from my aunt!


I'm really good at starting sweaters. Cast on something in the general dimensions of my hips and away I go. I will happily continue this for months, alternating between obsessively knitting and completely forgetting about the project. But the second I get to the armholes it all goes to hell. It's at this point that I remember I'm not following any sort of pattern whatsoever, and it can become impossible to find one that matches my stitches and arm size. As a sewer, I also recognize the importance of the arscye shape and am reluctant to improvise.


At some point though, after I had ripped and redone the armhole a few times, I remembered dropped shoulders. They're in style! They're easy! Why not? I simply knit the sweater up as a square, and then picked up my sleeve stitches from around the opening and knit down. Not bad! 


In truth I am just happy to have this sweater done. I think it's been on my needles since I started Mr. Made's sweater in 2013, and really something this basic shouldn't take that long (his is much, much nicer). By the end I wasn't really sure how much I'd like it, but I have found myself putting it on in the colder days we've been having. It's a bit scratchy (someday I'll learn to buy nicer yarn), but it's fine if I wear a long sleeve shirt under it, and it all came courtesy of my aunt's leftovers for free!

The stripes were a way to use up some other yarn in the same weight that I had also received from my aunt, but in a smaller quantity.  It adds a nice bit of interest to a plain sweater, and you all know how much I love stripes. I am now halfway through a sweater with my prize yarn from the Kollabora Christmas contest, as I have taken up knitting in class and am making quick progress. 


With this and my new Bernina machine I may be able to afford this hobby through grad school after all!

Men's Newcastle Cardigan

Pattern: Thread Theory's Newcastle Cardigan
Material: light sweater knit (body) and faux leather vinyl (yoke)
Cost: $20

Have you heard about Thread Theory patterns?! If you're into indie patterns and interested in menswear,  then you're about to get pretty excited! Thread Theory Designs is a brand new independent menswear sewing pattern company run by the lovely wife and husband team, Morgan and Matt. That's right: stylish, indie MENSWEAR!

While I've seriously been loving the amazing range of independent pattern companies popping up lately for WOMEN, until now I have struggled to find good patterns for the MEN in my life. I even went so far as to convert the Minoru Jacket into a men's pattern... So, you know I was darn excited when I discovered the Thread Theory site, and I have been eagerly awaiting the release of their patterns. 

Lucky me, this past week I had the opportunity to pattern test their first pattern, the Newcastle Cardigan, a gorgeous sweater with a shawl collar for "men who would like to stay cozy but look stylish."


First off, I love the look of this pattern: it's not too over-designed for a man, but still has stylish elements that make it unique and fun. While I am always a little bit nervous when sewing for others, the fit was great, the pattern worked, and we both love the final result! Especially for us casual west-coasters, I think this sweater is the perfect balance between dressed up and not-trying-too-hard cool.


For my version, I found a very lightweight sweater knit at the local discount fabrics, and I couldn't help but pair it with a faux leather vinyl yoke and wooden buttons for that 'hard and soft' look. The faux leather vinyl does have a bit of a stretch, so it worked perfect. I think this element also dresses up the sweater a little bit for a night out on the town (in a very casual San Francisco sort of way), and he can also wear it to work or dinner. The lightweight fabric makes it great for summer, and we already have plans to sew this up in a heavier fabric for the winter!


While I'm pretty notorious for not following pattern instructions, as a pattern tester I followed everything to the letter and was very pleased with the results! The instructions walk you through all the steps with clear pictures, and they have seriously thought of everything! The facings are nicely sewn down in place, the design of the upper and lower collars folds the seam line out of site, and I had no challenges whatsoever with fit. Bravo, especially for their first pattern!


 Look for the Newcastle Cardigan pattern to be released on May 15th, and a lucky surprise may be coming your way for one of my readers!!!

Whales Sweater!

Pattern: self drafted, with shaping based on Knit.1's Turtleneck, and whale pattern inspired by New England Knits's Whale Watch Hat
Yarn: Vanna's Choice Yarn in Scarlett and White
Cost: $32


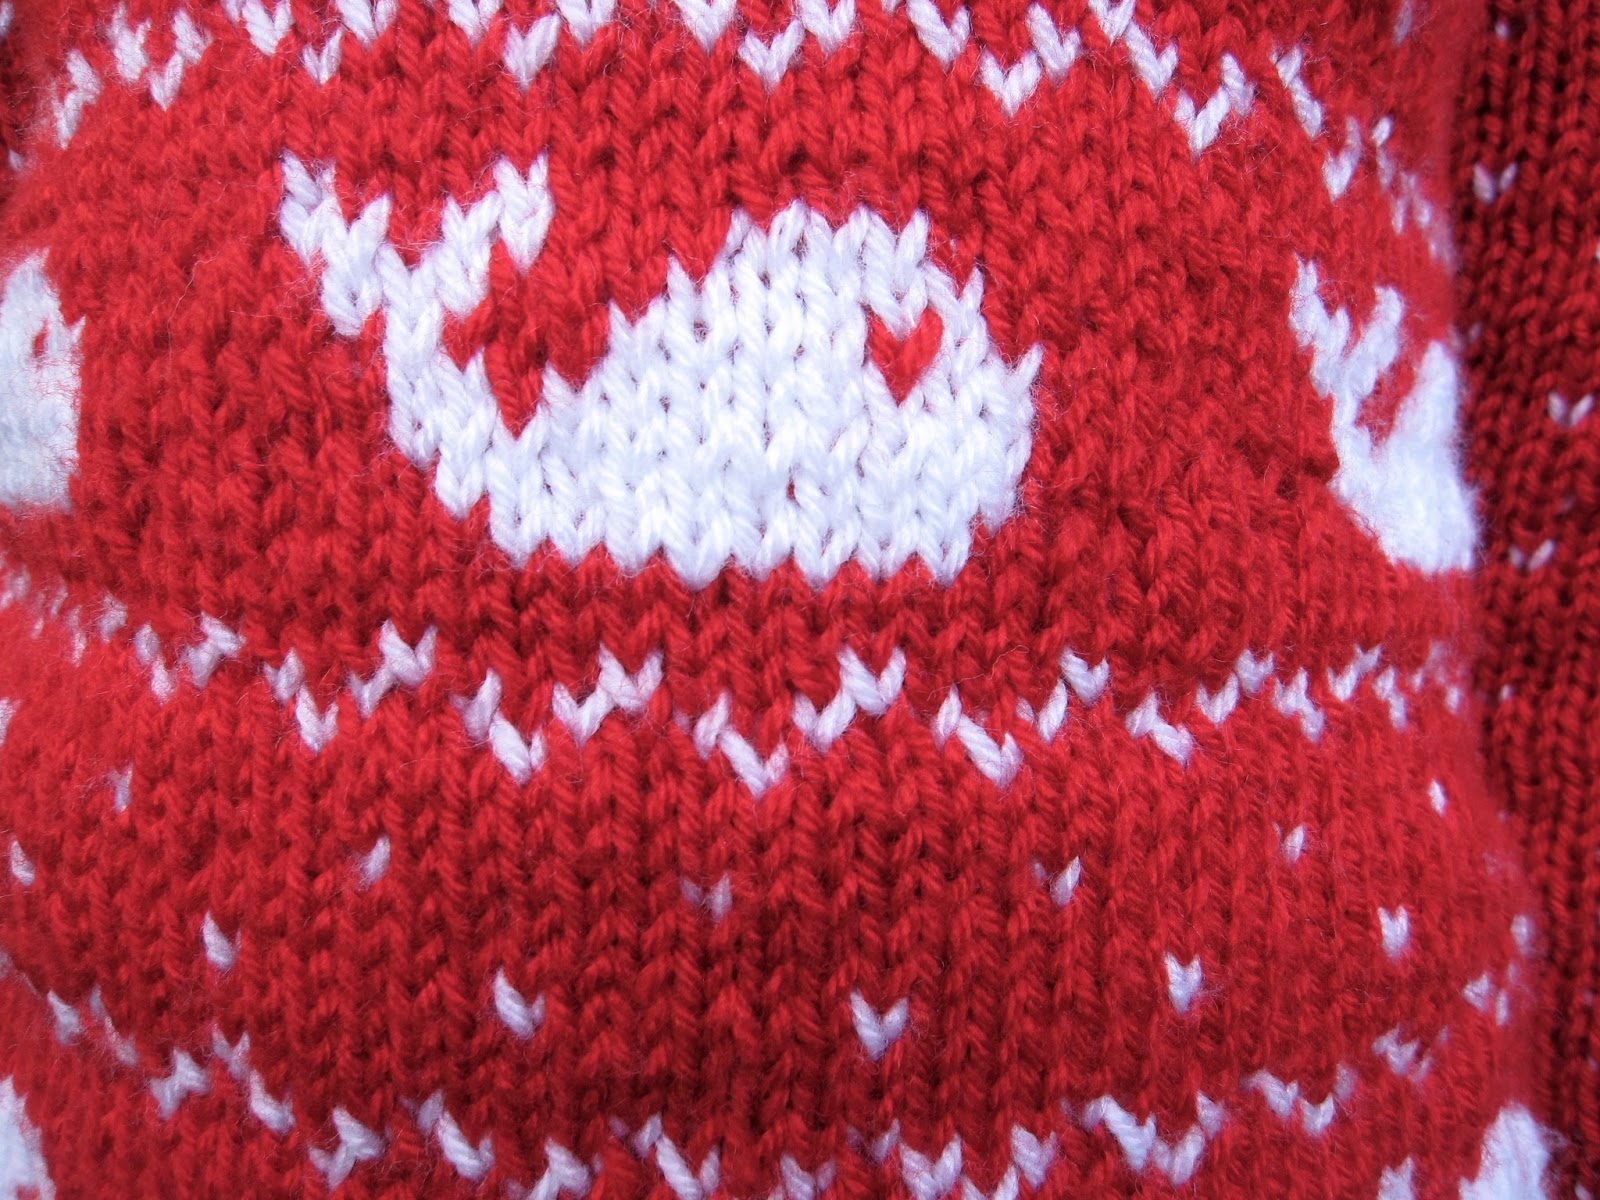
I originally started this sweater for Valentine's Day last year (yup, that's 2012). It originally had little hearts where the whales were. The night before, I tried it on, decided it didn't quite fit, and decided to frog the whole thing. In its next incarnation, the sweater became a whale sweater, and I love it in all its ridiculousness! 
I knit up the front and back pretty quick, and then waited a whole year to do the sleeves. 

What got me knitting it back up again was Design*Sponge's January Knitting Challenge. Alas, they announced the event halfway through the month, which isn't much time to knit much of anything. They also made it an Instagram challenge, and I don't have the phone with the internets. Nevertheless, it inspired me to get started again, and I finished this one in February. I'm also making some progress on my resolution to clean out my UFO/mend-it basket by the end of the year!

Here's the finished thing. The fit is great, it's warm and comfy, and absolutely silly. Soon to be a weekend favorite.


Mostly for my reference, but if anyone is interested in trying their own, let me know...
CO:
CO 64 sts.
Join in the round. Work 10 rows in 1x1 rib.
Increase row: *k2, m1 by knitting into front and back of 3rd st, repeat from * to end (85).

Pattern:
Make intarsia. starting with p side. I never made a chart, but here's the whale pattern:


Shaping:
Decrease 1 sts each side after first three zig-zag lines.
Don't decrease after 2nd whale row
Increase 1 st on each side after next "small hearts" row
After 3rd whale row, work two rows (remembering to increase), and begin arm hole shaping:

Armhole shaping:
BO 2 sts at the beg of the next 2 rows (remembering to con't small hearts pattern)
Dec 1 st each side of every other row 3 times.

Back:
Place the stitches for the front on holder.
Work back stitches in pattern until armhole measures 6 1/2 inches (just after last row of "small hearts").
After 5th small heart section, BO 4 sts at the beg of next 6 rows.
BO remaining stitches.

Front:
Pick up front stitches from holder.
Work in pattern until armhole measures 4 1/2 inches (just before first row of "small hearts").
Work 2 sts, BO middle 10 sts.

Front Left and Right (do for one side, then repeat for other):
Next row: k3tog, work row.
Then: k2tog at beg of every other row on the neck side 3 times.

Next row: BO 4 sts at the beg of every other row next 3 rows.
BO remaining stitches.

Sleeves:
CO 30.
Work 10 rows in 1x1 rib.
Work remainder of sleeve in small hearts pattern.
Increase 1 st either side every 10 rows.
Work 70 rows.

Sleeve shaping:
BO 2 sts either side of next 2 rows.
Decrease one stitch either side every other row (RS) until 12 sts remain. BO.

Collar:
Pick up stitches from around neck opening.
Work 3 rows in 1x1 rib.
BO with a stretchy BO.

Finishing:
Sew sleeves up and sew to sweater.
Wear ridiculous whale sweater and show to friends.

Kangaroo Pocket Sweater

Yarn: Vanna's Choice in Taupe (Color A), Dusty Blue (B), and Silver Grey (C) ($3.99/ball)
Pattern: Vogue's Shawl Collar Tunic
Cost: Approximately $35


This sweater is more than a year in the making. It first started when I found some more of Vanna's yarn on sale at the fabric store and decided to buy a whole bunch in Taupe to make a sweater that I had had in my head for a while. Originally, the project was going to be a bomber-style jacket like the one on the right from Anthropologie. But I had since bought myself a ready-made one, and so I decided to do a simple cardigan like the one below from Zara. I always find myself admiring simple sweaters with good texture, and so I got to work. But after nearly completing the body, it just wasn't fitting right, and so I abandoned the piece.

People are usually horrified when I decide to change a project after doing most of the work, but I'd rather have something wearable than an ill-fitting sweater in the back of my closet. Rather than do it over again in a larger size, I started looking for a new pattern--one a little more sophisticated than my make-it-up-as-you-go variety.

And so I began to use my remaining Vanna yarn to make something entirely different. I picked up a pattern for this sweater on sale at Vogue Knitting and decided to try it out. I started it at my boyfriend's place when he was moving in and had no internet to entertain me, and have been working on it a little every night while watching The Wire. In the intervening months I have since moved on to Say Yes to the Dress and Intervention (great, now a good knitting habit is turning in to a bad TV habit). It's also been useful on the occassional long train ride to the city. After I finished the front pocket, I was wishing that I had some different colors to mix it up, so I popped in to Jo-Anne's to pick up some more Vanna in Dusty Blue and Silver Grey. Now it's actually turning out a lot like the pattern picture.

Vogue patterns are often made for very small gauged yarn, and I like mine to knit up a little quicker. After knitting a test swatch, I recalculated the pattern as I went using 95 stitches to cast on compared to Vogue's 143, and this became the basis for my conversions. The neck is a little long and the sleeves and sleeve caps needed to be made longer, but nothing a little patience couldn't solve. And with a year to do it, patience was what I had. Of course, don't be fooled, a more dedicated knitter will make this up in no time.


Read my review of this pattern at PatternReview.com.

And check it out at BurdaStyle!

Gauge Sweater


This pattern was inspired by Anthropologie's Highland Sweater (pictured at right) that sells forabout $198. My version (on the left) is knit using two different needle sizes to give it added texture: size 11 to knit the stockinette stitches and size 9 to knit the ribbing and the purled stripes. It has shaping at the waist and a turtle neck, so it's super warm and cozy for the winter time.


I first created the pattern using an online pattern generator, and then went through all of the directions, modifying them to my needs and making them more readable. Pattern generators are a really useful way to get an exact-fitting basic pattern that can then be altered to incorporate your ideas.

Sizes:
Small (Medium, Large)
Finished bust: 32" (36", 40")
Finished length: 21" (21", 32")

Gauge:
Size 11 needle: 10 sts and 23 rows = 4"
Size 9 needle: 15 sts and 21 rows = 4"

Materials:
Crystal Palace Iceland Solid (100% wool) in Forest, 6 (6, 7) balls ($11.35/ball)
US size 9 (5.5 mm) 36" circular needle
US size 11 (8 mm) 36" circular needle
For the project, I used Knit Pick's Options circular knitting needles that have interchangeable tips, making it easier to change sizes.
Stitch holders and stitch markers if desired (I don't actually own any myself; a string and a hairclip usually do the trick).

Abbreviations:
CO: cast on
K, K1, etc: Knit, Knit one, etc
P: Purl
sts: stitches
Pm: put marker
m: marker

Stitch Pattern:
The stitch pattern for a stripe is 2 rows of purl stitches on size 9 needles and 10 (10, 11) rows of stockinette stitch on size 11 needles.
To switch from size 9 to size 11 needles: Using size 11, *K1, K2tog, repeat from * to end.
To switch from size 11 to size 9 needles: Using size 9, *P2, M1, repeat from * to end.

Pattern:

Sweater Body:
CO 116 (132, 144) sts in the round on size 9 needles. Work 12 rows in K2, P2 rib. P 2 rows.

Work two decrease stripes (Switch to size 11. Work two more rows in St st. Next row: Pm to indicate one side of waist, K2tog, K half of the sts, Pm to indicate other side of waist, K2tog, K to end. Work 3 rows. Next row: K2tog at m, K to second m, K2tog, K to end. Work 2 (2, 4) rows. Switch to size 9. P second row.)

Work two increase stripes (Switch to size 11. Work 2 rows in St st. Next row: M1 at m, K to second m, M1, K to end. Work 2 (2, 4) rows. Switch to size 9: 114 (132, 144) sts. P second row.)
Piece should measure about 43-45 cm or 17-18 in.

Armhole Shaping on Body:
Switch to size 11. Work 3 (3, 5) rows.

Divide the sts onto two holders between the markers. This will be the front and back of the sweater. Knit each as follows:

Alternate a decrease row (K1, K2tog, K until 5 sts remain, ssk, ssk, K1) and a St st row 3 times (6 rows total). Work 1 more St st row: 26 (32, 36) sts. Switch to size 9: 39 (48, 54) sts. P second row. Work regular stripe (Switch to size 11, work 9 (9, 11) more rows in St st; switch to size 9, work second P row) two times. Place sts on holder.

Piece should measure about 63-63 cm or 25-26 in.

Sleeves (x2):
CO 30 (34, 38) sts on size 9 needles. Work flat rather than in the round. Work 12 rows in K2, P2 rib. P 2 rows.

Work 7 increase stripes (Switch to size 11. Work next row in St st. Next row: K half of the sts, Pm, M1, K to end. Work 7 (7, 9) rows. Switch to size 9. Purl second row.). Work 1 regular stripe (Switch to size 11: 27 (30, 32) sts. Work 9 (9, 11) rows in St st. Switch to size 9: 40 (45, 48) sts. Work second P row).

Armhole Shaping on Sleeves:
Switch to size 11. Work 1 (1, 3) row(s) in St st. Next row: K1, K2tog, K half of the stitches, Pm, K2tog three times, K second half of sts until 3 remain, ssk, K1. Alternate decrease row (K1, K2tog, K to m, M1, K until 3 remain, ssk, K1) and St st row three times. Switch to size 9. Work second P row. Switch to size 11: 19 (22, 24) sts. Work 1 (1, 3) row(s). Alternate decrease row with St st rows 2 more times. Next 2 rows: K1, K2tog, K until 3 sts remain, ssk, K1. Place sts on holder: 8 (11, 13) sts.
Piece should measure about 68-70 cm, or 27-28 in.

Garment:
Sew up seams on sleeves and sew sleeves to sweater body, joining all unbound sleeve and body sts at the neck in the round on size 11 needles: 72 sts (78, 84).

Neck:
Work 2 rows in St st. Switch to size 9 without increasing the number of sts. Work second P row. Switch back so size 11 without decreasing the number of sts, working instead in a K2, P4 rib. Work a second row in this pattern. Switch to size 9, again without increasing the number of sts, working instead in the following pattern: *K2, P2tog, P2tog, repeat from * to end (knitting the knits and purling together the purls); 48 sts (52, 56) sts. Work 9 rows in K2, P2 rib.

BO using the stretchy BO method (*Work 2 sts as usual, then pass first stitch over the second as with a normal BO, but then return that st to the right hand needle. Repeat from * to end.).

Trim and sew in all loose ends.


Check it out at BurdaStyle!

First Sweater


Yarn: about 6 skeins of Plymouth, Galway Worsted in white ($5.99/ball)

Pattern: Peppermint Twist Sweater from Stitch 'n' Bitch

This is my first sweater, knit from the scrap yarn of my much-too-complicated attempt at a first sweater project. I finished this one during a ski trip a couple of years ago, and it's a good lounge piece. It's knit using I learned a lot about sizing and working with gauge. The piece turned out a little too wide and a little too short, but at least it's wearable.
Lesson learned, I do not recommend an overly-complicated stitch pattern for a first sweater (see the scrap from my first attempt at right). Not only did I try to invent my own cable, but my own pattern as well (don't we all like to think we are so independent and capable). It proved to be too time consuming and virtually impossible to undo mistakes, so I took the yarn and made this much more simple, classic piece above. The next sweater I made I did design myself, with much more successful results. Ah patience...


Related Posts Plugin for WordPress, Blogger...