Showing posts with label fabric: knit. Show all posts

Best of Handmade Swimsuits

Bathing suits are one of the few items of handmade clothing that I find are actually cheaper than most store-bought versions. However, despite being two small pieces of cloth, they are trickier to get right than I thought. For the first several years I made suits, most of them were duds. Some didn't feel substantial enough, some too tight, some too loose. But after more than a decade, a have not only improved my technique but also found a few favorite patterns. As the originals had worn out, I thought it was time to reprise my favorites for our recent trip to Hawaii. 

Fabric: swimwear fabrics from Blue Moon Fabrics 
Cost: $75 for all three suits


Pattern: BurdaStyle Bandeau Top 05/2014

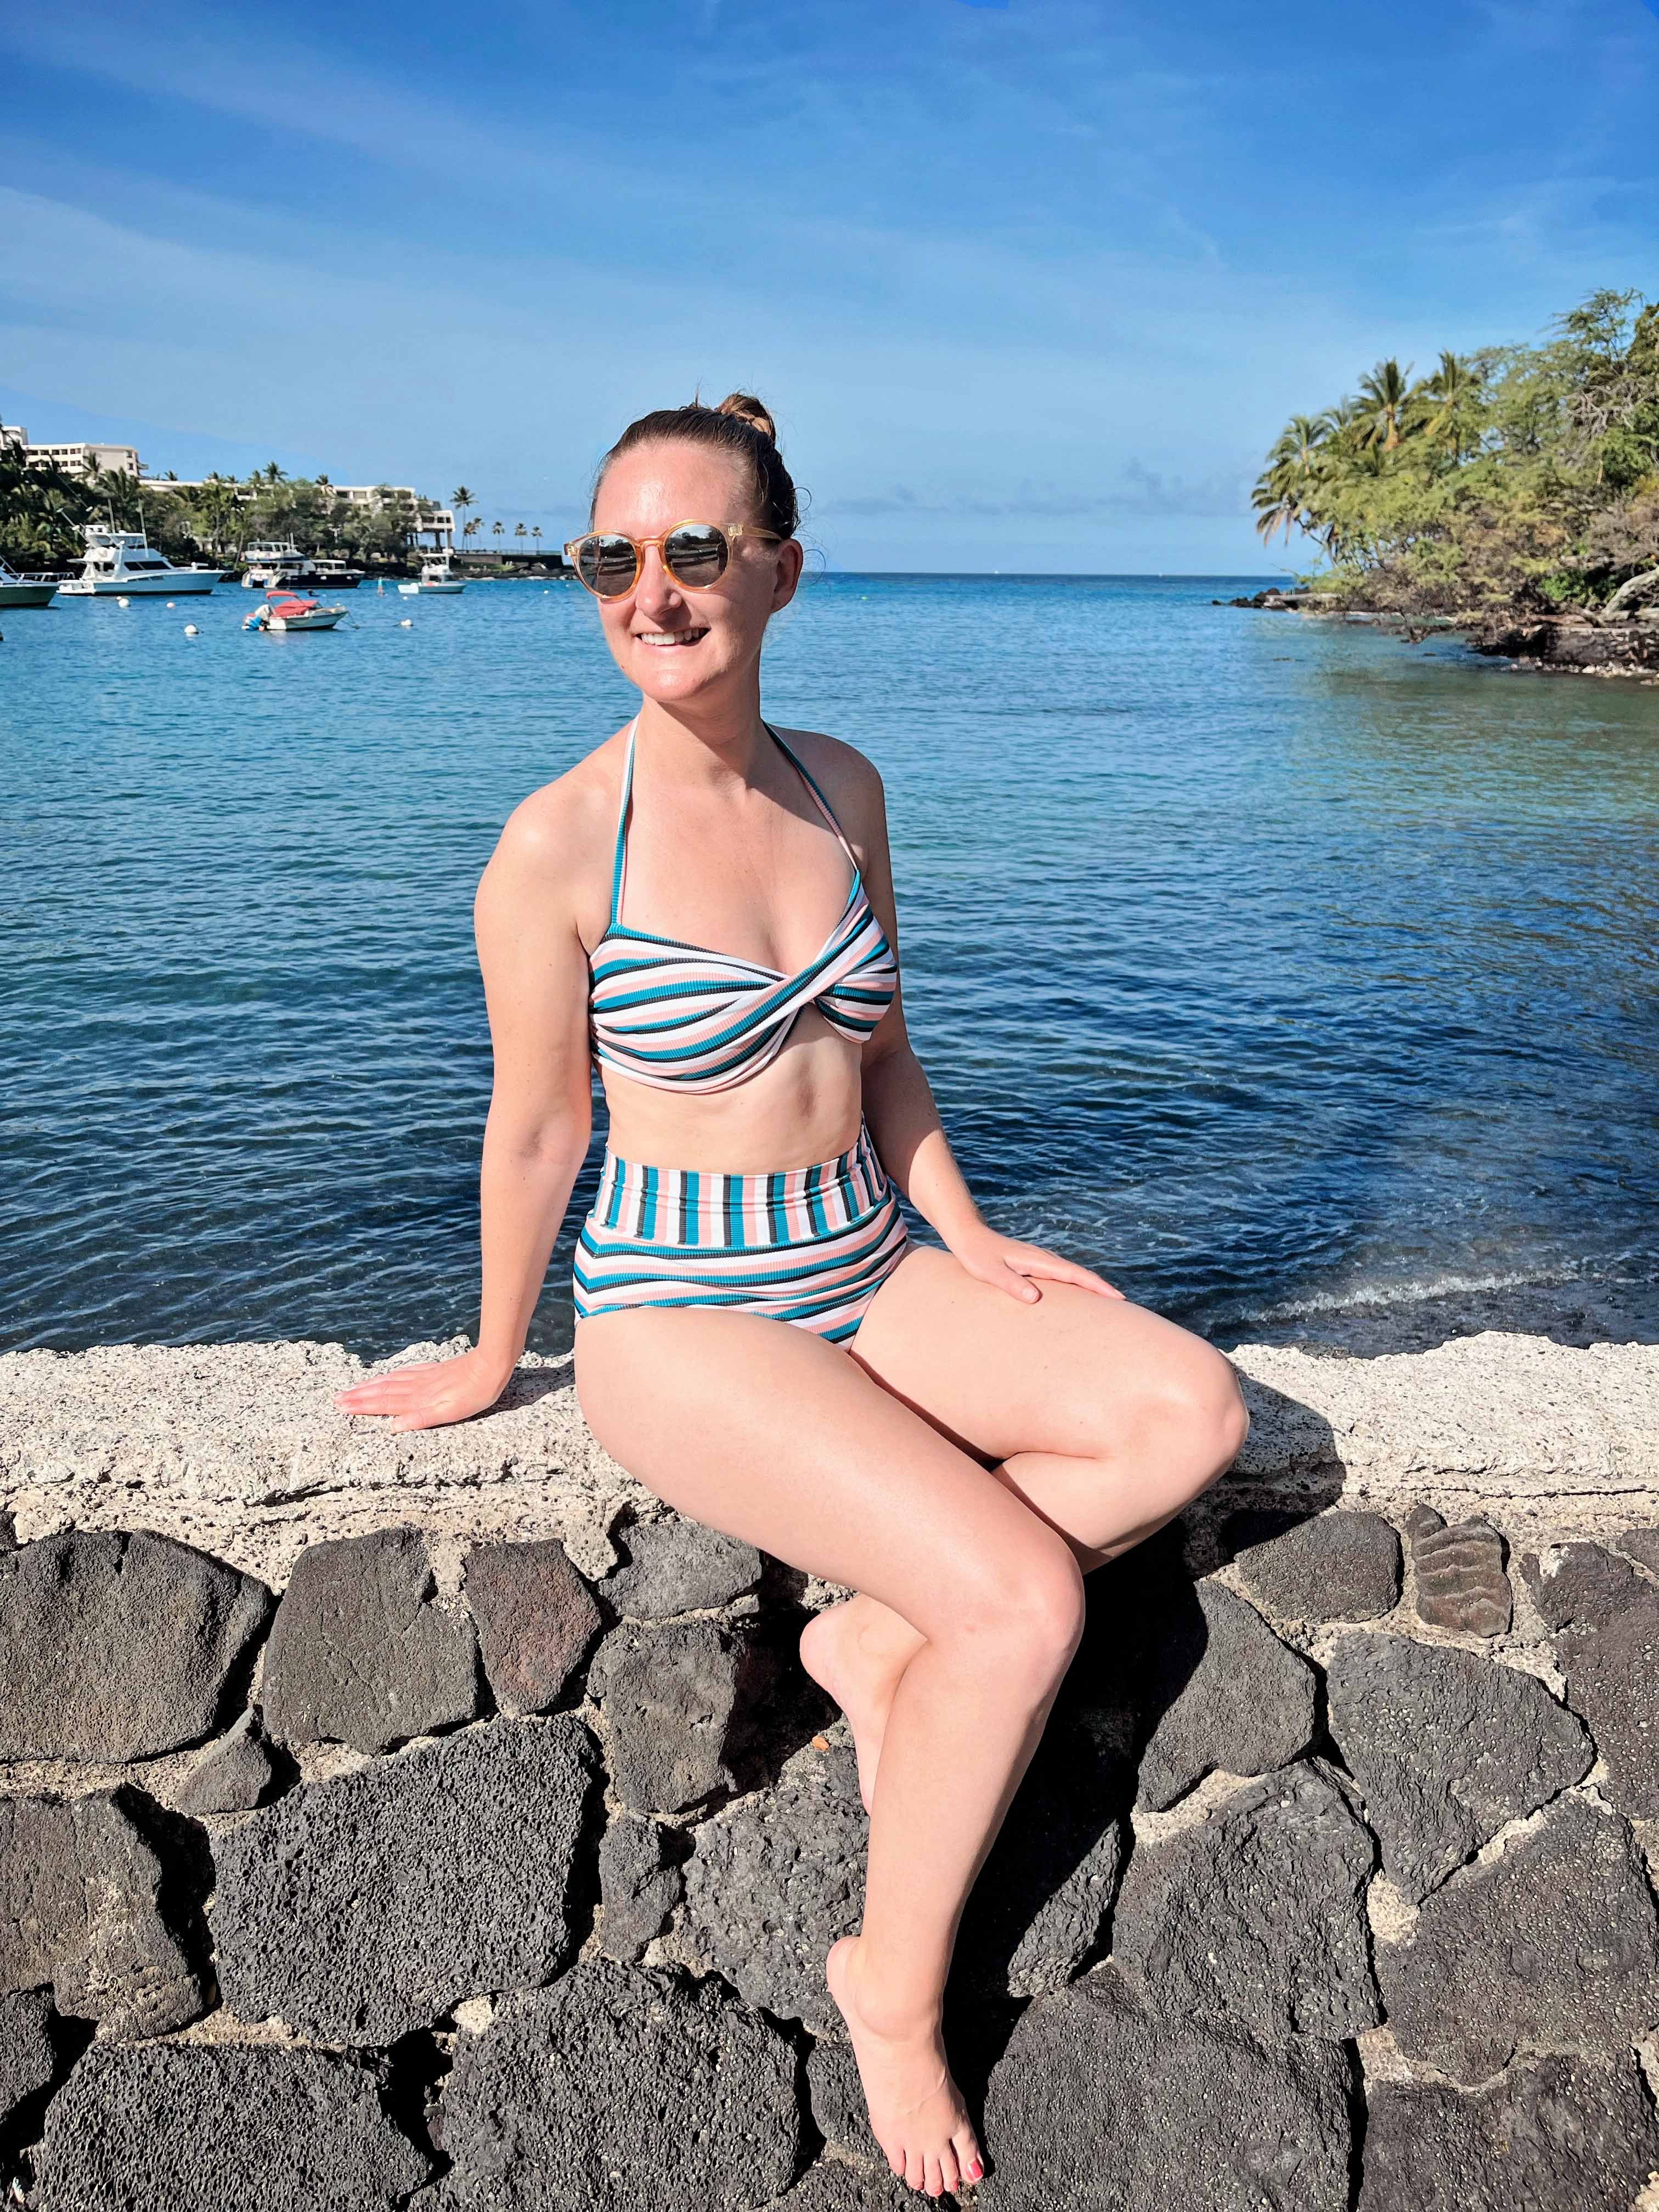
This was one of my first successful swim tops, after about five years of sewing them. While the pattern directions are sparse and typical of Burda, I had less trouble with them time around. As with last time, I added swim cups which give a really nice shape. I believe the original has normal straps, while this has a halter. It's not designed for lots of surf and waves, but feels fairly secure (as worn in the kayak, below). 

The bottoms are another TNT pattern - a simple front and back with a high cut. This time I also added a waistband. I also drafted a low-waist one with leftover fabric (not pictured), though those didn't feel very secure so might not work out. 

The next one I first made in 2016. 
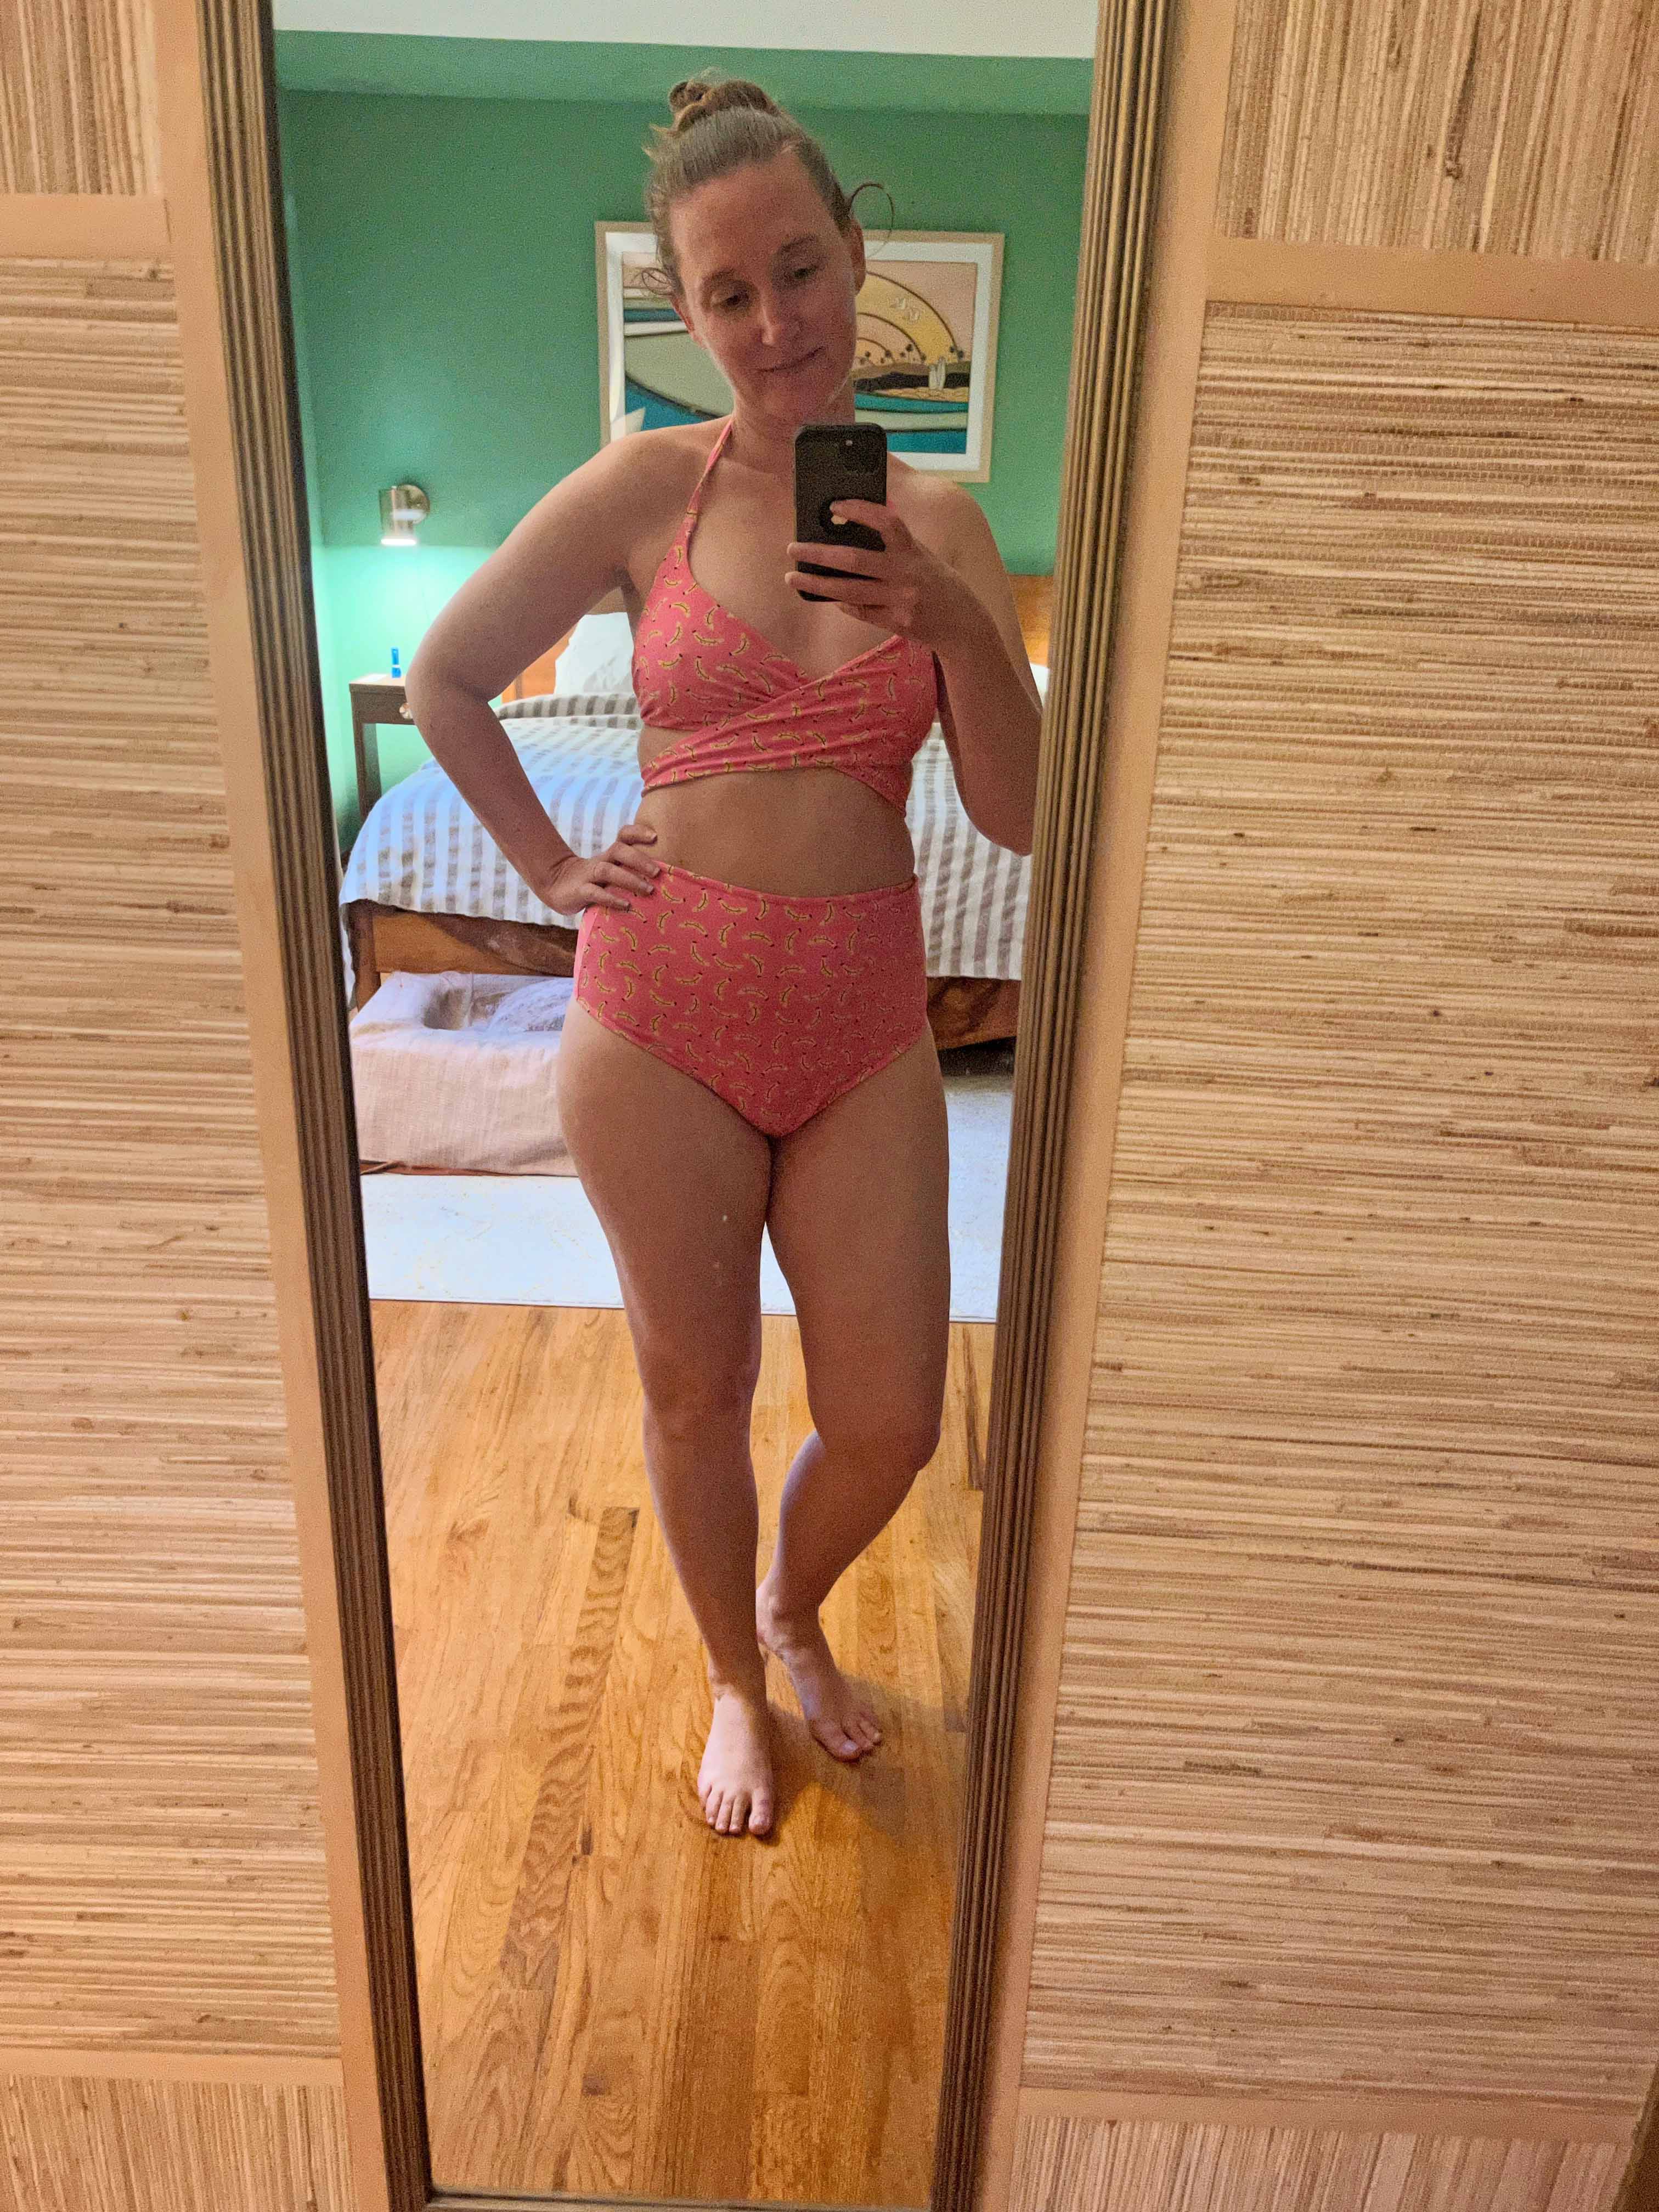
Pattern: Madalynne Sierra Bra (a free pattern!)

This one comes together fairly quickly, with a few modifications including completely lining it. Last time I made it I drafted the halter strap as one piece with the top. This time I did not (in order to make it easier to line), but didn't have the cleanest results. Regardless, this is an easy style for me to wear and gives a good shape. 

Same bottoms as before. I had originally tried the Edgewater Ave Oakley Bottoms, but realllly don't like high cut legs on me. As with the other, this also had a low-cut version with the leftover fabric (not pictured) that worked out fairly well. 


Finally, I tried one new-to-me pattern that I really liked. 
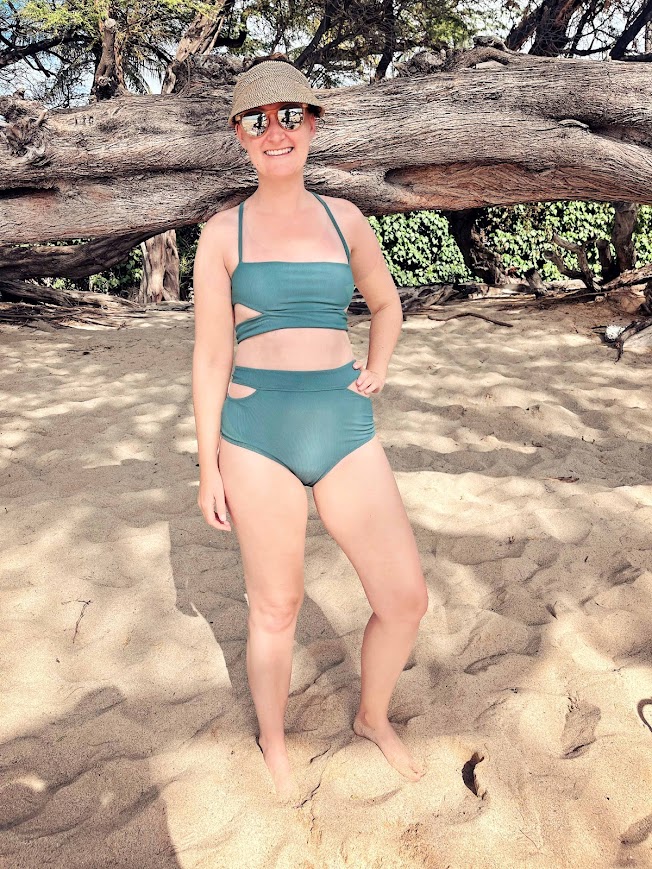

Pattern: Luciolons Cassis swimsuit (maillot de bain Cassis)

Someone on Reddit described this suit as their dream pattern and I have to agree! I love that it is covered up but still shows a bit of skin. It's got something very French about it. I actually worried that the top would provide too little coverage with the low cut and the cut-outs under the boobs. I do not recommend if you are more endowed. That said, I really enjoyed it and it worked out well on me. I takes a little fiddling with the straps when I put it on but then stays in place. 

As I looked up bathing suit bottoms online, one thing I had trouble with was getting a good idea of how cheeky the backs were cut. Several patterns out there have multiple options cuts, but often don't identify in the photos which is which. The same goes for people's posts on Instagram. And many don't post pics of the backs at all which is... understandable. So here's my contribution to the internet: this is the cheekier of the two options. 


I'm back home from the delightful warm weather now, but it's finally starting to heat up at home. I'm fully restocked ready for summer!

My Perfect T-Shirt

Probably more than a decade ago, I bought a cute striped shirt with cut-on sleeves. I wore it all the time (still do) and eventually decided I needed to make myself a pattern. I sewed myself one and wore that one all the time. So I guess it was time to make two more. 


Pattern: self drafted t-shirt with cut-on sleeves 
Cost: sponsored

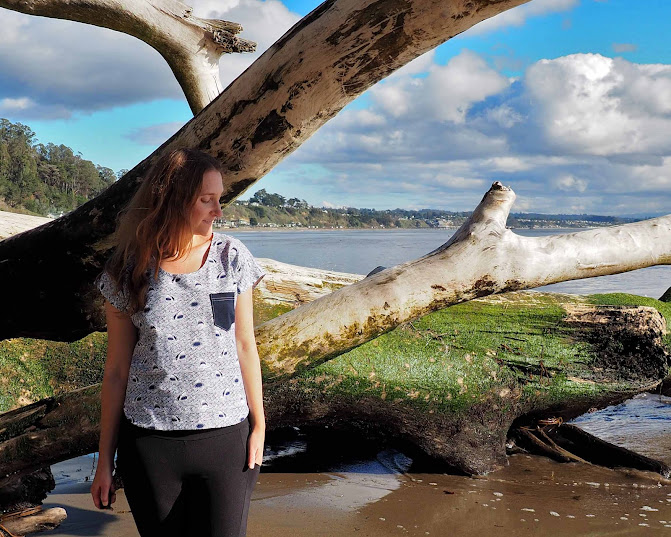
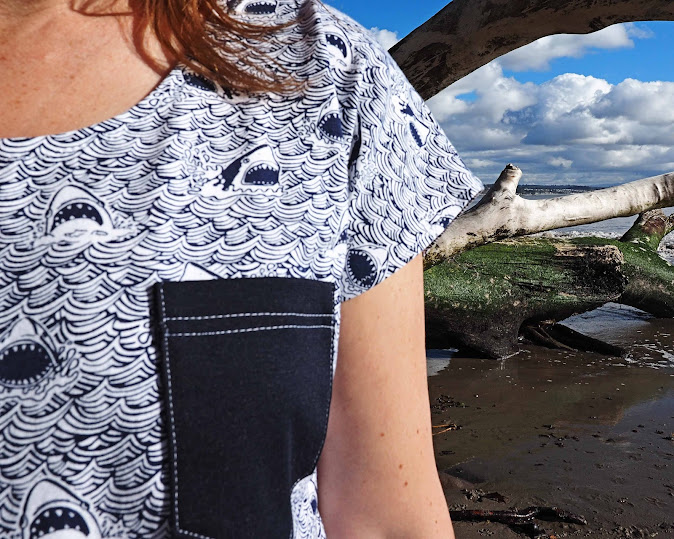
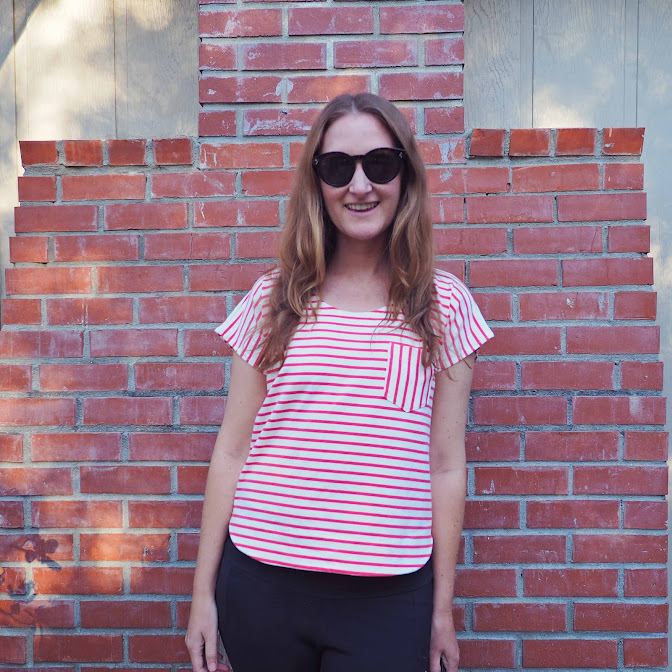
One of the best parts about making your own t-shirt is picking out a fun fabric. As opposed to a coat or a special occasion dress, I feel like I can be a little bit more playful with a t-shirt. Modes4U, who specializes in cute prints, was nice enough to send me a yard each from two brands I'm obsessed with: a Dear Stella shark knit and an Art Gallery coral stripe knit. 

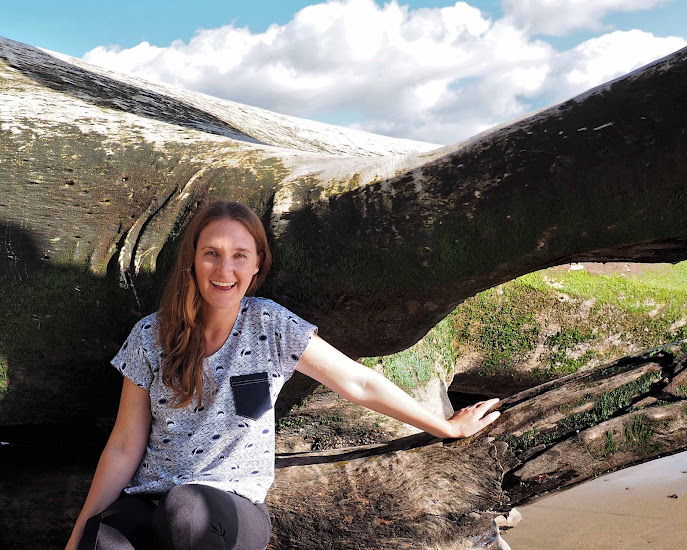
How great is this shark print!?! Fun fact: that ocean behind me is VERY sharky. 


This top has some nice features that I think make it a favorite. For one, the cut-on sleeves are easy to wear and make it very fast to sew. I also make it with a hem facing that gives the top a nice weight and prevents any curling hems. The hems of the sleeves and neckline are serged to give them a bit of weight, too, and then just folded under and stitched with a zig-zag stitch. 

I've always loved Art Gallery knits because they have a nice weight without being too bulky, and they're buttery soft. The Dear Stella print has a bit less stretch and feels more like a traditional t-shirt weight, which also works well for this top. 

If you'd like to make your own, this is probably the most common shirt pattern I've seen on the internet, so choose your favorite pattern brand and see if they make one. And check out the Modes4U knits to get yourself something fun. 

Happy holidays everyone!

October Days Sweater

After knitting for nearly two decades, I think I've finally timed it to actually finish a sweater in the fall. And, more importantly, I'm finally figuring out the types of sweaters I'll actually wear. 


Pattern: October Day Sweater by Masha Zyablikova
Yarn: 8 balls of DROPS Kid-Silk from Garnstudio in rust
Cost: $70

Learning to knit, I gravitated toward chunkier yarns that were easier to work with and came together quickly. However, over time I've become more interested in complicated stitch patterns. I liked to think that I was getting better and making nicer sweaters. Still, they weren't always getting worn. Made in worsted wool, cotton, or even acrylic, I realized most of my sweaters were HEAVY. They felt like a lot to wear, were often too warm, and were not always made in the best quality yarn. 

Recently, after making a t-shirt from sock yarn, I've decided the key is to knit lighter, smaller gauge sweaters that are more wearable. I've also started investing more in nice yarn for my projects. This project is a combination of both those things and I've actually found myself wearing it quite a bit!


The sweater is a modified version of the October Day Sweater. I made it in the recommended yarn (DROPS Kid-Silk from Garnstudio) which is 75% mohair and 25% silk - fuzzy, soft, and really light! I'll admit that the first time I tried on this sweater I felt a bit like a yetti, but after fixing some fit issues it feels much better. 

This is the rust color, which I had a really hard time tracking down but eventually found it on Etsy and got it shipped from Lithuania. This pattern has you knit with two strands together, which knits up quicker than I thought given how small the yarn is, but the end result is still really lightweight. 


The October Day pattern is really beautiful. I was inspired to make it by a sweater in the Spring 2019 collection from Delpozo, which has a similar lacey leaf pattern. To adapt this pattern to look more like the inspiration, I gradually faded the leaf pattern into stockinette rather than carry it through the entire sweater. Either way it's a fun piece to knit and the lace is really beautiful. 

Other than changing the lace pattern, I tried to follow the instructions closely. Admittedly, they were a bit of a challenge, owing in part to the fact that they're translated from Russian. Some of the things just don't quite make sense or aren't written the way I'm used to. However, I took my time and eventually figured it out. It's a bottom-up pattern with the top knit as a yoke, which allows for a mostly seamless construction.


I'll leave you with this final view at sunset overlooking the cliffs near our house. It's so beautiful I even ventured out in public with my tripod to capture some pictures. Even though it's November it was over 70 degrees out with people playing in the waves down below. 

Now to start knitting some Christmas stockings!

Shoulder pads??

I am not quite old enough to have worn shoulder pads the last time around. To me, they remind me of my mom's old 80s blouses or the polyester shirts we'd turn our noses up at in thrift stores. Shoulder pads were the first thing I'd rip out of vintage finds, and it actually took me years to learn to put them IN blazers to give shape to a garment. 

So imagine my surprise to see them popping up in garments and sewing patterns all over. And I'm even more surprised to say I gave them a TRY. I can't say they worked out in every instance, but it's fun to experiment with something out of my comfort zone.


Pattern: Grasser Knit Jumper 810
Fabric: 2 yds knit
Cost: $12

First up is the Grasser jumper. This is a new-to-me pattern company from Russia and what drew me to it was a wide selection of really interesting patterns. This jumper in particular had such a different construction and shape that I was really excited to give it a try. 

The instructions are complete and include some pictures, but the translation is a bit off and the sleeve construction involved some trial and error on my part. But in the end, it all came together mostly as designed. The shoulders are supported with "roll fabric;" I used some light quilt batting to give it the extra shape. 


I did make some updates to the pattern before cutting it out. One, it's cut from a stable jersey rather than a thicker sweater material, so my version has less structure than the pattern. Because of this, the sleeves collapse a little rather than holding their shape, but I don't mind. And while I kept the sleeves the same, I updated the main body by eliminating the princess seams and changing the neckline to a regular crew neck. I got this idea from a few people on Instagram who had done the same and I find it works well on this less-structured version. Sometimes putting too many seams in jersey is just asking for wonky seams. 


It is admittedly not the easiest shirt to wear. It doesn't fit easily under sweaters, and is a bit of a new shape for me. But I actually like it more than I thought I would and have been wearing it a good bit. 


Next up is the MadeIt Patterns Eight Tee. This is part of their No Frills line, which is the same style and fit as their regular patterns but without detailed, step-by-step instructions. I found the information to be more than adequate, with full sizing information, technical drawings, fabric recommendations, and one page of instructions with a few illustrations for the more involved steps. 


Pattern: MadeIt Patterns Eight Tee
Fabric: 1 yd jersey
Cost: free - remnant

This top and the Just Patterns Claudia Tee have been really popular on Instagram this past month. I chose the MadeIt version because I liked the shoulder/sleeve construction - it folds under to create the shoulder line in a really unique way.  The top can be made with or without shoulder pads and, despite the name of this post, I chose to make it without. Even without the pads, it gives an exaggerated shoulder line for the same look. 

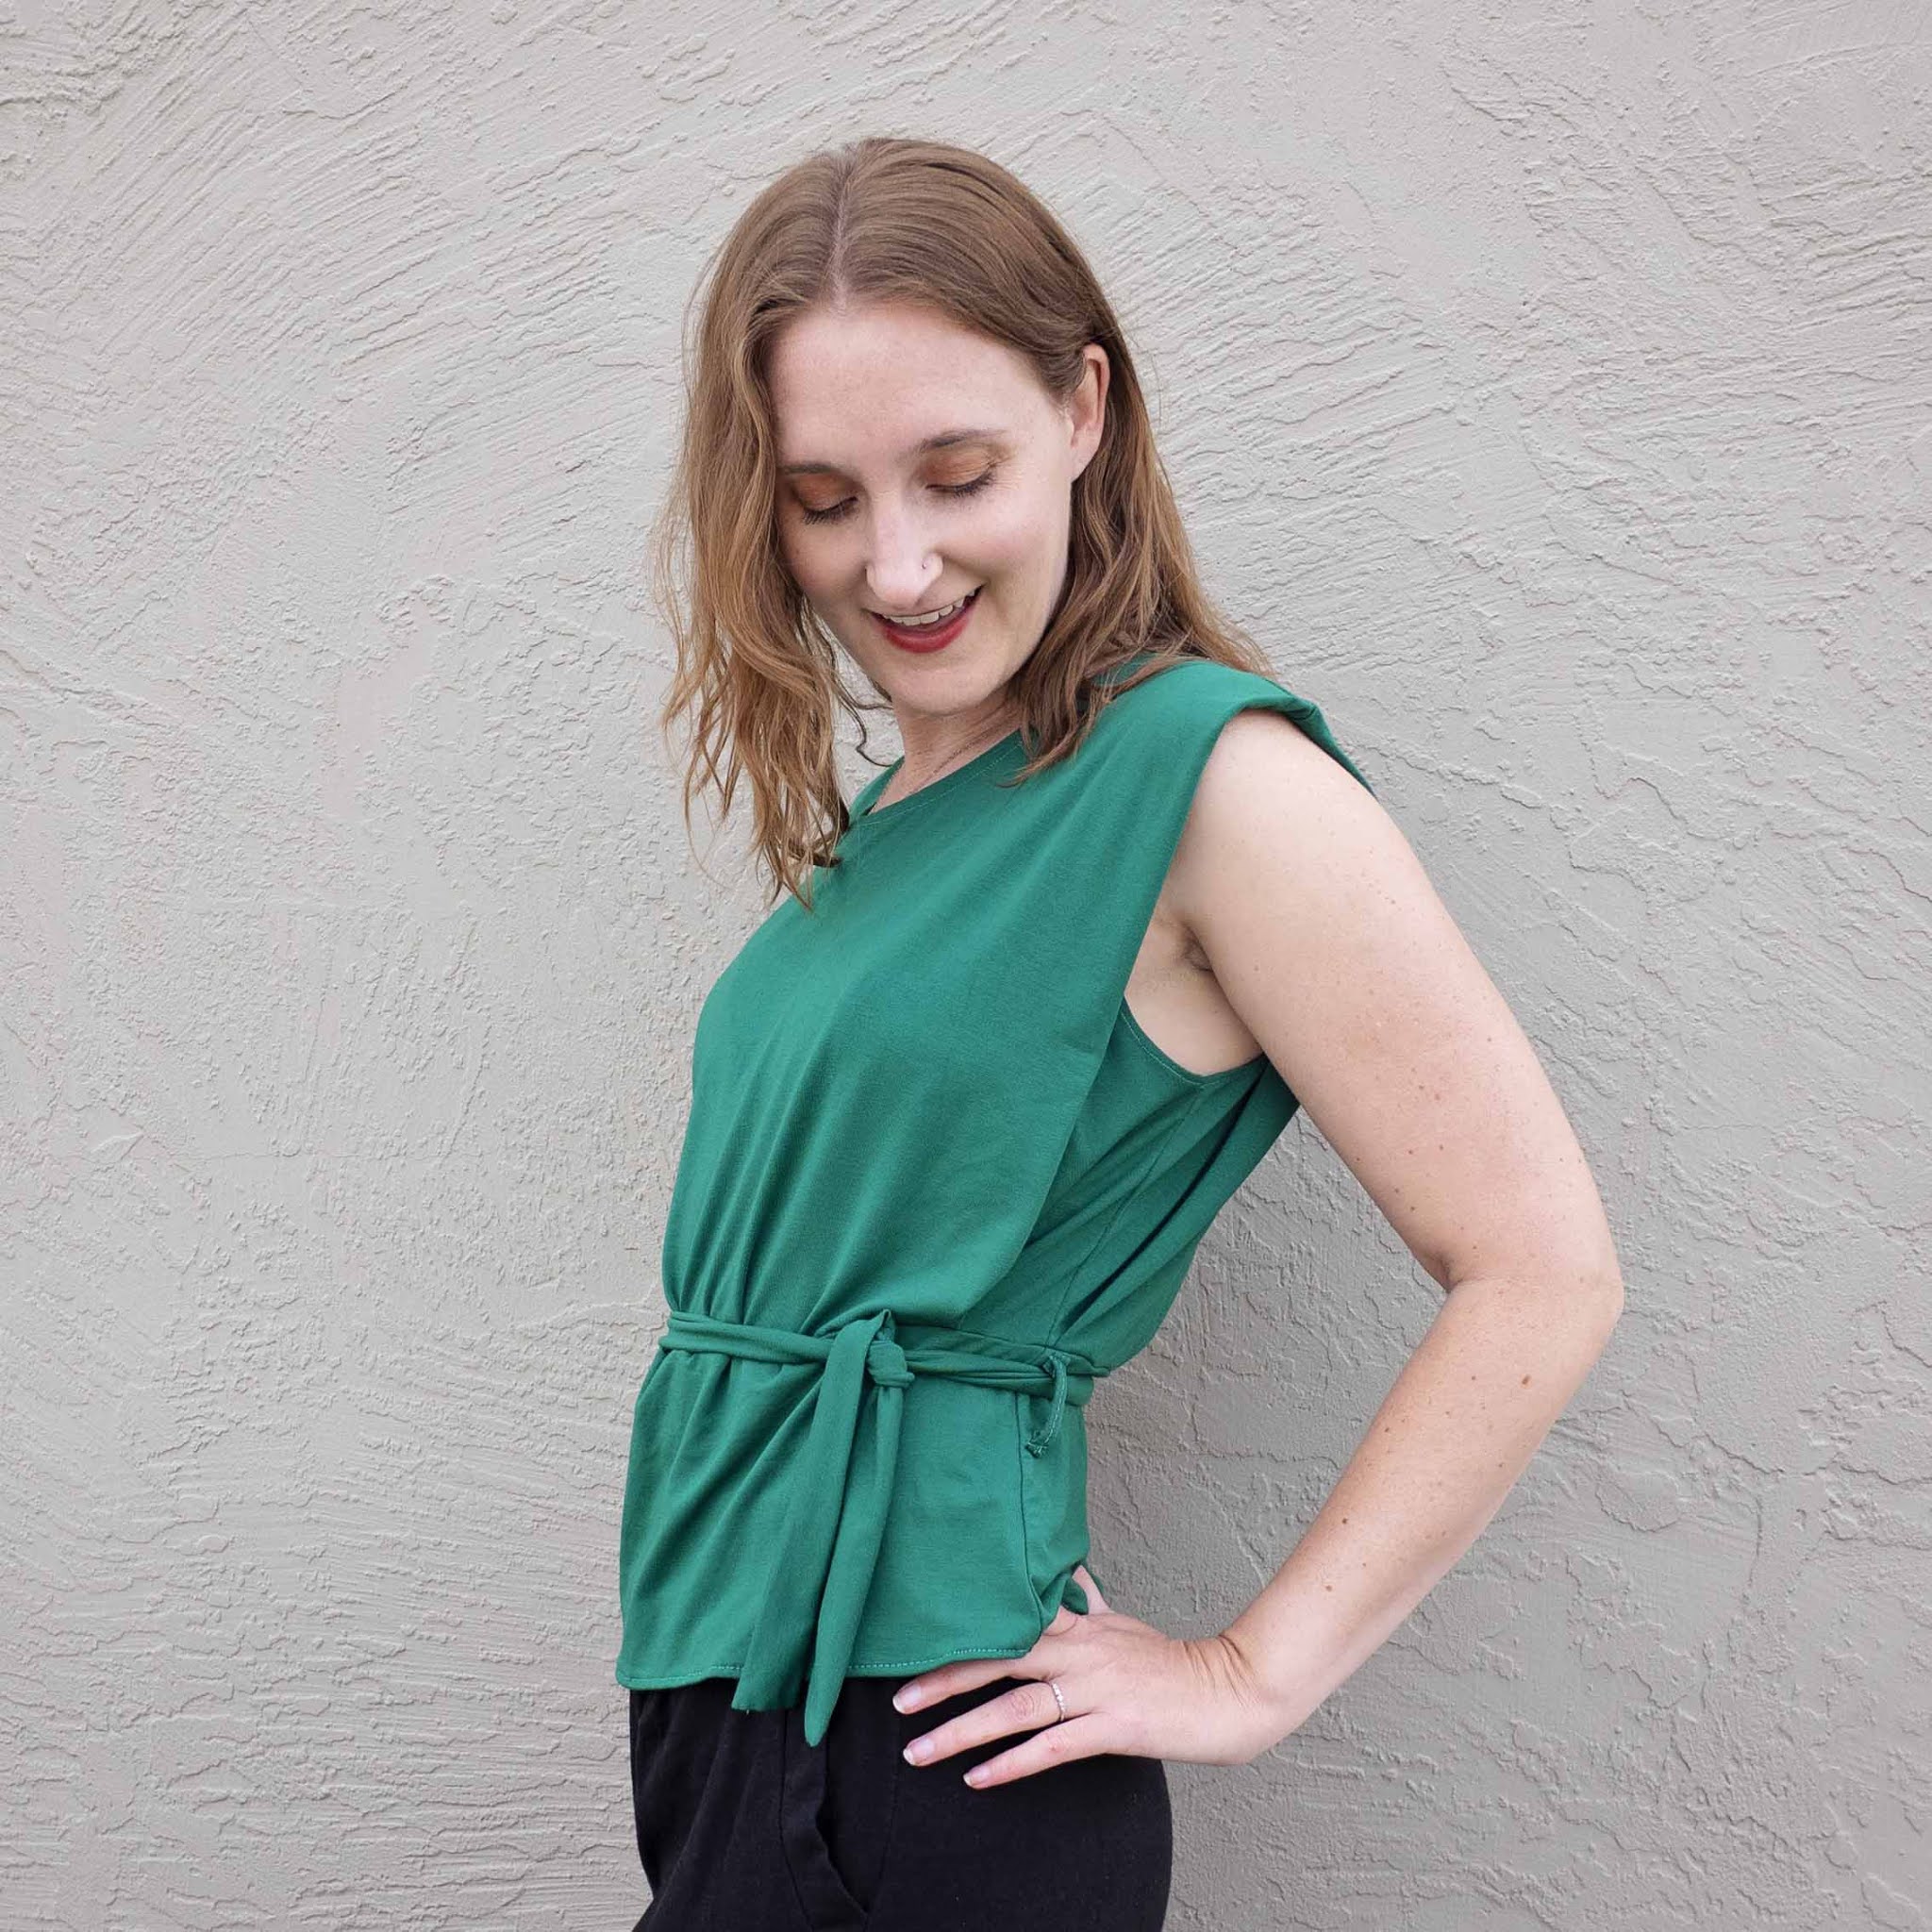
While the original shirt has a very boxy construction, I wanted something with a more exaggerated shape - wide shoulders and a nipped-in waist. To do this, I cut the shirt off at the waistline and added a narrower band. I then pleated the top into the band at the side seams. I also experimented with adding a waist tie. Mijke from SewItCurly did a similar alteration, but by sewing the shoulder "pleats" together rather than adding a hemband. 

I'm not yet sure how I feel about this top. It's definitely interesting, but I'm not sure I like the silhouette on me. Perhaps the original silhouette would have been better, but with my small shoulders I do feel like I'm swimming in it a bit. 

Either way both of these tops were really fun to experiment with and I'm glad I tried a new trend.  I've also been playing with wide-leg pants, another trend I've seen popping up, but I'm NOT ready for the return of low-rise jeans. 

Zoom Tops - Switching up Plain T-Shirts

In my year-end round-up, I mentioned closing out the year by making a bunch of "Zoom Tops" - comfy but cute tops to wear at work on my Zoom calls. T-shirts are a wardrobe staple for pretty much everyone, and this year I realized just how much I reach for them more than any other thing in my wardrobe. To make them a bit more work-appropriate, I've been trying to add fun details that make them a bit more interesting than a basic tee without sacrificing any of the comfort. 


So here is a roundup of my tees and my tips for making a basic t-shirt pattern work harder for work:


1. Pick an Interesting Neckline

This is probably the most obvious tip for a Zoom shirt, but I find that switching out a regular neckband for something more interesting makes my plain t-shirts much more work-appropriate. On this top, I used my regular t-shirt block and added the neckline from Vogue 1460, a Badgely Mischka designer dress, to create a high neckline with a bit of drape. So much fancier and just as comfy as a regular tee. I also like boatnecks, turtlenecks, gathered necklines, and even just turning under the raw edge rather than adding a neckband. 


2. Add Fancy Sleeves


While this switch isn't as visible on Zoom, adding fun sleeves definitely takes my plain tees up a notch. This shirt uses the Iris Pleated Tee sleeves. I added them on to my Mandy Boat Tee, which is a personal favorite pattern and one that I know I will wear a lot. I also love bishop sleeves from McCall's 7993, which I recently tried out. 


3. Layer Your Basics


I also cannot understate the importance of having simple basics in my wardrobe. I made this black turtleneck almost exclusively as a layering piece. I can see putting it under my Vogue Rachel Comey Jumpsuit for winter or, as pictured here, layered with a wool vest. 


4. Have Fun!

Whatever you do, have fun with it! Here I experimented by copying a favorite ready-to-wear design from my closet. The cut-on sleeves and loose fit make this an easy shirt for weekends. And I'd love a version in colorful stripes!  

Now to figure out what to make next...

Atlas Top

Yesterday was over 90 degrees with smokey air. That means I spent the day inside, windows closed, in a building with no AC. I honestly don't know what I'd do without my sewing this year because it really is the only thing that makes things bearable. Can't even do any stress baking without turning up the oven. Luckily sewing also gives me the skills to sew up amazing warm weather tops like the Atlas Top, the newest release from Stitch Witch Patterns. 


Pattern: Stitch Witch's Atlas Top 
Fabric: 1 yd jersey knit
Cost: fabric remnants from my mom

While I haven't pattern tested anything in a while, I have an abundance of time on my hands and was immediately drawn to this pattern. The front has clean lines and a shape I really like with a high neckline and the perfect sleeveless cut. It also has interesting bust darts that emanate from the center front seam rather than the sides, which keeps things interesting. 

Of course, the back is the real star of this pattern. It has a lovely criss-cross strap design that is really cute! It also helps to keep things breezy when it is the aforementioned 80+ degrees inside my apartment. And while I almost never wear a bra these days, I put one on for these photos and was pleasantly surprised to see that it's pretty bra friendly. 


As I do for most pattern tests, I first sewed this up muslin fabric to test the fit and construction. Madeline had already adjusted the neckline to sit a tad lower and the bust darts to sit a tad higher and the fit was spot on for me. Since the testing phase, she also reported making the sides a bit more fitted but I prefer this cut. 

For my final version, I sewed it up in a remnant jersey from my stash. This top is NOT intended for stretch knits, but it being quarantine and fire season and I all I decided to work with what I had on hand. The bust darts sit a bit too low in a knit but otherwise it's really comfy and works well. Someday I hope to make it up in a woven whenever I'm able to restock the right fabric. 

I sewed this final version up in a length slightly longer than the cropped version. Unlike a traditional shirt, you have to make the length adjustments before cutting out your pattern, as the back straps need to be adjusted to hit at the right length. I have a long torso, and so this length allows it to sit perfectly with my high-waisted jeans. 


Madeline, the designer, has a degree in Fashion Design and has worked in the industry before designing sewing patterns. I really appreciate patterns from those who have taken the time to get more formal training as I find they are more dependable to fit and sew. This top is simple but came together really nicely and has thoughtful fit and construction. The only thing is I wish she had added some more pattern markings, particularly at the shoulders, to help you put things together more easily. If you measure right and are careful with the facings though, you will have a nice, clean finish on your top. 


Ok, off to go fan myself and dream of another long weekend of sewing... 

His and Hers: Favorite Quarantine Patterns

At this point we've been mostly sheltered in place since March 11. That's over 5 months. Over 150 days. It hasn't always been easy - I had a lot of anxiety and some depressed feelings as I adjusted to it all. And these days find myself very angry at times. But we're learning to live with it and committed to slowing the spread. Sewing definitely helps. So today I'm sharing some of my favorite summer loungewear patterns that I've made these past few months for both me and my husband. They aren't anything too groundbreaking - Hudson pants, the Axis tank, Greenstyle leggings. But they do get worn all. the. time. 


For her: Sophie Hines Axis Tank, Hudson Pants, Greenstyle Stride Tights
For him: Thread Theory Strathcona Henley

First up is the tank top pattern of these summer - the Sophie Hines Axis tank. It's a unique pattern with no side seams (just a single seam up the back) so it sews up very quickly. I love the cutout shoulders and that it comes with some color-blocking options. That said, I had to make a few adjustments to the pattern to make it work for me. First, I re-sewed the neckline three times, moving lower until it no longer felt like it was chocking me. While I like the high-neckline look in theory, I quickly discovered it was not comfortable for me. I also found I had to shorten the armhole bands to get the right tension. Turned into a bit of a longer project with all that fiddling. You'll also notice that I lengthened the top. I'm not quite sure this is advisable given the lack of side seam - I definitely had to grade out and it still rides up at my hips a bit. Overall though a very comfy top for summer and I managed to sew it before our heat wave hit.

Below you'll also see that I made a more A-line version. Again this is a bit tricky without the side seams and I'm not sure it fully worked, but I'm all about playing with patterns and having fun during quarantine. The fabric is very soft. 


I've paired each of these tops with two patterns I've sewn over and over again - the Hudson pants from True Bias and the Greenstyle Stride Tights. Each has pockets and lets me trade off between tighter and looser styles so they're pretty much all I need. The one thing I'll say about the Hudson pants is that, like most pants patterns, the fit really varies based on the fabric you're using. The two times I've made this previously they've been on the looser side, but this time they were actually so snug through the legs that I had to add a few inches of fabric to the outside leg seam to relax the fit a bit. I also subbed out the waistband for one that is the length of the elastic rather than the length of the pants to achieve a smoother, un-gathered look. I think I also adjusted the angle of the pocket opening so that my phone wouldn't fall out. 

For the Stride Tights, I used a semi-opaque mesh fabric on the side panels which makes them breezier for summer. I mostly wear this pair for running, but have another pair that I wear around the house. I just LOVE the pockets. 

Ok that's four for me what about for the Mr.? He somehow still wears non-stretch pants most days, though I've definitely seen him get more use out of the stretch jeans I've made him. This time around I made him two Strathcona Henleys. I think I meant to make these up for his last birthday (in December - whoops) but had the fabric on hand ready to go. He is partial to soft shirts and these definitely fit the bill. Plus the buttons make a t-shirt look a little dressed up for video meetings. Right?

One of the fabrics had a print on one side and was plain on the other, so I decided to have some fun with it. I like the diagonal stripe although I wish I'd centered it a bit lower. For some reason, I really struggled cutting this one out. 


I've made him one of these before that he wears often. While he is nearly 6 feet tall I did shorten the sleeves and torso as they are quite long. I also hate that placket - I find myself swearing every time I make it. On the plus side, you'll notice there was some fabric leftover for me ;) 


Any recommendations for your favorite loungewear patterns? 

Greenstyle Tempo Tights

For the past fifteen years, I've worn the same workout clothes. Yup. They were high quality, made to last, and, while not particularly fashionable, I didn't need anything special to go for a run. But recently my workout clothes have started to show their age. Holes, sagging, you know the drill. And the new ones I bought just weren't cutting it - not stretchy enough, ill-fitting, not breathable (!). So despite never feeling the urge to sew workout wear before, I finally decided it was time to make my own. And you guys, I've caught the workout wear bug. I pretty much want to dress like an IG workout influencer now.


Pattern: Greenstyle Creations Tempo Tights
Fabric: spandex
Cost: $10

While I've made a few pairs of Greenstyle tights now, this one is definitely the pinnacle of wild workout wear. Bright colors? Check. Color blocking? Check. Swooping seam lines. Check check. 

In full disclosure though, this pair was actually somewhat of an accident. I bought some pink "twill" from Spandex World only to realize when it arrived that it was... spandex. Not quite suitable for its intended purpose. But, it did turn out to be a good opportunity to try out my new Greenstyle Tempo Tights pattern. 

This is the second Greenstyle tights pattern I've made after the Stride Tights. These have a similar pocket style and fit. But what I appreciated about this pattern was that, while similar to the other one, offered a different style of pocket construction, a differently shaped gusset, and the waistband style lines had been adjusted to match the lines of the pants. I appreciated this attention to detail and getting the most out of each pattern.

Of course, what I really like about this pattern is the cool seam lines and potential for color-blocking. This spandex was darker pink on one side and lighter on the other, which was perfect for this pattern. I also found some red mesh in my stash and was able to squeeze out the calf cutout for the full ombre look. If you're sewing these up, I highly recommend basting along the inseam to make sure your color-blocking perfectly matches up. I don't usually baste but it's definitely worth the extra effort here.


In terms of fit, I love that I can sew my own tights that actually fit. Other tights I've bought have been too tight in the leg and too loose at the waist, leading them to ride down as I ran. Looking at the Greenstyle size chart, I now realize that it is because my thigh is actually several sizes bigger than my hip. I already knew I was pear-shaped, but I didn't realize that I needed to size up for my thighs as well. Much better! 


The only thing now is I have the urge to sew a matching top. And I have like three more spandex colors coming in the mail. Please send help - this may be one of those weird quarantine obsessions. 

Greenstyle Swimsuit

The fact that we have no big trips planned for this summer didn't stop me from making my annual swimsuit. This has been a yearly tradition of mine since I started sewing. It's actually more of a rule than a tradition - if I allowed myself to sew up all the swimsuits I could dream up I'd have many more than I could use!


Pattern:
 Greenstyle Creations North Shore Swimsuit
Fabric: 1 yd nylon spandex knit and lining
Cost: $12

This year I tried out the North Shore Swimsuit by Greenstyle Creations. I've been obsessed with their leggings and am becoming a big fan of their patterns overall. I love the range of options included in this pattern - there are five different tops plus different closure options and two different bottoms with three rise options, plus a one-piece. Right now it's on sale for just under $12. 

As with their leggings, the one thing I wish they did was more clearly indicate which pieces to cut for which view. I just ended up printing and tracing the whole thing since I plan to use this pattern again and color-coding the pieces as I went. But I love how the pieces are drafted - they're a great shape!


I do need to adjust the sizing for making this suit again. The pattern has a great size range (from XXS to 3XL). I cut the bottoms as M and top as XS based on my measurements. I adjusted the underbust band so it was tighter and will size the bottoms down to a S next time. 

Usually when I make bathing suits I prefer some negative ease in the swimsuit and to lightly stretch my elastic for additional stability. However, this pattern instructs you to cut elastic that is much smaller than the suit, using the elastic to create much of the negative ease in the pattern. I find that creates too much bunching in the fabric for my liking, so that's why next time I will size down, especially for the bottoms. This may also be helpful for the people online who I saw had a lot of trouble with their elastic insertion - less stretching makes it less fiddly!


We saw my parents a few counties over for the first time since quarantine at the start of July. It was so nice to spend time together and enjoy the conversation without the filter of a video call. We also got amazing weather and a chance to walk down to the beach and take a dip - socially distanced of course! I'm hoping for a few more outings like this this summer but we'll see!

Cape-Sleeve Top

I have finally made my way to the end of my planned sewing list, leaving my mind to wander over the possibilities of fabrics and patterns in my stash. I'm not worried - this is when quarantine creativity kicks in. I can finally start dreaming about what I want to do with a remnant I've been saving or that fabric my mom gave me. I try to always sew things that I think will get worn and have a place in my wardrobe. This time, those creative musing paid off with my new cape-sleeve top! 

Pattern: self-drafted using my t-shirt block
Fabric: 1.5 yds fleece-backed sweater knit
Cost: free

I have been obsessed with making a top with cape-like sleeves for a while now. My Pinterest history shows that I pinned this photo of Victoria Beckham in one in 2015. I'm pretty sure hers is just a cape over a top (maybe a two-piece set?), but I wanted an integrated piece (edit: turns out it's this Balenciaga piece). Ever since then I have occasionally pinned more inspiration or looked around for a pattern but never found anything that was quite right. 

The more I thought about it, the more complicated it got. You know what else I wanted? I was set on the idea that it shouldn't look like a cape from the back. Too much like a superhero. Too extra. I wanted something with the cape look in the front, but the look of a regular sleeved top in the back. And I just couldn't wrap my head around how to do that! 

But you know what? I finally figured it out! When you have months alone to your thoughts, even the most persistent problems seem to work themselves out. Here's a view from the back - actual sleeves!

After years of musing, the construction popped into place in my head one night based on a few key ideas. The first was that I needed a cape or yoke in the front that then attaches to regular set-in sleeves at the back. The way to do this is to draft half a set-in sleeve by folding the sleeve piece down the center and keeping just the back half. The sleeve gets set into the back armscye. This creates a long shoulder seam that extends from the neckline down toward the elbow. In the front, I drafted a yoke piece (similar to this top). I then connected front to back along the long shoulder seam similar to how you would assemble a normal cape. 

The second issue is what to do with the underarm of the back sleeve. In a normal top, the back underarm wraps around the arm and is sewn to the front underarm, creating a tube for your arm to go in. But we only have a back undearm - no front piece. So I re-drafted the sleeve to attach to the side seam: instead of having the sleeve extend out the arm toward the wrist, I continued extending the sleeve down toward the waist. During construction, it gets sewn into the side seam between the shirt back and front. The full effect is that the cape drapes across the front, wraps around the arm, and is attached to the back at the armscye and down the side seam. 

Does that make sense? No? I knew I would need to drape it on my dress form to get it right and test it out. I started with my t-shirt block and cut out a half sleeve from muslin to drape on the form. Here's what I got:   

And here's what it looks like on:


As you can see, it was a bit of a mind twister. In the end, however, there were relatively few pieces and it's not that much harder to sew up than a basic t-shirt. Honestly, if I were a pattern maker (which I'm not) this would be my ideal pattern - an interesting shirt that takes a lot of conceptualizing but isn't that hard in practice to sew up once you work out the mechanics. As you can tell, I was quite pleased with myself. See how you get that cape look when I bend my arm but without the full superhero cape in the back? Love it! 


The top is made from a fleece-backed sweater knit that I think my mom gave me. It feels really nice and worked out really well for this project. It is drapey with a lot of stretch but still has good weight and structure. It is incredibly comfortable to wear and I must admit I do feel a bit like Victoria Beckham when I put it on. I was a bit worried that the sleeves wouldn't allow for much arm movement but it's actually fine. The only thing this top is not good for is layering under any type of coat or jacket!

Now that I have finally finally worked out how to do it, it would be easy to make again. Unfortunately, it's the type of garment you probably only need one of in your wardrobe. Perhaps I'll think up another clever way to make it up, but for now I'm enjoying that I actually did it!

Note: This post contains affiliate links. 


Spring Sweatshirt

Are there stages to quarantine sewing? My trajectory has been like this: finishing up the projects I was working on for events I won’t be able to go to, followed by making all the fancy/weird things I've always wanted to make but didn’t have time for, and, finally, coming to terms with reality and just making loungewear. What’s next? I’m worried I may be reaching the bottom of my list and actually make menswear! Ha!

Pattern: MadeIt Patterns Glide Jacket
Fabric: 2 yds french terry
Cost: free gift/scraps

For this project, I wanted something cozy to wear at home. I have a similar store-bought sweatshirt with black accents that I've had forever, but it's always been a bit cropped and bit tight. My mom had given me this french terry and I had a coordinating black zipper, so I decided to see if there was a pattern that caught my eye. I wanted something with some interesting details and re-discovered the MadeIt Patterns Glide Jacket. I like the interesting seaming at the front as well as the triangle cut-out openings at the side hem and the way the front wraps around to the back. The collar variation was the final selling point - I love a good collar.

To transform this into a more fitted, unlined sweatshirt, I had to make a few modifications. First, I recut the armhole and new sleeves to be cut-on. This is more fitted than the drop-sleeve in the pattern. As I was sewing, I also did some fitting at the waist by nipping in the diagonal side seam there. The fit at my hips was spot on though. The result is a nice fit that's still good for layering. 

Because I wasn't using a lining, I topstitched the neckline facing down in the back and then hand-tacked it to the pocket bag in the front to keep it in place. In the back, I cut the hem facing in black and sewed it to the outside of the jacket for some contrast. I omitted the pocket zips because it's quarantine and I'm hoarding those for something else. However, if I were to make this again, I think I would make the entire diagonal front piece into a pocket bag. As it is right now, there's the outer piece, the pocket and bag, and then the front/hem facings. This makes sense for a lined jacket, but I could have simplified for a sweatshirt. It also would have given me roomier pockets. These are a bit on the small side.

MadeIt Patterns was another new-to-me indie pattern company. I've been following Olu on Instagram and like the creative take she has on everyday clothes, like the hug hoodie. Unlike some other patterns I've tried recently, I found both the drafting and instructions for the pattern to be pretty good. There is lots of detail in there for newer sewers and really takes you through EVERY. STEP. Their measurements seemed accurate and there were good pattern markings, etc. I'm a little confused about why some pieces had a separate facing and some had a cut-on facing, but I didn't follow the instructions or fully read them so I guess I'll never know. I also found that I had to even out the back hem because it sloped down, but again didn't follow the pattern construction so there may have been a reason.

Above is a shot from the side so you can get a sense of how the front piece wraps around to the back. It's hard to see my black hem facing against the color of my pants, but you can also see the cool hem notch detail near the pockets. I used an extra stretchy fabric for the cuffs as I almost always end up wearing long-sleeved garments pushed up around my elbows.

I'm hoping this will be a nice staple in my temporary stay-at-home and permanent work-from-home life. The collar elevates it a bit from a normal sweatshirt, so I think it will pass muster on video calls. It has already done well on dog walks and lounging around the house.

Related Posts Plugin for WordPress, Blogger...