


Pattern: my own (see below) with help from McCall's DIY style Misses' Tops and Panties M6128 and Misses' Two-Piece Bathing Suits #M5861
Material: Rayon/Lycra blend + decorative elastic + Wash-Away Wonder Tape
Cost: $3

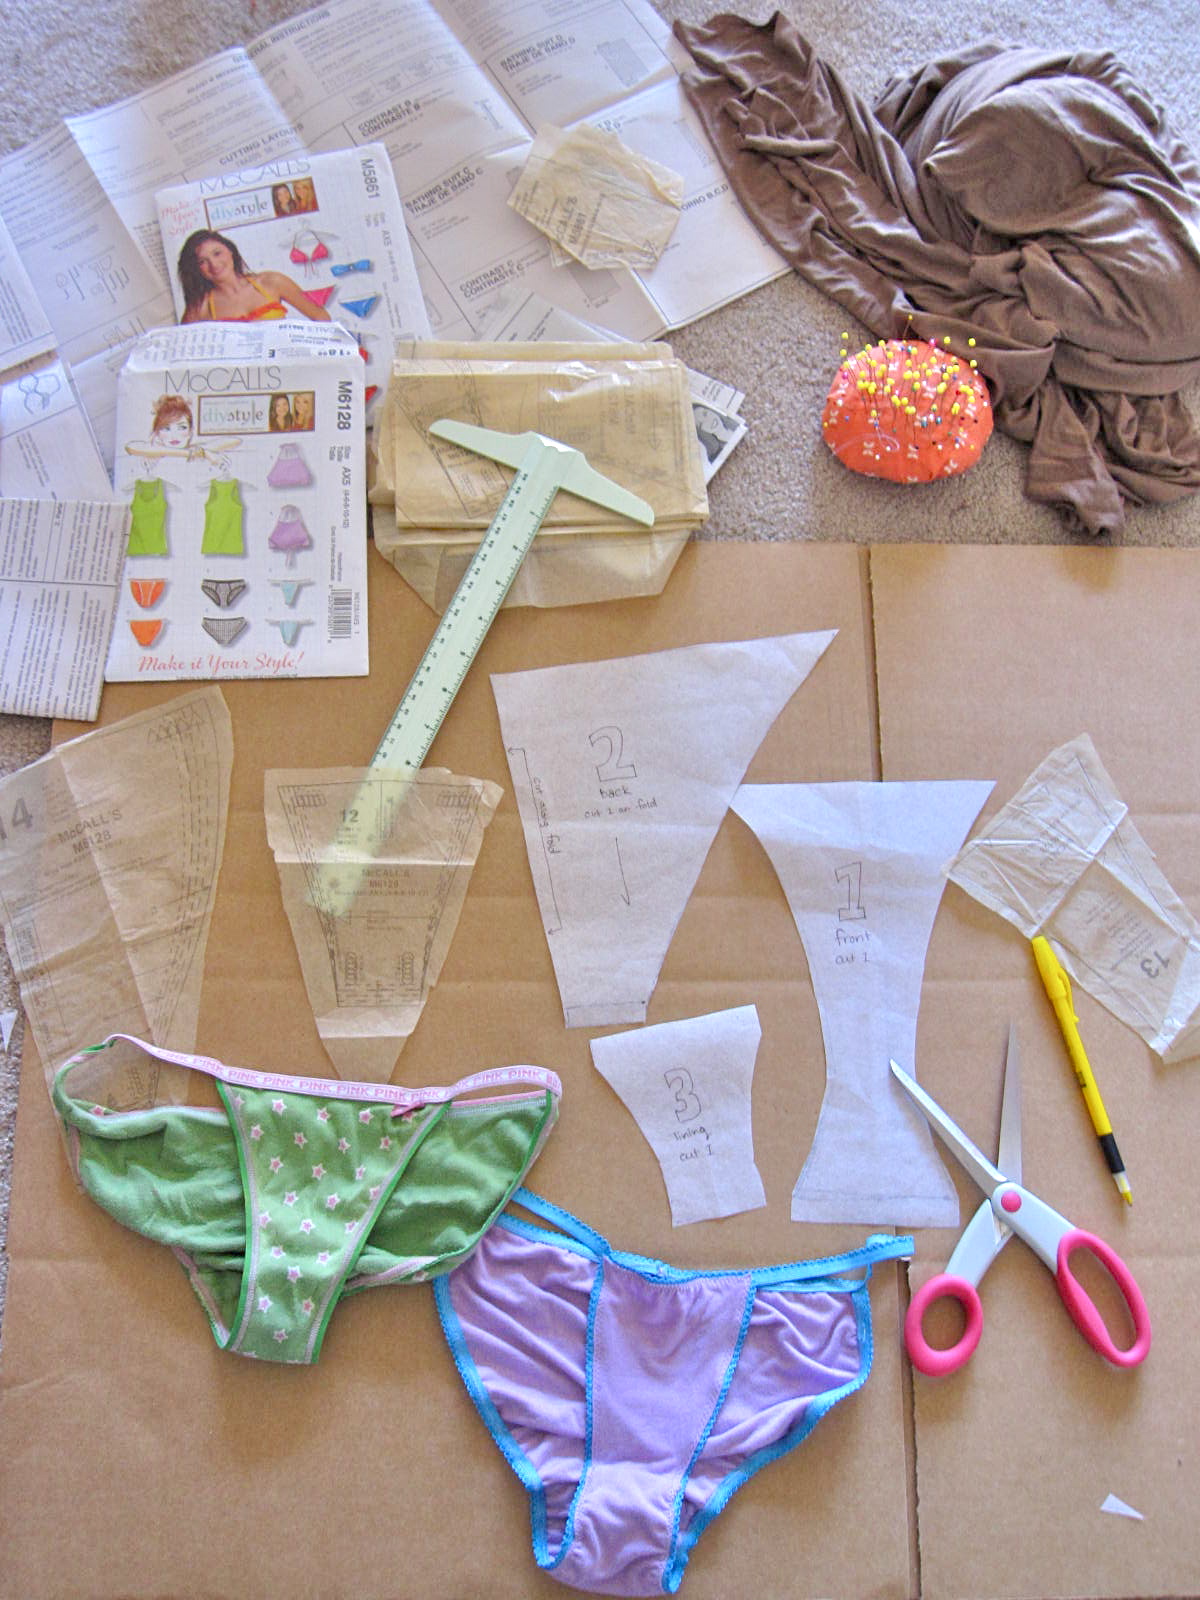
 So the morning after I tried McCall's DIY style pattern , I sat down with my pattern paper, patterns, a ruler, pen, and my Victoria Secret undies and got to work. It didn't take much to draft up a new underwear pattern. This one has more coverage on the sides and no third crotch piece, which means less seams and less bulk. I believe these are also a bit more low-rise than the ones at the top, too.
After trying them on, I was thrilled with the results. I probably could have done this without buying the Tops and Panties pattern, but it was worth a try. The other innovation I came upon was using Wash-Away Wonder tape, a double-sided, sew-through, wash-away basting tape. I put that sucker on to attach the elastic and my stitches came out beautifully--perfectly holding the fabric and elastic in place. But beware when you are buying tape--if it is not double-sided, sew-through AND wash-away, you do not have the right product. Buy it in 1/4" or 1/8" strips for this project.
Here are my directions, with PDF pattern pieces to come later:
Cut: FRONT (x1), BACK (x1, along fold), LINING (x1), ELASTIC (two pieces at 18 1/2", one piece at 25")
Seam finishing: This pattern uses stretch Lycra blends that do not ravel. For this reason, none of the raw edges are finished. If you would like to add finishing to the edges, cut a bigger seam allowance and either surge along the raw edges or zig-zag along the raw edges and trim.
 Step 1: With right sides together, pin along the bottom of the FRONT and BACK. Baste together.
 Step 2: Pin the right side of the LINING to the wrong side of the back along the bottom. Stitch.
 Step 3: Grade seam allowances, clipping the lining allowance the shortest (you may want to remove your basting stitches to do this).
 Step 4: Turn the lining towards the front, covering the seam. Baste raw edges together along the sides.
 Step 5: Place a 1/4" or 1/8" strip of Wash-Away Wonder Tape (or its equivalent) on the wrong side of the fabric along the edge of the leg opening from front to back. Use this tape to attach the elastic like so: Stretch the elastic only a little along the front piece while applying it. Distribute the rest of the elastic from the lining through the back along the fabric, stretching to fit. Allow the edge of decorative elastic to peek out from underneath the fabric, if desired.
Stitch, using a zig-zag stitch. On my Janome, I set the zig-zag width to 2.5 and sewed at a 1/4" stitch allowance.
Repeat for the other side.
Step 6: Stitch the ends of the longer piece of elastic together by overlapping the ends and sewing a line of stitches across. Make sure that the elastic isn't twisted. It may be helpful to secure with Wonder Tape before stitching to baste in place.
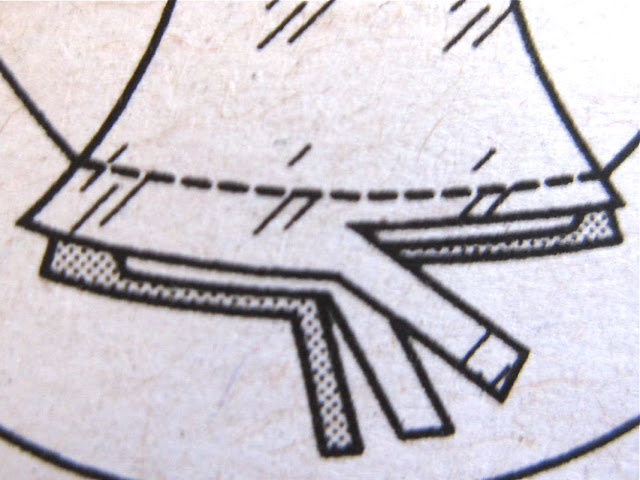
 Step 7: Apply tape as in step 5 to the right side of the upper edge of the front and back of garment. Attach elastic as follows: Secure the overlapping ends at the end of the back (not in the middle); leave a 2 1/4" strip of elastic free, then secure 6" of elastic across the front piece; leave another 2 1/4" of elastic free, then secure the remaining to the back piece. Pull the elastic to fit across the front and back; it may be easiest to work the back half in two sections, making it easier to pull the elastic taught as you secure it to the tape.
Stitch, as on the leg openings, using a zig-zag stitch. I switched to a thread color that matched my elastic band here because the elastic is on the outside of the garment here.
Variations: If desired, add bows, buttons, decorative stitching, embroidery or zippers to personalize the look.


Material: Rayon/Lycra blend + decorative elastic + Wash-Away Wonder Tape
Cost: $3

 So the morning after I tried McCall's DIY style pattern , I sat down with my pattern paper, patterns, a ruler, pen, and my Victoria Secret undies and got to work. It didn't take much to draft up a new underwear pattern. This one has more coverage on the sides and no third crotch piece, which means less seams and less bulk. I believe these are also a bit more low-rise than the ones at the top, too.
After trying them on, I was thrilled with the results. I probably could have done this without buying the Tops and Panties pattern, but it was worth a try. The other innovation I came upon was using Wash-Away Wonder tape, a double-sided, sew-through, wash-away basting tape. I put that sucker on to attach the elastic and my stitches came out beautifully--perfectly holding the fabric and elastic in place. But beware when you are buying tape--if it is not double-sided, sew-through AND wash-away, you do not have the right product. Buy it in 1/4" or 1/8" strips for this project.
Here are my directions, with PDF pattern pieces to come later:
Cut: FRONT (x1), BACK (x1, along fold), LINING (x1), ELASTIC (two pieces at 18 1/2", one piece at 25")
Seam finishing: This pattern uses stretch Lycra blends that do not ravel. For this reason, none of the raw edges are finished. If you would like to add finishing to the edges, cut a bigger seam allowance and either surge along the raw edges or zig-zag along the raw edges and trim.


Stitch, using a zig-zag stitch. On my Janome, I set the zig-zag width to 2.5 and sewed at a 1/4" stitch allowance.
Repeat for the other side.
Step 6: Stitch the ends of the longer piece of elastic together by overlapping the ends and sewing a line of stitches across. Make sure that the elastic isn't twisted. It may be helpful to secure with Wonder Tape before stitching to baste in place.
 Step 7: Apply tape as in step 5 to the right side of the upper edge of the front and back of garment. Attach elastic as follows: Secure the overlapping ends at the end of the back (not in the middle); leave a 2 1/4" strip of elastic free, then secure 6" of elastic across the front piece; leave another 2 1/4" of elastic free, then secure the remaining to the back piece. Pull the elastic to fit across the front and back; it may be easiest to work the back half in two sections, making it easier to pull the elastic taught as you secure it to the tape.
Stitch, as on the leg openings, using a zig-zag stitch. I switched to a thread color that matched my elastic band here because the elastic is on the outside of the garment here.
Variations: If desired, add bows, buttons, decorative stitching, embroidery or zippers to personalize the look.


And check out my bikini brief version!


Adorable with the little button embellishment!
ReplyDeleteAnd good work on the new draft.
Wow great job, i love making my own undies too! we should swap patterns and pics.You are so game modeling them too! WOW!
ReplyDelete