


Pattern: Closet Case Files's Ginger Jeans
Fabric: stretch denim
Cost: $12

Ever since I vowed to stop worrying about all the sewing that needs to be done and focus instead on each project as I go, I've really been able to take my time with each garment that I make. This was certainly the case a few weekends ago, when I decided to perfect the fit of my Ginger Jeans. Mr. Made was out of town, we got a bit of rain, and I had the perfect opportunity to hole up inside and get to work! The time and concentration really paid off, as I made a few adjustments and got my best pair yet.
The first thing I did was sit down with the sizing guide, a tape measure, and my past versions of the Ginger Jeans to take some proper measurements. Oh boy! You know you're pear shaped when you measure size 8 in the hips, size 6 at the waistband, size 4 at the waist, and size 2 at the bust, all in the same size chart! While I can usually get away with just measuring my hips for a pattern, on a design this fitted I'm learning I have to be precise. My last few pairs had left me with some gaping at the waistband that desperately needed fixing, so I was determined to get my measurements right.
Fitting the Ginger Jeans required some calculations and also a little guesswork and luck. To fit the pattern, you are supposed to know your hip and waist measurement, but you also need to figure out what size waistband you need, which falls somewhere between the hip and waist. I used my previous pairs of Ginger Jeans to calculate what finished measurements I needed, as well as some additional information provided on the pattern envelop about how far below your belly button the waistband is supposed to sit. It was also crucial to remember to calculate in some negative ease, as the wearing ease I left in my last pair meant the pants were too loose!
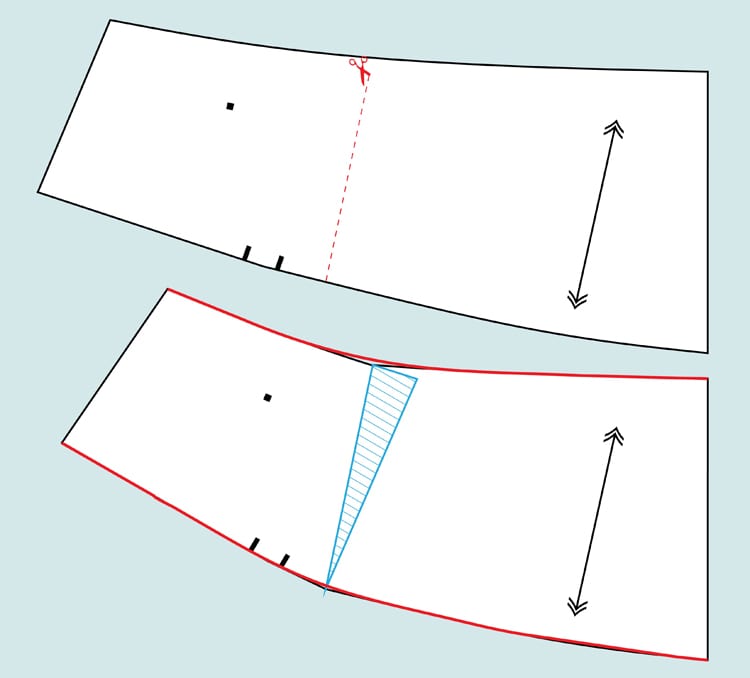
To get the best fit, I decided to trace the high-waisted version of the pattern and grade between sizes. First, I traced a size 8 from the legs up through the hips. Then I graded down to a size 6. In the front this is accomplished by simply tracing down to the next size. In the back, however, the yoke requires some more advanced modifications. To accomplish this, I traced a size 8 yoke and then used Heather's method to curve the yoke so that the bottom (near the hips) is a size 8 but the top (near the waistband) is a smaller size 6. I then did the same with the waistband, cutting a size 6 and curving the top down to a size 4. Luckily this wasn't a onesie so I didn't have to compensate for my size 2 bust! Finally, I mirrored these changes on the pocket pieces, as they have to have the same side seam curve as the pants.
Needless to say, it took all of Friday evening just to measure, trace, and cut out my fabric. On Saturday I slept in, took the dog for a run, and then set about on the construction. By mid afternoon I had completed the front of the pants - pocket construction and front zip fly - and was planning on running out for some groceries but it started raining again, so I cancelled my plans, ate some lunch and got back to work. As opposed to my previous sewing marathons, I was glad to take a few mini breaks to keep me sane!

An hour later, I had attached the back yokes, basted the pants together, stay-stitched along the top, and was trying them on. They were not too tight! In fact, they fit great along the waist, curving in to my body along the back and not too snug along the tummy. The only adjustment I needed was in the section from the hips to the knees, where I was able to pinch about an inch out of the outer leg seam. I realized here that, while I needed the full size 8 at the hips, below that I actually needed to size back down. By shaving half an inch off the front and back sides, I essentially graded back down to a size 2-4 through the knee.
Rather than tracing my adjustments onto the fabric as I usually (lazily) do, I went back and traced these changes onto my pattern pieces, and then used the pattern pieces to make modifications to the fabric. I find that this allows me to grade more smoothly between sizes, and keep things more consistent. However, I must also remember to check and make sure the edges of the front and back are the same length!
By dinner time on Saturday I had sewn up the sides, done the waistband and the hem, and was attaching the back pockets. This pair is made with medium-weight stretch denim, which I like better than my last pair of lighter-weight jeans. I used triple stitching throughout to make the pants more durable, and the topstitching is done in black thread.
The one thing I would fix on the next version is the extra room at the front crotch. I didn't have this issue with the low-waisted version, so I'll have to play around with it. Looking at the back pictures now, I'm also wondering if there is a wedge that could be taken out of the center back crotch, but I'm also conscious of the need to bend over and move around, and so some ease is necessary.
Unfortunately by the end of the evening no one had cooked dinner, but I had finished my best pair of pants yet! Now to decide whether or not to try to sew a second pair this weekend... (see Part II on Friday!)

Fabric: stretch denim
Cost: $12
Ever since I vowed to stop worrying about all the sewing that needs to be done and focus instead on each project as I go, I've really been able to take my time with each garment that I make. This was certainly the case a few weekends ago, when I decided to perfect the fit of my Ginger Jeans. Mr. Made was out of town, we got a bit of rain, and I had the perfect opportunity to hole up inside and get to work! The time and concentration really paid off, as I made a few adjustments and got my best pair yet.
The first thing I did was sit down with the sizing guide, a tape measure, and my past versions of the Ginger Jeans to take some proper measurements. Oh boy! You know you're pear shaped when you measure size 8 in the hips, size 6 at the waistband, size 4 at the waist, and size 2 at the bust, all in the same size chart! While I can usually get away with just measuring my hips for a pattern, on a design this fitted I'm learning I have to be precise. My last few pairs had left me with some gaping at the waistband that desperately needed fixing, so I was determined to get my measurements right.
Fitting the Ginger Jeans required some calculations and also a little guesswork and luck. To fit the pattern, you are supposed to know your hip and waist measurement, but you also need to figure out what size waistband you need, which falls somewhere between the hip and waist. I used my previous pairs of Ginger Jeans to calculate what finished measurements I needed, as well as some additional information provided on the pattern envelop about how far below your belly button the waistband is supposed to sit. It was also crucial to remember to calculate in some negative ease, as the wearing ease I left in my last pair meant the pants were too loose!
To get the best fit, I decided to trace the high-waisted version of the pattern and grade between sizes. First, I traced a size 8 from the legs up through the hips. Then I graded down to a size 6. In the front this is accomplished by simply tracing down to the next size. In the back, however, the yoke requires some more advanced modifications. To accomplish this, I traced a size 8 yoke and then used Heather's method to curve the yoke so that the bottom (near the hips) is a size 8 but the top (near the waistband) is a smaller size 6. I then did the same with the waistband, cutting a size 6 and curving the top down to a size 4. Luckily this wasn't a onesie so I didn't have to compensate for my size 2 bust! Finally, I mirrored these changes on the pocket pieces, as they have to have the same side seam curve as the pants.
Needless to say, it took all of Friday evening just to measure, trace, and cut out my fabric. On Saturday I slept in, took the dog for a run, and then set about on the construction. By mid afternoon I had completed the front of the pants - pocket construction and front zip fly - and was planning on running out for some groceries but it started raining again, so I cancelled my plans, ate some lunch and got back to work. As opposed to my previous sewing marathons, I was glad to take a few mini breaks to keep me sane!
An hour later, I had attached the back yokes, basted the pants together, stay-stitched along the top, and was trying them on. They were not too tight! In fact, they fit great along the waist, curving in to my body along the back and not too snug along the tummy. The only adjustment I needed was in the section from the hips to the knees, where I was able to pinch about an inch out of the outer leg seam. I realized here that, while I needed the full size 8 at the hips, below that I actually needed to size back down. By shaving half an inch off the front and back sides, I essentially graded back down to a size 2-4 through the knee.
Rather than tracing my adjustments onto the fabric as I usually (lazily) do, I went back and traced these changes onto my pattern pieces, and then used the pattern pieces to make modifications to the fabric. I find that this allows me to grade more smoothly between sizes, and keep things more consistent. However, I must also remember to check and make sure the edges of the front and back are the same length!
By dinner time on Saturday I had sewn up the sides, done the waistband and the hem, and was attaching the back pockets. This pair is made with medium-weight stretch denim, which I like better than my last pair of lighter-weight jeans. I used triple stitching throughout to make the pants more durable, and the topstitching is done in black thread.
The one thing I would fix on the next version is the extra room at the front crotch. I didn't have this issue with the low-waisted version, so I'll have to play around with it. Looking at the back pictures now, I'm also wondering if there is a wedge that could be taken out of the center back crotch, but I'm also conscious of the need to bend over and move around, and so some ease is necessary.
Unfortunately by the end of the evening no one had cooked dinner, but I had finished my best pair of pants yet! Now to decide whether or not to try to sew a second pair this weekend... (see Part II on Friday!)


Because the rise is higher, on some bods that crotch may be too long even though the crotch curve is the same for both. I'd take a little bit out here like ya said. Also, your bum looks GREAT but I think the yoke is too long on you. If you make em again, trim the yoke about 1/2" and transfer that to the top of back leg. You may also want to take out a small wedge at CB since it seems like you have a little excess there unless it's just in that photo only.
ReplyDeleteOh good, I think you're going to like Ginger Part 2 because that's exactly what I did! I ended up taking some height off because it "felt" better, but looking at the pictures I can now see that there is some visible excess too. Thanks for the help!
DeleteThe back crotch length looks pretty good (did you end up changing that?) but I agree with Heather - you could take a bit more from the center back yoke. I'm finding it a bit tricky to alter to fit my pear shape - the last pair I made (shorts) were TOO tight in the waist!
ReplyDeleteThese look pretty damned good though, I look forward to seeing part two
Wow sounds like you took your time and got a great fit! I agree with the girls above on the yoke, but other than that I think the fit looks great! That denim looks really awesome too!
ReplyDeleteLove that you had a weekend of tea and Ginger jeans. That sounds like the PERFECT weekend! Can't wait to see your next pair :) x
ReplyDeleteHow fun! I can't imagine sewing a pair of jeans that fast because I'm seriously a turtle, but these look great and I bet your next pair will be awesome with your fitting changes!
ReplyDeleteIf it makes you feel any better it pretty much took me all. day. In tomorrow's post I actually timed myself which is interesting - who knew it takes a whole hour and a half just to sew up the leg seams?!
Delete