Best of Handmade Swimsuits

Bathing suits are one of the few items of handmade clothing that I find are actually cheaper than most store-bought versions. However, despite being two small pieces of cloth, they are trickier to get right than I thought. For the first several years I made suits, most of them were duds. Some didn't feel substantial enough, some too tight, some too loose. But after more than a decade, a have not only improved my technique but also found a few favorite patterns. As the originals had worn out, I thought it was time to reprise my favorites for our recent trip to Hawaii. 

Fabric: swimwear fabrics from Blue Moon Fabrics 
Cost: $75 for all three suits


Pattern: BurdaStyle Bandeau Top 05/2014

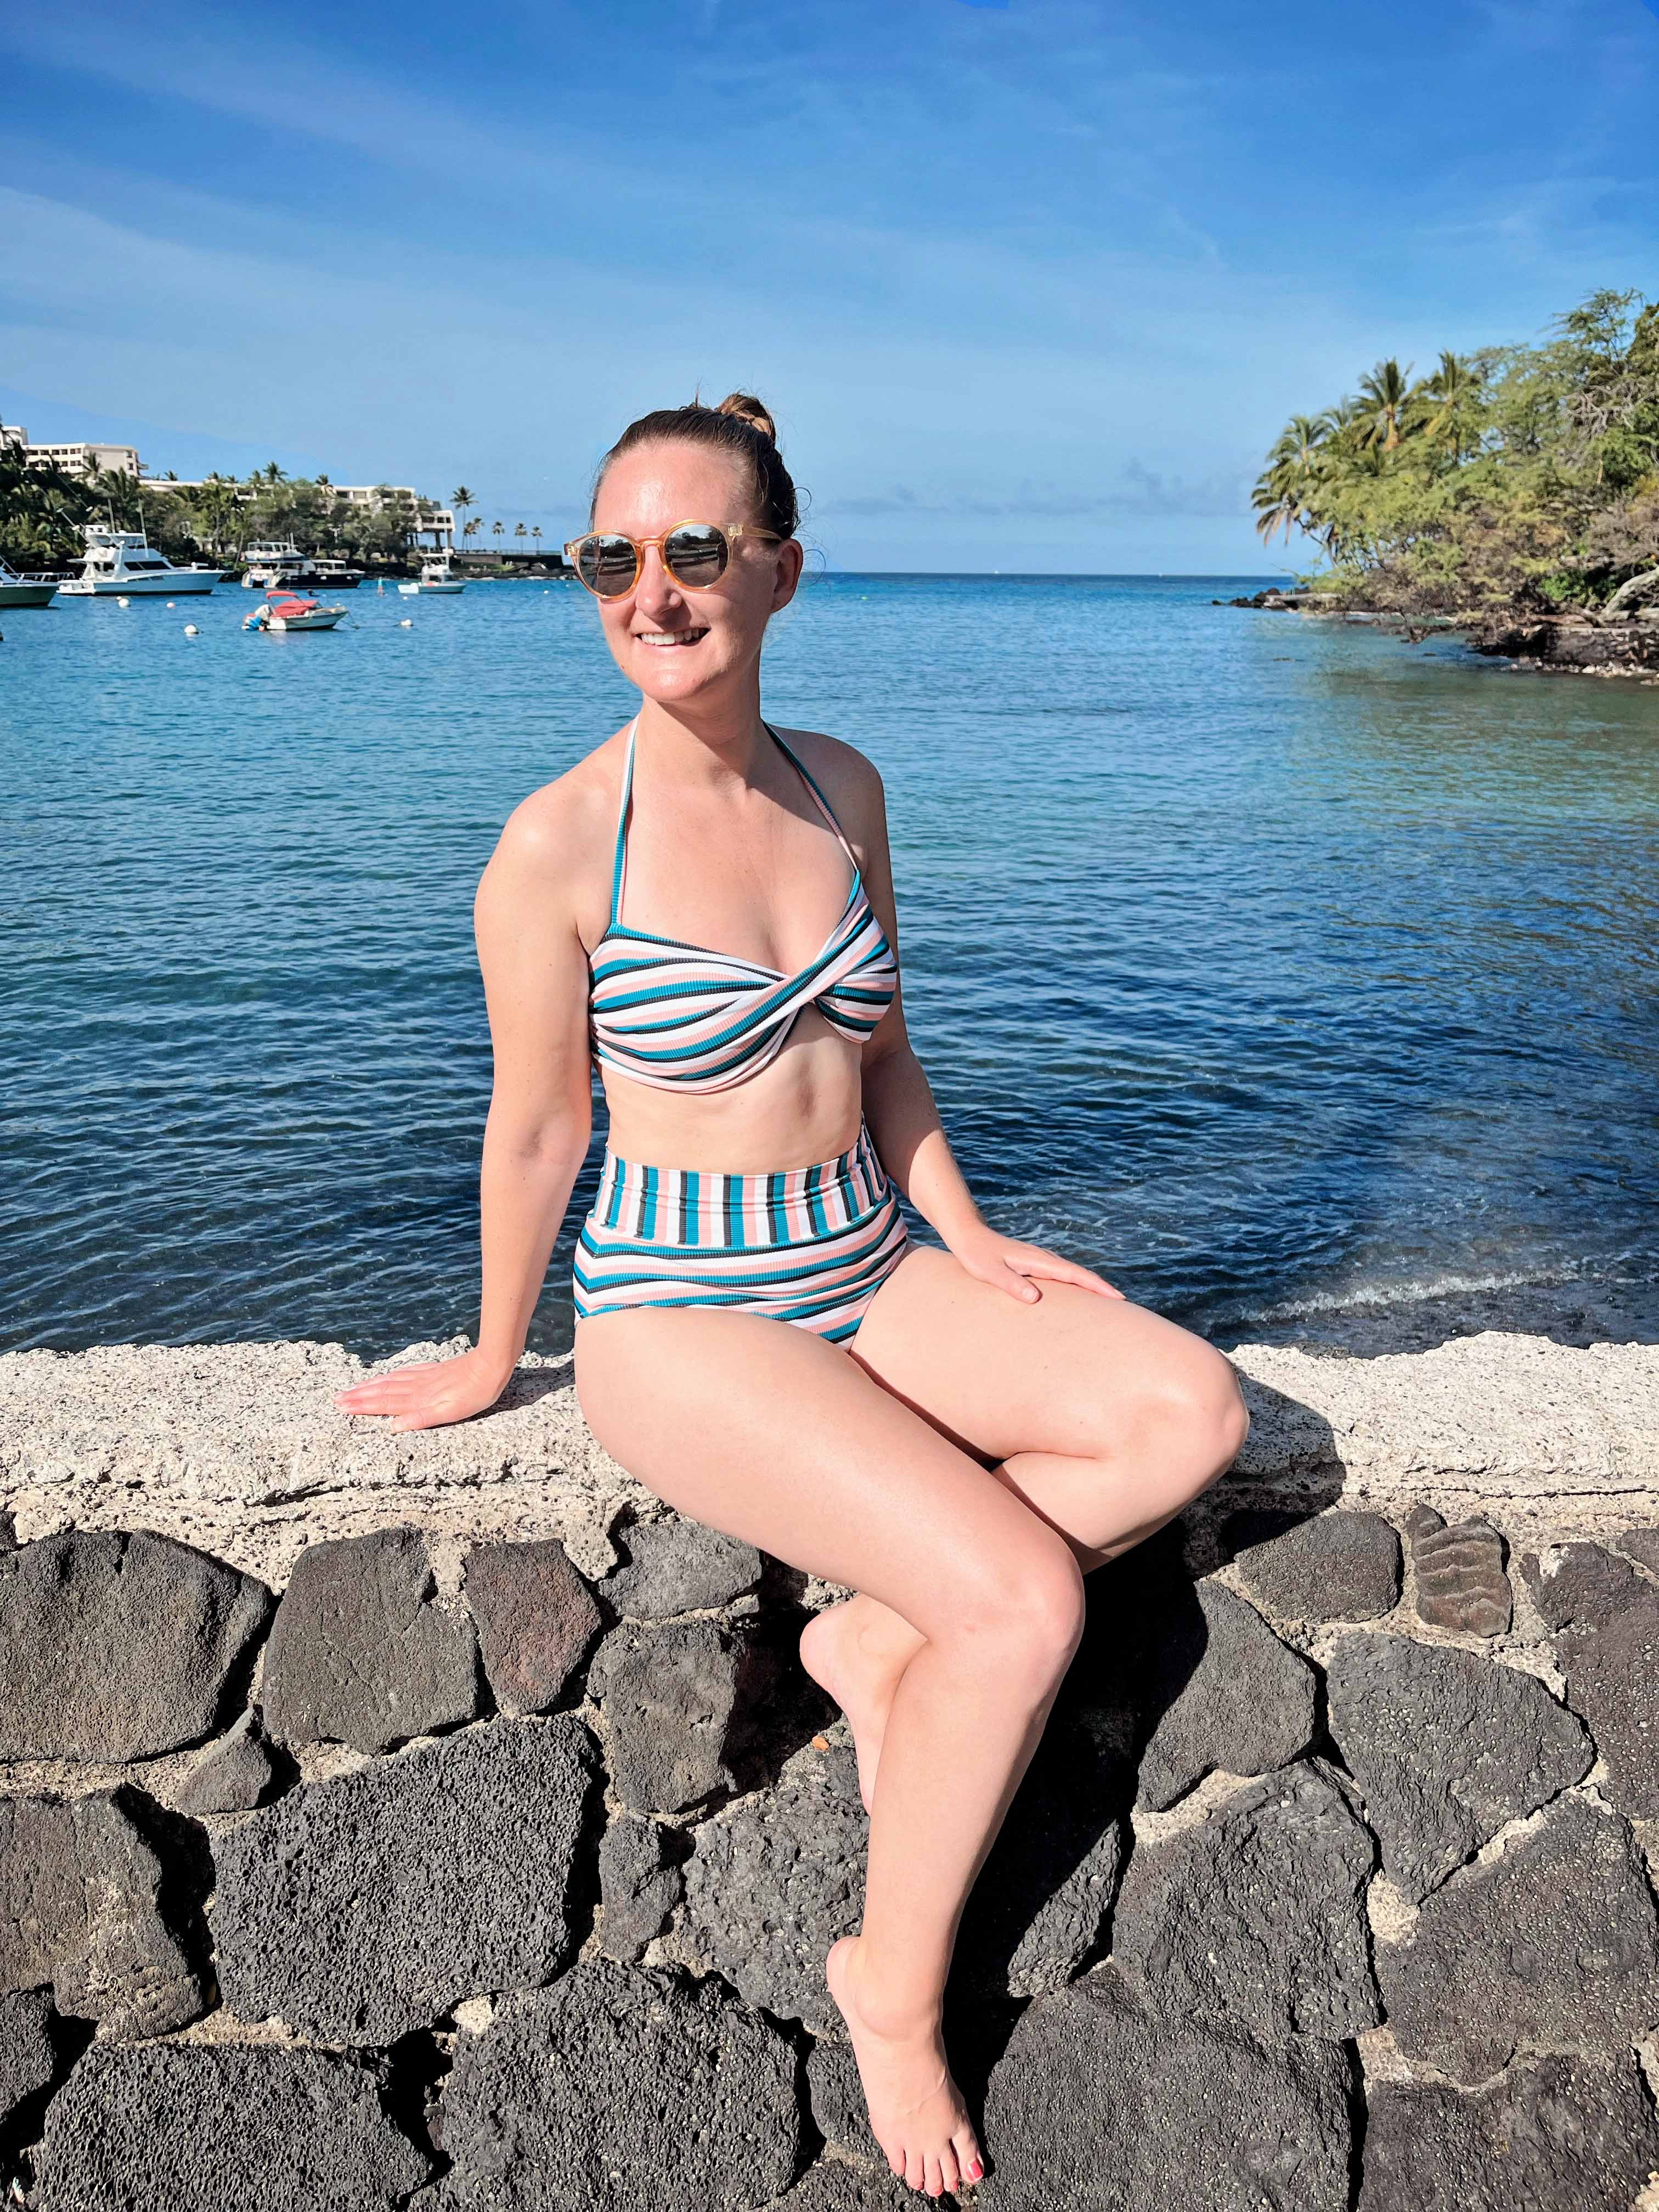
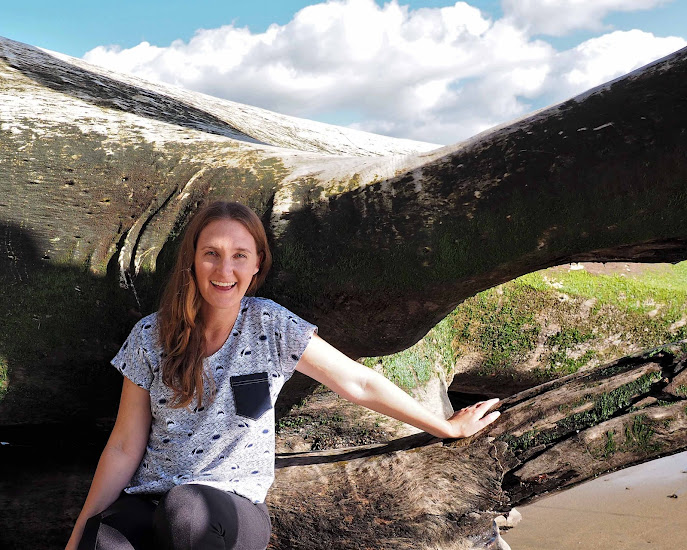
This was one of my first successful swim tops, after about five years of sewing them. While the pattern directions are sparse and typical of Burda, I had less trouble with them time around. As with last time, I added swim cups which give a really nice shape. I believe the original has normal straps, while this has a halter. It's not designed for lots of surf and waves, but feels fairly secure (as worn in the kayak, below). 

The bottoms are another TNT pattern - a simple front and back with a high cut. This time I also added a waistband. I also drafted a low-waist one with leftover fabric (not pictured), though those didn't feel very secure so might not work out. 

The next one I first made in 2016. 
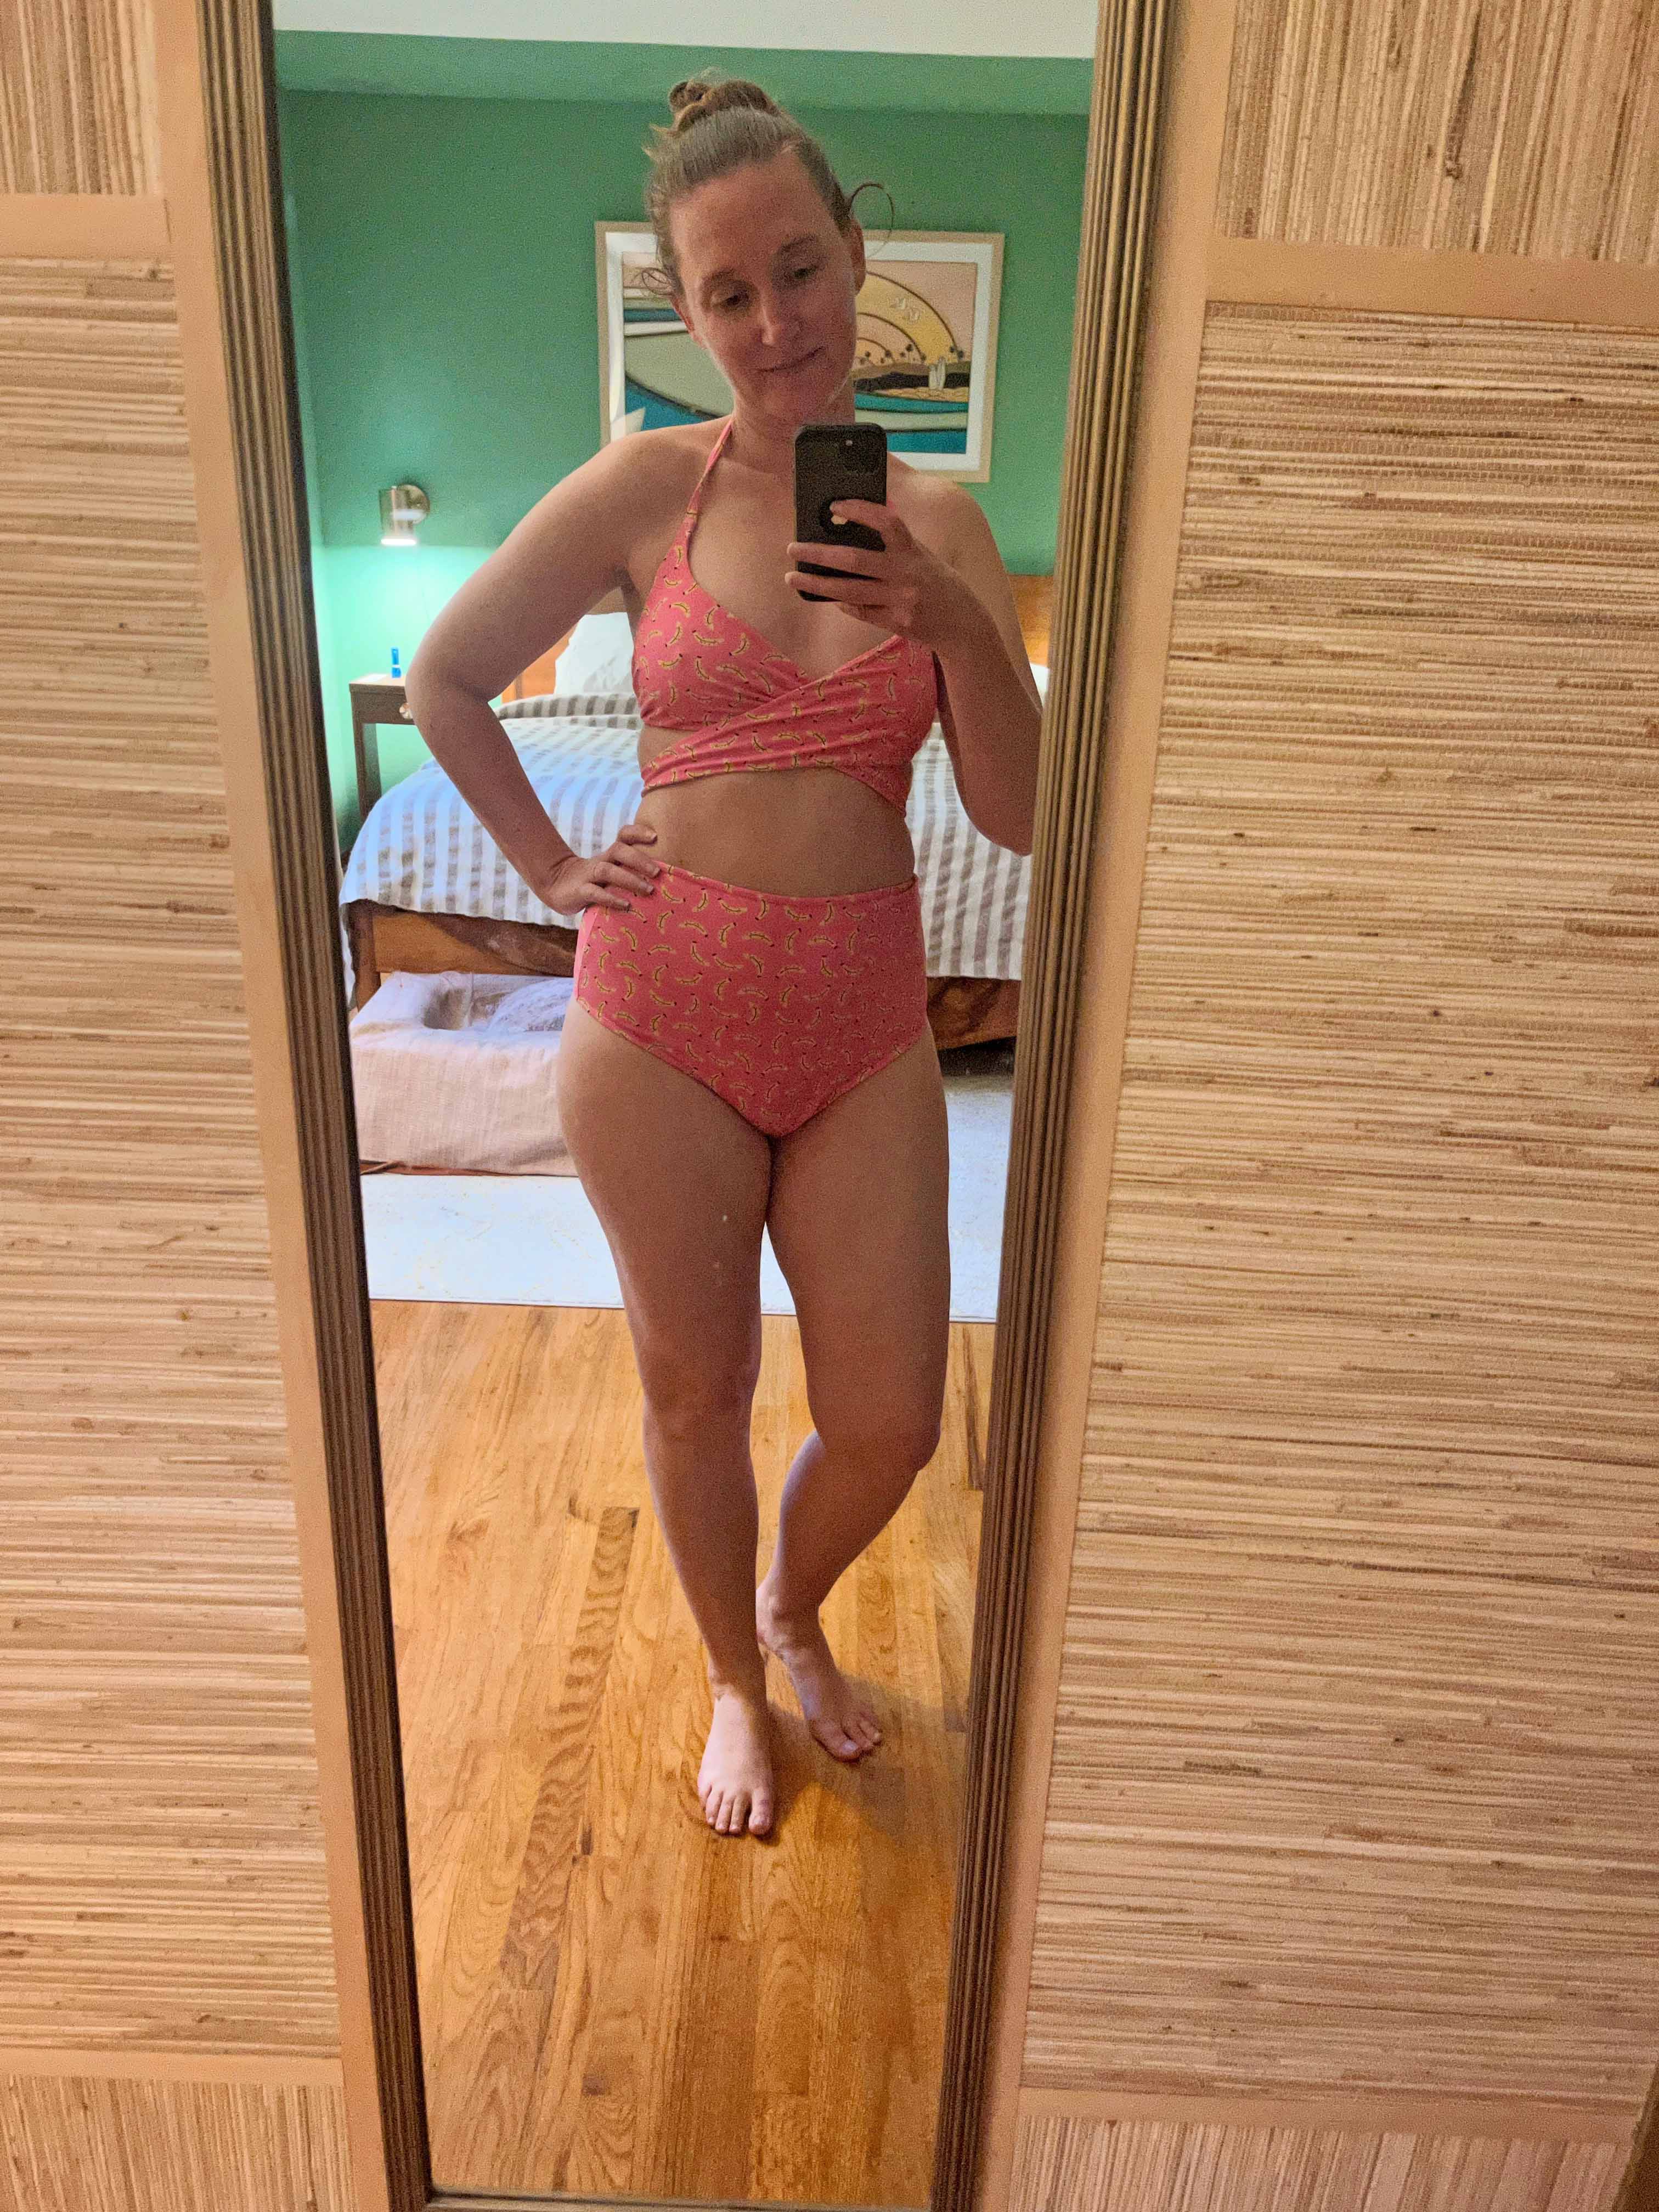
Pattern: Madalynne Sierra Bra (a free pattern!)

This one comes together fairly quickly, with a few modifications including completely lining it. Last time I made it I drafted the halter strap as one piece with the top. This time I did not (in order to make it easier to line), but didn't have the cleanest results. Regardless, this is an easy style for me to wear and gives a good shape. 

Same bottoms as before. I had originally tried the Edgewater Ave Oakley Bottoms, but realllly don't like high cut legs on me. As with the other, this also had a low-cut version with the leftover fabric (not pictured) that worked out fairly well. 


Finally, I tried one new-to-me pattern that I really liked. 
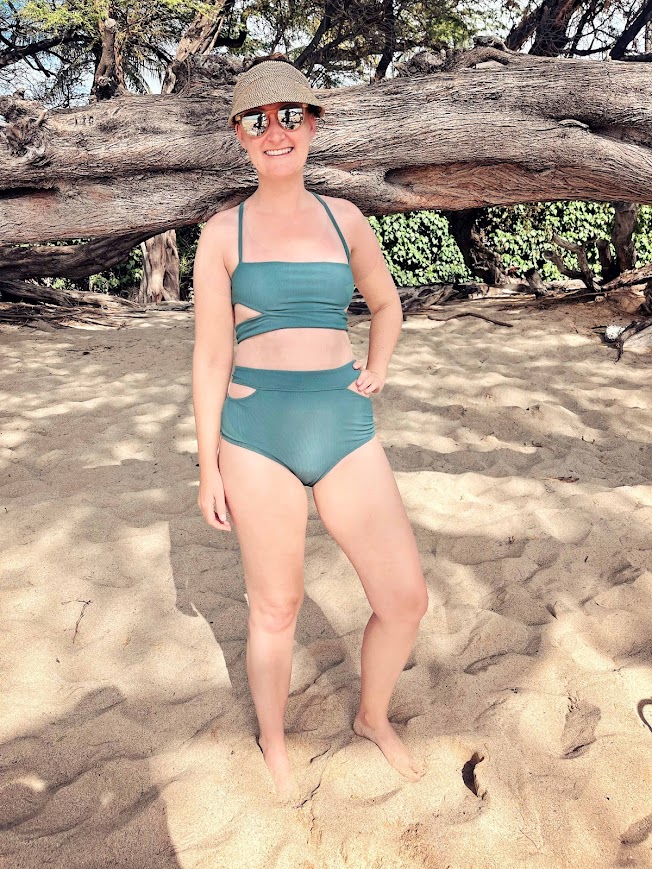

Pattern: Luciolons Cassis swimsuit (maillot de bain Cassis)

Someone on Reddit described this suit as their dream pattern and I have to agree! I love that it is covered up but still shows a bit of skin. It's got something very French about it. I actually worried that the top would provide too little coverage with the low cut and the cut-outs under the boobs. I do not recommend if you are more endowed. That said, I really enjoyed it and it worked out well on me. I takes a little fiddling with the straps when I put it on but then stays in place. 

As I looked up bathing suit bottoms online, one thing I had trouble with was getting a good idea of how cheeky the backs were cut. Several patterns out there have multiple options cuts, but often don't identify in the photos which is which. The same goes for people's posts on Instagram. And many don't post pics of the backs at all which is... understandable. So here's my contribution to the internet: this is the cheekier of the two options. 


I'm back home from the delightful warm weather now, but it's finally starting to heat up at home. I'm fully restocked ready for summer!

Handmade 1980s Ski Suit!
I was looking for my next big project and planning my next trip and thought - if I can make a bathing suit, jeans, and a wedding dress, why can’t I make my own snow clothes? This one took a lot of research and was a bit intimidating to start, but ultimately is not much more complicated than making a lined jumpsuit.


Patterns: 
  • Ski Suit: DaisyKingdom mash up of Ladies’ Alpine Suit 75, Ladies’ Zippered Overpant 72, and Men’s Exhibition Suit 98
  • Mittens: Jalie Mimi Mittens
  • Fanny Pack: Proper Fit Clothing DIY Fanny Pack
  • Balaclava: Katrin Schubert Matching Balaclava
Fabric: 2-ply waterproof breathable fabric from Peak Fabrics with a Radiantex insulation and ripstop lining
Cost: ~300 for jump suit, mittens, fanny pack, and balaclava

My tips for making a snow/ski suit: :
  • Get the right fabric: I bought 2-ply waterproof breathable fabric from #peakfabrics with a radiantex insulation - store owner Agnes was a big help! Also check out Discovery Fabrics and Seattle Fabrics
  • Don’t forget notions: I used waterproof seam sealing tape, 10 zippers, a buckle, yarn… Matching notions from Harts Fabric and yarn from Yarn Shop Santa Cruz.
  • It’s all in the details: Things like zippers at the leg opening, pit zips, pockets, ski pass holder, and a fanny pack for my water bottle made this really functional
  • Test the fit: I made two muslins and sewed my lining first to triple check the fit and movement
  • It’s not cheap: All told, I spent just about $300 for a suit, mittens, balaclava, and fanny pack. But that’s less than a @tipsyelves suit + hours of entertainment (aka sewing time) for me
  • Have fun! 


Pattern notes:
  • Ski Suit: As I drafted/hacked this myself from a combination of patterns and made two muslins, the fit was pretty great. I worried about mobility on the slopes, but really had no issues. I was careful to make it a little looser to account for the insulation, but it really didn't need to be too bulky. My one wish is that I had made the sleeves a bit longer to account for mending the elbow. But it's really not any different than drafting a jumpsuit. 
  • Mittens: Jalie always has well-made patterns with excellent instructions. This one even came with a video! I wish I had given a bit more reinforcement at the thumb joint, but otherwise these came together really nicely. 
  • Fanny pack: Unlike Jalie, with this pattern I took a chance on a new-to-me designer and was a bit disappointed. This pattern came ONLY with video instructions, which I found really obnoxious. I also did not like the technique for the lining. While it is supposedly fully lined, in reality it was actually interlined, meaning in most places the lining was sewn together with the outer fabric and the raw edges were finished with bias tape. I made a few modifications (once I understand the pattern by watching the video 100x) and was able to easily fully line without needing bias finishes. The pattern was only $2.99, so I guess I got what I paid for. On the plus side, it was a nice big size for my water bottle. 
  • Balaclava: It was fun to add in a knitted piece to this outfit. I didn't realize the pattern was brioche when I originally bought it, which is a new technique for me despite knitting for many, many years. And you know what? Now I'm hooked on it! I am currently starting my third brioche project since finishing it. Overall the pattern was solid, though I did make a mistake and used a wool blend that isn't as water-resistant as a 100% wool yarn. 
Final notes:
The skiing conditions were perfect. It was relatively warm (40F), and I was able to unzip the pit zips and the front zip and feel great. We took it easy the first two days and I really loved getting back on the slopes after not doing much skiing. Unfortunately, at the end of the third day I fell on some baby moguls in the Ditch of Doom and recently learned that I completely tore my ACL. I guess I sew better than I ski! Luckily I am healing up nicely without surgery and hope to wear this out again next season. 

Fairyland Dress

I love dressing to a theme, and so when our friends invited us (and Beatrix!) to their wedding at Fairyland in our old neighborhood I couldn't resist making an over-the-top dress for the occasion. 


Pattern: Simplicity Misses Cocktail Dresses #4070 bodice with a self-drafted double circle skirt
Fabric: 6 yds each of satin twill and organza
Cost: $75

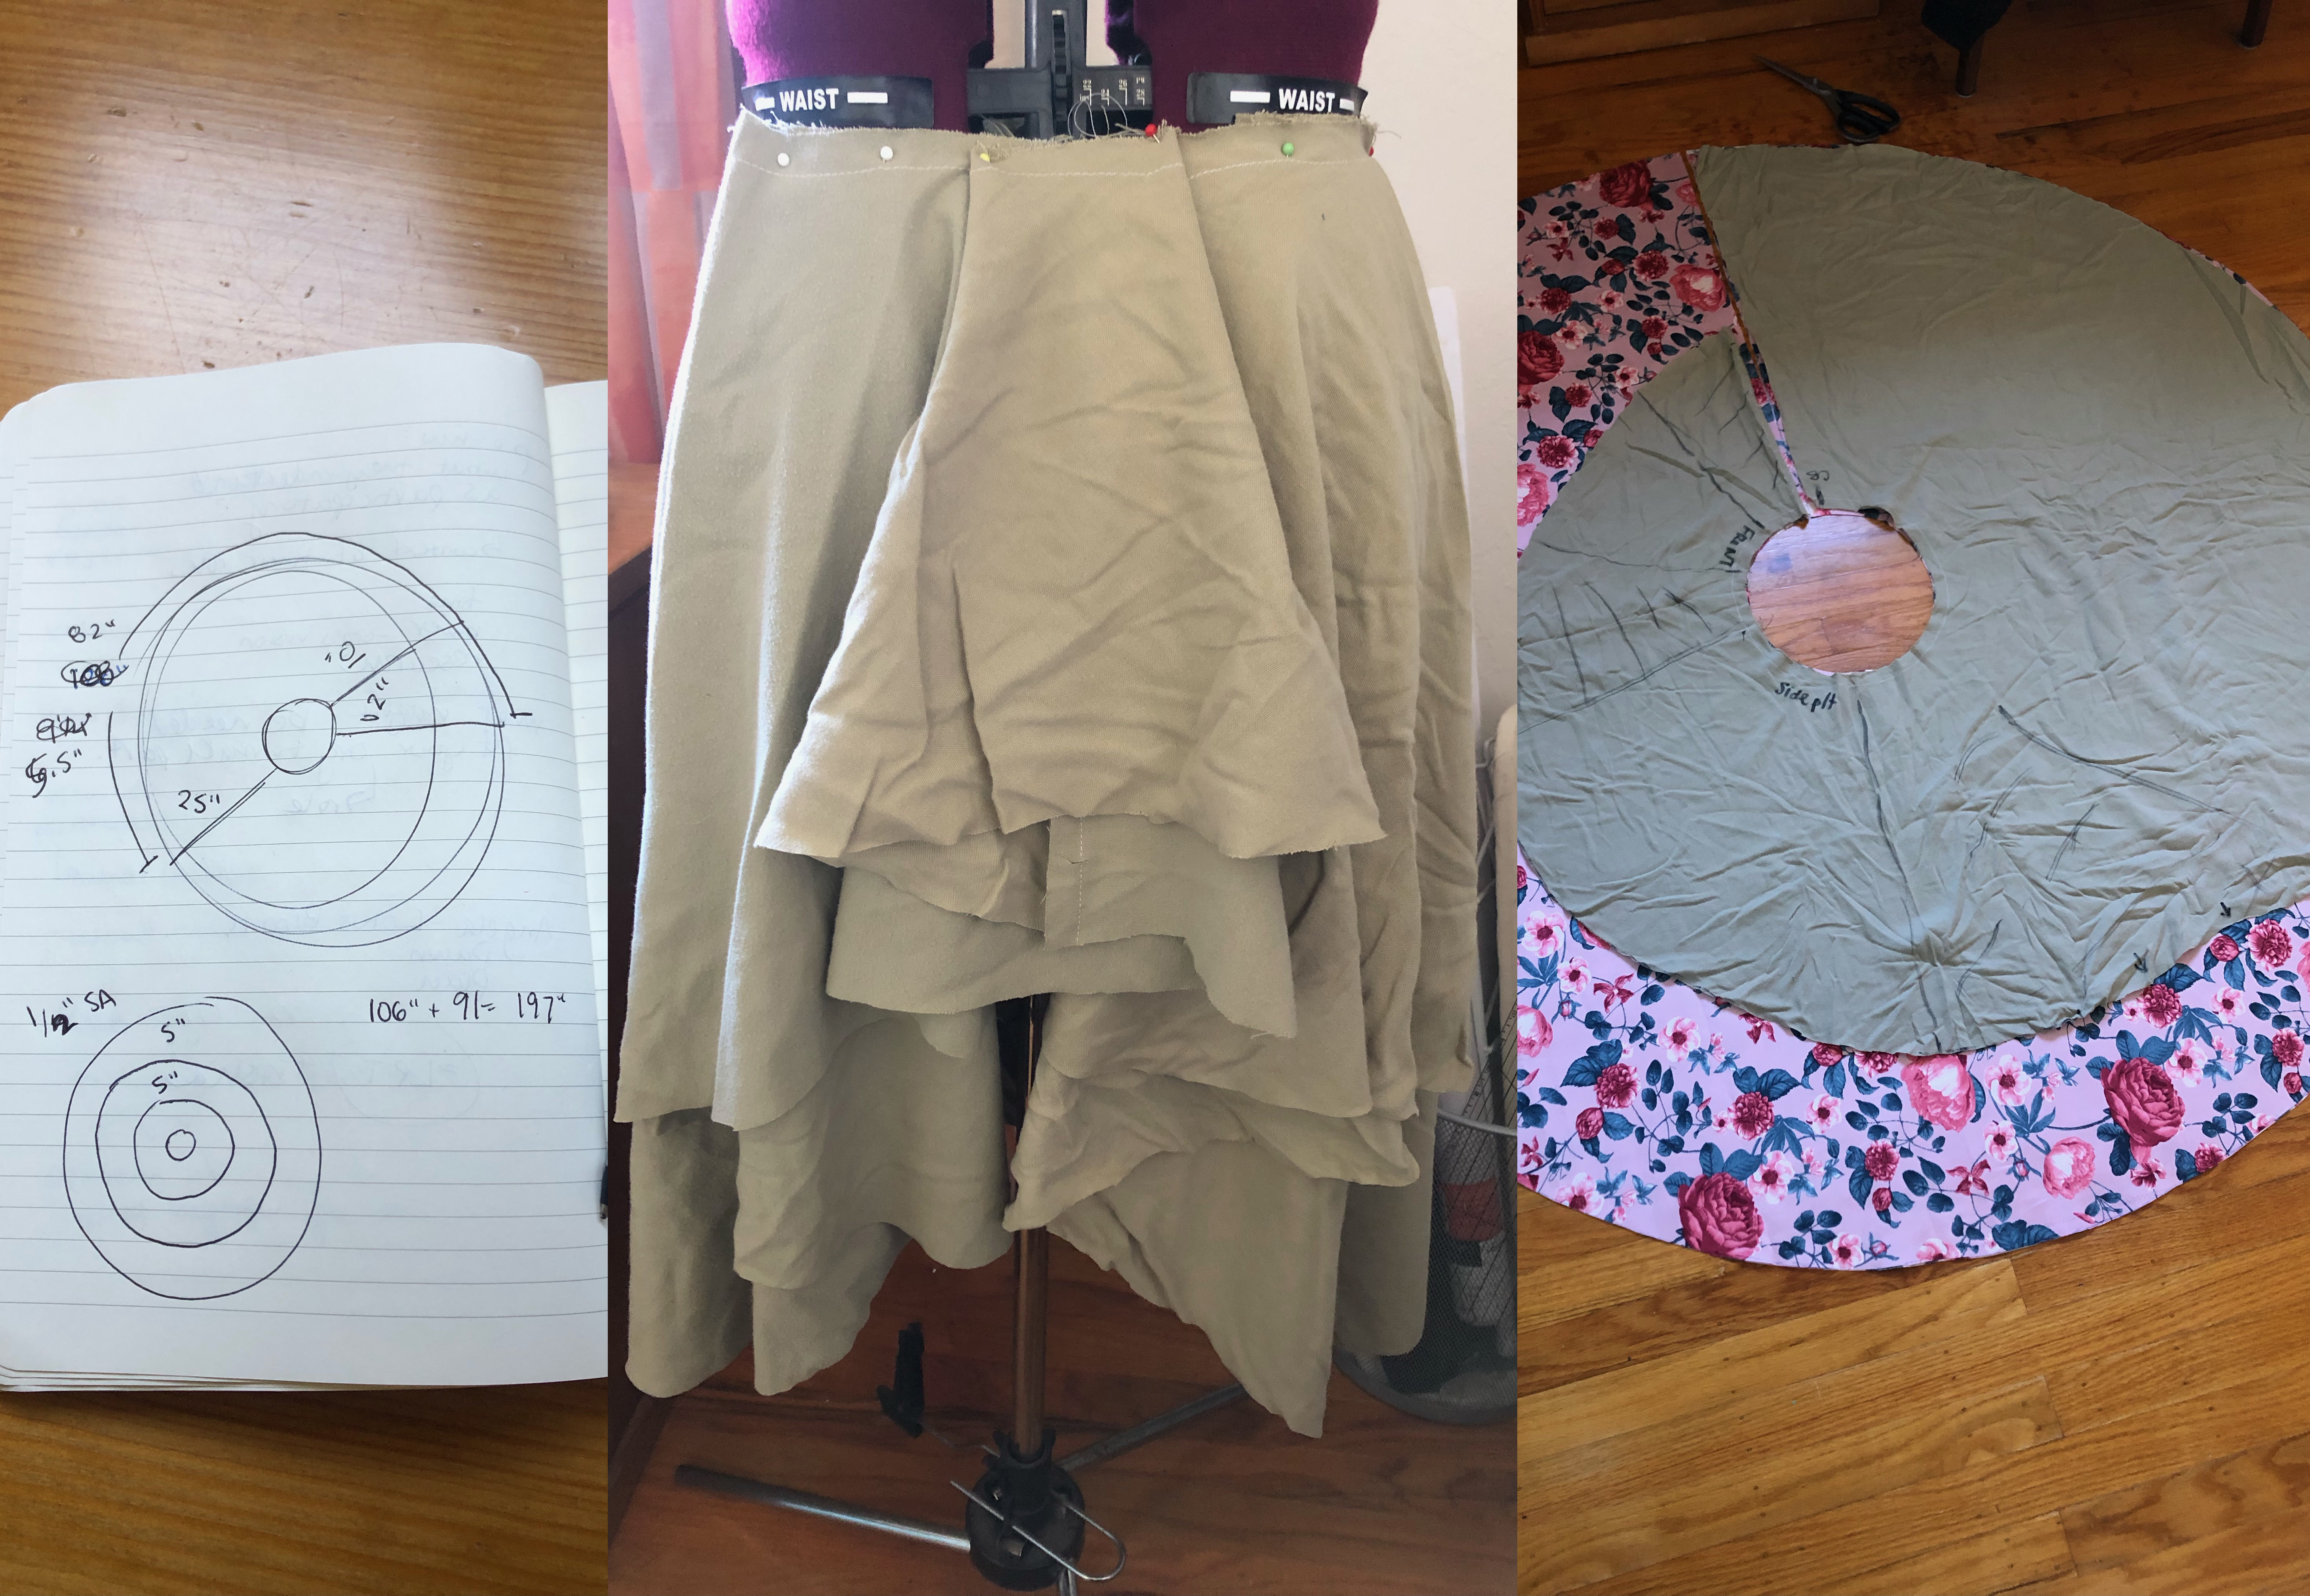
My dress was inspired by this elaborate creation from Krikor Jabotian's 2016 collection. I love the challenge of trying to recreate a couture piece from an image and spent a lot of time on the research for elaborate pleats like this and this. I eventually decided on a double circle skirt (two circle skirts sewn together) with tapering and pleating on the front half. I can't say exactly how it worked out because I adjusted the pleats right up until I sewed the final skirt onto the bodice (and a few times after) until I got something I liked. I did add one extra piece to the front for... modesty. 


I love how even in the back, without the pleating, the double circle drapes really nicely


To give the skirt added volume, I created a petticoat with two tiers of ruffles out of red organza to line the fabric. I think I cut and sewed nearly 100 feet of ruffles. As if that wasn't enough, it's hemmed with horsehair braid - a cheap one that caused me a bit of grief. After machine-sewing the horsehair to the hem, I turned it under and hand-sewed it for an invisible finish that took me all of one evening. I also hand-tacked the petticoat to the skirt at regular intervals. 


The bodice is my go-to Simplicity #4070 that I've been making dresses with for nearly a decade. I did a heart cut-out for the back which was fun to put together and not all that difficult once you get your head wrapped around it. 


I even sewed a little capelet from Vogue #9315, a top pattern that I thought had good potential to be used as outerwear. The wool and lining were leftover from my husband's coat, and very much needed on any California night. 


My one word of advice is, if you make a fancy new dress, don't let Beatrix in a tux steal the show. And get your man a matching bow tie, of course. 


A Sweater with Reckless Abandon

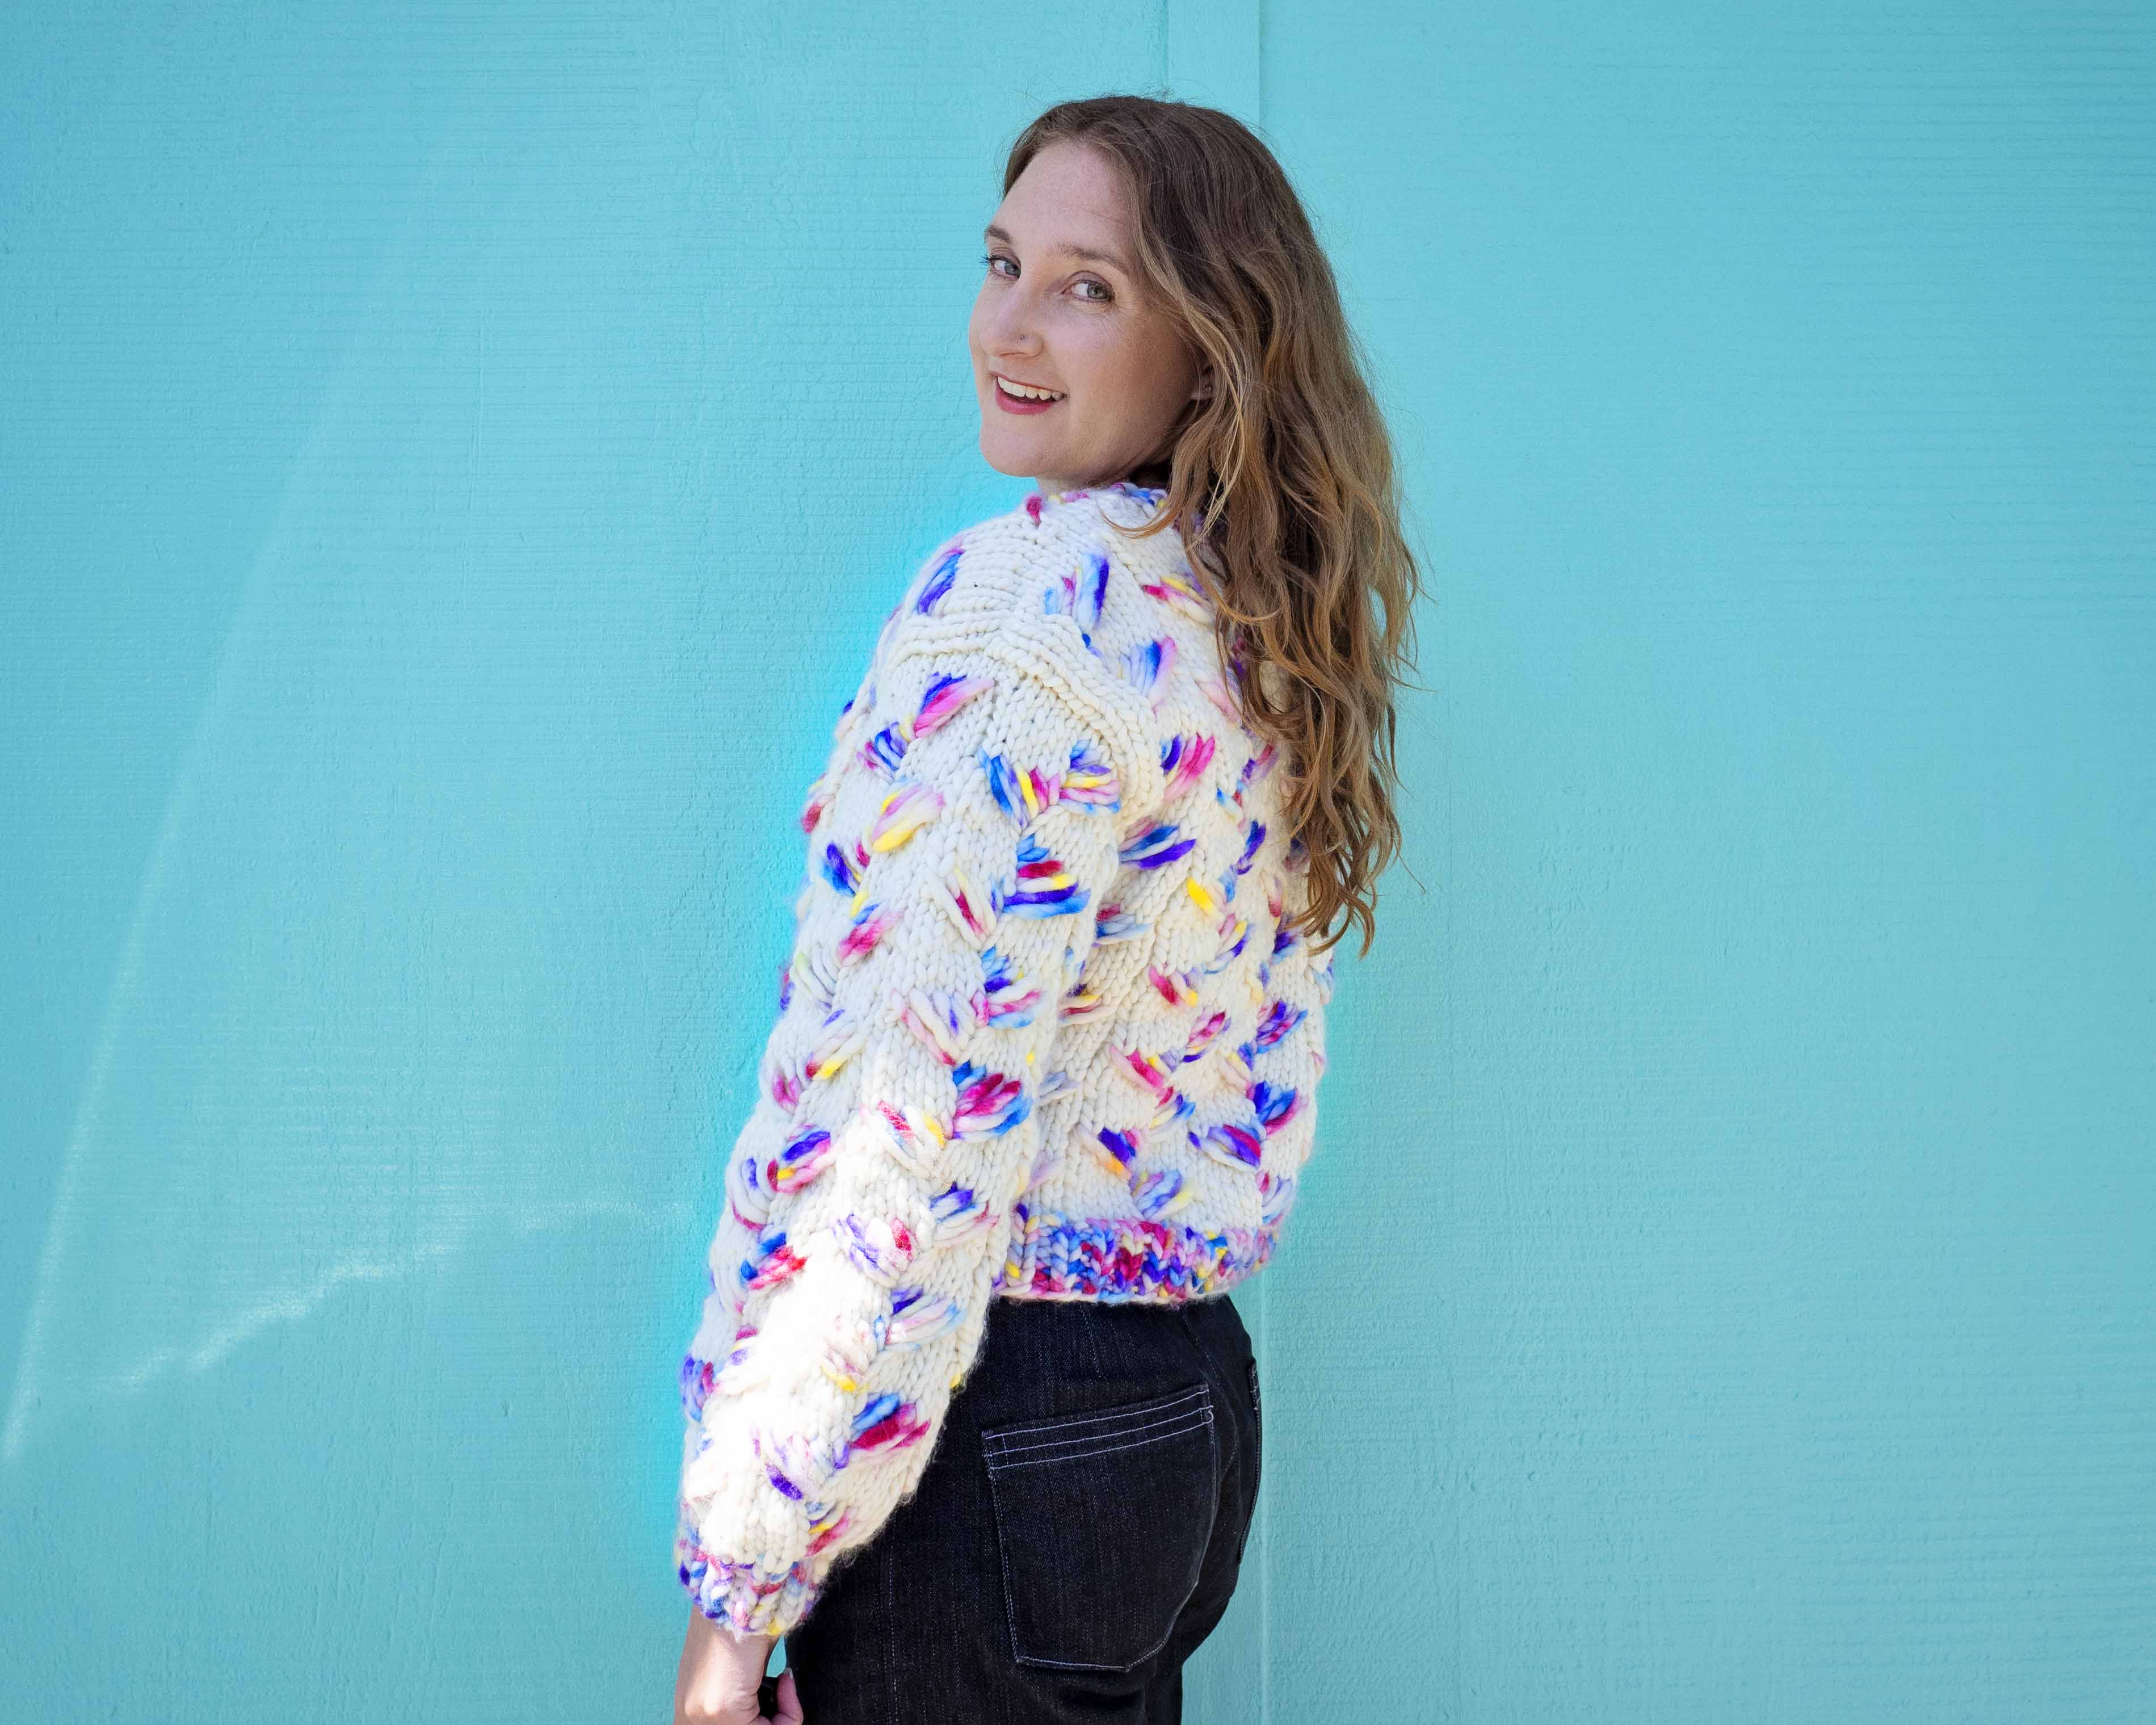
So there I was browsing through Instagram one day minding my own business when I saw the most wild, amazing knit I've ever laid eyes on. @verca_knits was making this joyous, rainbow-colored hat that was just too cool for words. The knitting was unlike anything I'd ever seen, with bursts of color against a pillowy-soft white yarn. It was nothing like I typically make, and yet suddenly I HAD to make one for myself. I was in love. 

Pattern: DaisyAndPeace Chunky Knitted Sweater No. 15 with this stitch pattern
Yarn: Malabrigo Rasta in Unicorn Bark (4 skeins) and Natural (7 skeins)
Cost: $250

After some internet research, I discovered that the pattern was the Tentacula hat from Jenny Noto. Being extra (and already owning too many knitted hats), I decided I needed this as a SWEATER. After more research, I settled on using Malabrigo's Rasta yarn in Unicorn Bark and Natural (I'll let you guess which color is which). Not only was this a big departure for me style-wise, as I typically don't wear these colors and especially not all at once, but I almost never knit with chunky knits. Undeterred, I soon found myself adding over $200 of bright yarns to my cart. *Gulp*

To adapt Jenny's Tentacula hat pattern, I first found a suitable pattern for a plain chunky knit sweater. You almost don't need a pattern as any two oversized rectangles with sleeves will do, but I still like a bit of guidance. I ended up using this pattern from Etsy. My yarn was a bit bigger than gauge so I ended up kitting the smallest size and reducing the number of stitches to 80%. I know, I know, if I'm going to buy a pattern specifically for a project I should at least get the right one, but I liked its simplicity, the slight puff of the sleeves, and it really was nearly the right size. 


Next was to figure out that stitch pattern. Jenny's pattern has a lot of good information, but I found it a bit difficult to follow. Luckily, she links to this great YouTube video from Knit with Me on how to do the stitch pattern. Even if you don't plan to make this I recommend giving it a watch because it really is a very ingenious stitch pattern. It is mostly worked in stockinette stitch, with loops pulled through with your needle or a crochet hook. She calls the stitch "draw a loop," which I'd never heard of before but has some really cool knitting applications, not the least of which is this stitch pattern. If you follow me on Instagram I'll put up some videos of how it looks to knit. 

From there the sweater knit up pretty quickly, minus some time to order more yarn (twice). The Malabrigo yarn is really very soft and lovely. The sweater is a bit of a beast, but not as stiff as I worried it would be. I think it will serve me well for outdoor dining or drinks, or perhaps an art walk? Anyway, I hope you enjoy this sweater as much as I do and it inspires you to step out of your comfort zone and try something wild. 


Handmade Kayak Paddle Jacket

Since moving to Santa Cruz, my favorite new toy by far has been the second-hand kayak we scored on Craigslist. It has more than paid for itself this past fall and, after a short break in December and January, I had it back on the water in February with my mom and Beatrix, and my dad alongside us in his rowboat. The otters of Elkhorn Slough have been phenomenal. 


Pattern: Jalie Maxime Jacket
Fabric: ripstop nylon and nylon rainwear
Cost: free - remnants

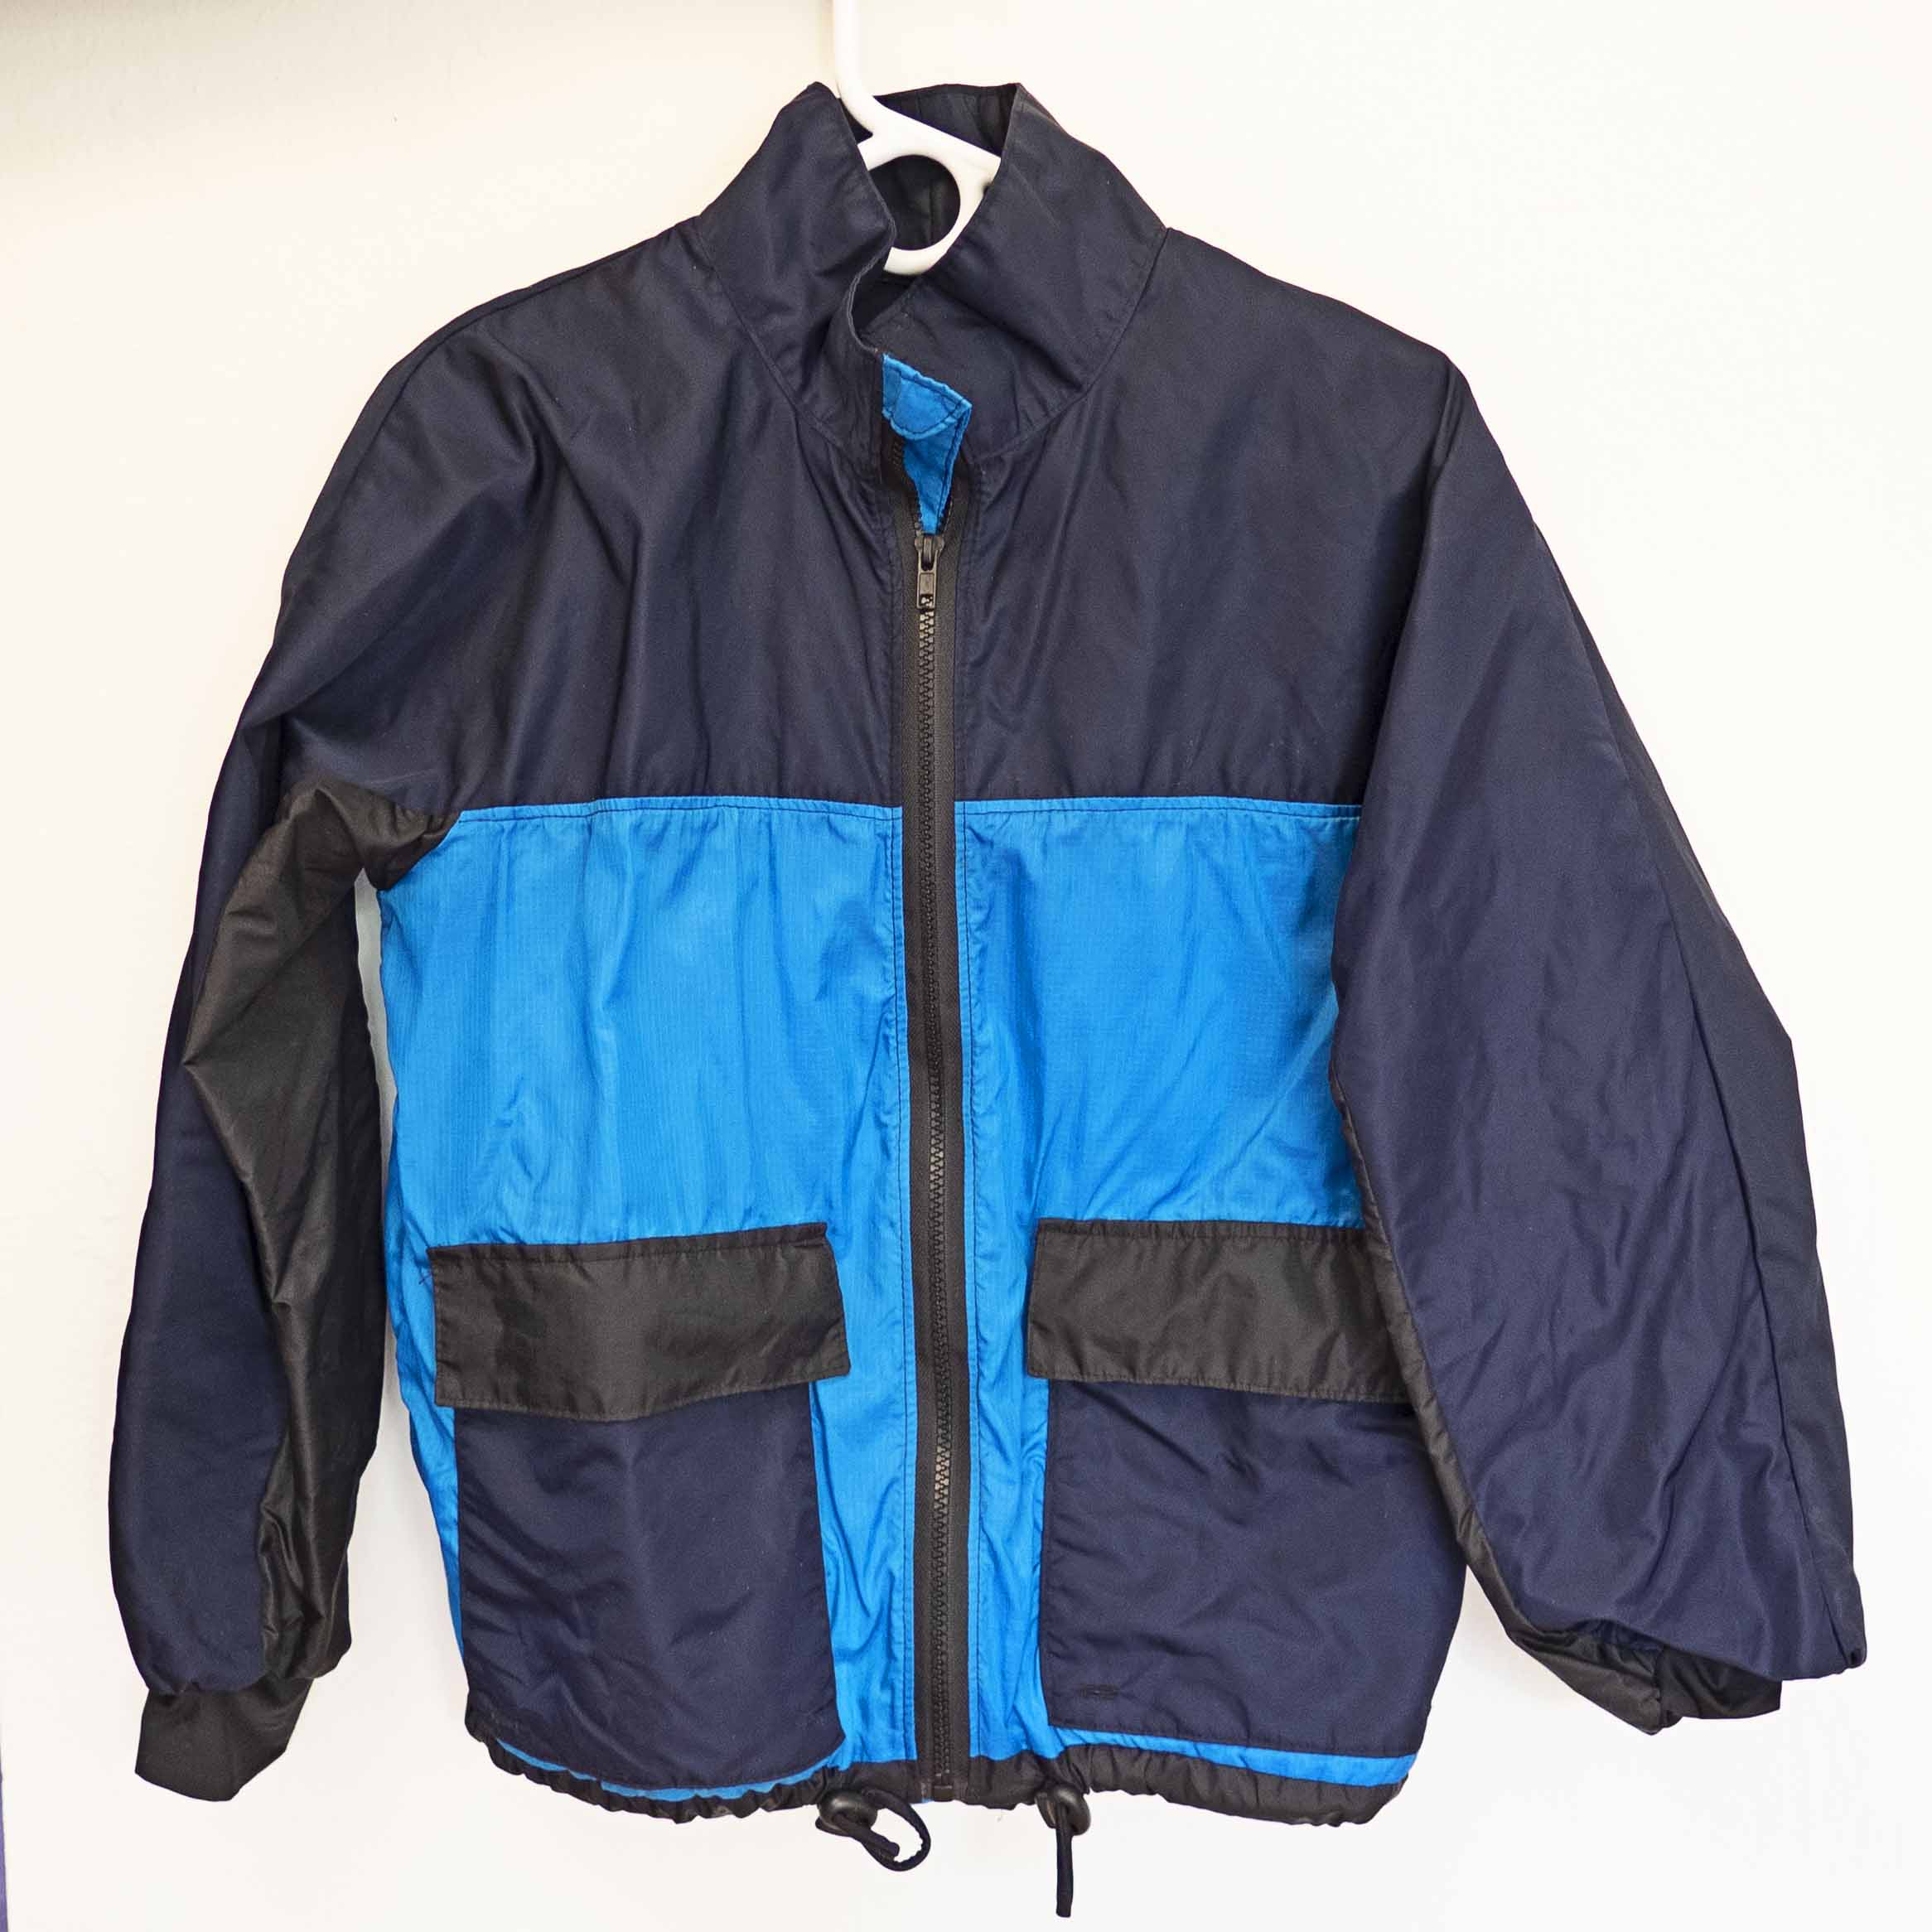
I wanted a new paddle jacket for the cooler months in spring, so I decided to see if I could make my own. After some research, I downloaded the Jalie Maxime Jacket. I liked that it was designed for athletics with things like a zipper shield, chin guard, and elastic cuffs and hems. I also wanted one with a front zip because temperatures can change quickly when you're paddling and I wanted to be able to cool off a little if I needed to. 


The jacket is made entirely with fabric from three different water-repellant scraps I had laying around. The sleeves and upper body are made from my most waterproof fabric, a water-repellent "aviator flight outdoor satin" (whatever that is?) that I used in my raincoat. I modified the Jalie pattern so that the jacket yoke and upper sleeve were cut in one piece, similar to McCall 6531. I also eliminated the pleat there. The body is made with light blue ripstop nylon, which isn't totally water-repellant but dries quickly. And there's even some black ripstop nylon filling in over the rest of the jacket. For the sleeve cuffs, I opted to use poly spandex (swimsuit fabric) to make a cuff that fits tightly to my wrist to help keep water out. Since they're stretchy, I can also push up the sleeves when it gets a little warmer. Finally, I used a stretchy cord rather than elastic at the hem of the jacket. 


Here we are out on the water and it worked well! It keeps me dry from splashes and also dries quickly in the sun. Not bad for a bunch of scraps from my cupboard! Since this is a water jacket, I sewed small buttonholes at the bottom of each pocket to drain water if needed. But mostly the jacket just gets some ocean spray. 


Aren't the otters just amazing? 


Spring Dress Mash-Up

After a few years of t-shirts and sweatpants, it felt good to break out the dress patterns again. It took me about a month to sew this one up, and I enjoyed taking my time to make something nice. 


Pattern: McCall's Meadow Dress M8105 with McCall's Dawn Dress M8104 
Fabric: 2+ yds rayon
Cost: free

This dress is a mash-up between M8104 and M8105, mostly because I got the two mixed up in my head and thought it was one pattern. Once I dug them out and realized my mistake, I couldn't help but try making my vision a reality. The dress is mostly M8105 with the cut-on sleeves and sleeve ruffles of M8104. 


McCall's M8105 is actually a pretty clever pattern. The base is a simple strappy dress, but there's a tie overlay that attaches to the neckline and wraps around the body, giving it a faux-wrap style. It makes it very easy to fit but with a sophisticated draped look. 

What was not so easy was adapting it to have cut-on sleeves. That, and making it out of just 2 yards of fabric. I used every scrap of the fabric and puzzled through some fitting issues with the sleeves and the ties. Admittedly, I probably wouldn't recommend this mash-up, as the ties can pull a bit on the sleeves. But it ended up looking pretty good and even gives me enough movement for dancing. 


But I can't quite make up my mind about the sleeves. I love the flounce in theory, but on my body it feels like it overwhelms my frame. For our second wedding this month, I took the sleeve flounce off to try it the other way. What do you think? This is the second time I've sewn a project with the sleeves from this pattern and the second time I've taken them off, so there might be a lesson in there. 


As a bonus, the Mr. got to finally wear this coat I made for him way back when we thought we were going to a wedding in March 2020. 


Jaws Jacket

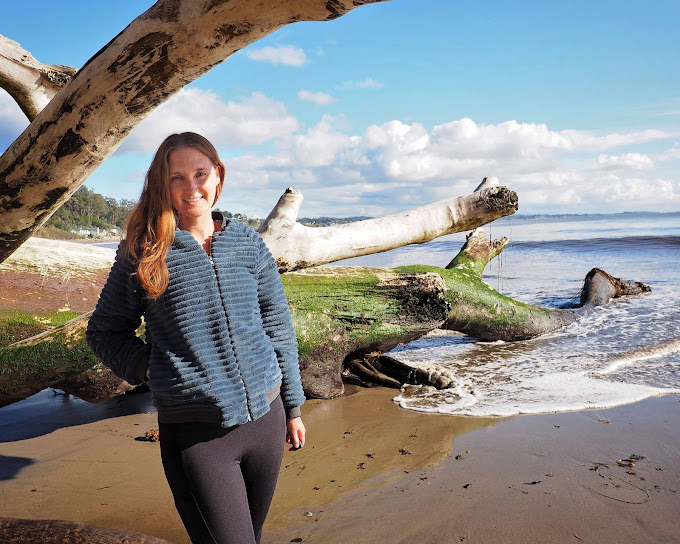
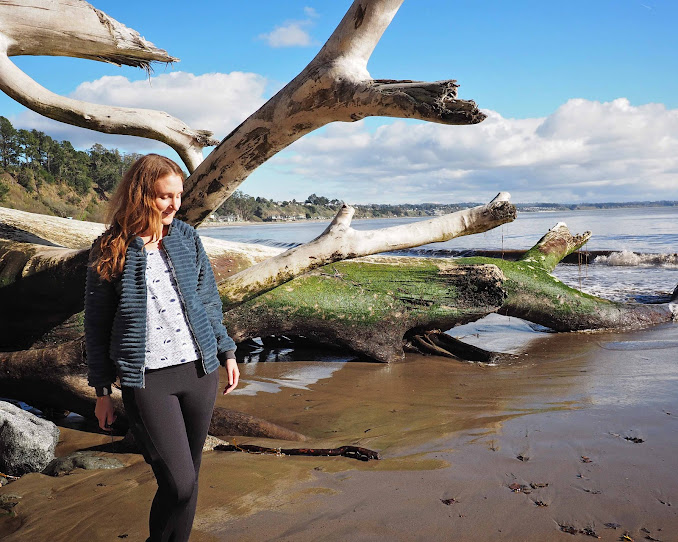
Maybe it was the chills that ran through my body as we sat at yet another outdoor hangout, maybe it was just the effects of my COVID booster shot, but I knew I needed another cozy, fuzzy jacket in my closet. I wear my teddy-bear-lined parklet jacket all the time, so there was no denying the utility of a second variation on the concept.

Fabric: 2 yds upholstery remnant + minky lining
Cost: $80

The star of this jacket is really the fabric. Aside from being ridiculously soft and fuzzy on the inside AND out, it's a fun texture and nice color with lots of dimension. This is not the sort of fabric you can dream up in your head and go out and find. Rather, I walked into the store with an open mind and, after perusing the fur aisle, I found this beauty in the section of upholstery remnants and knew it was the one. The ribbed texture even makes it look like a quilted jacket

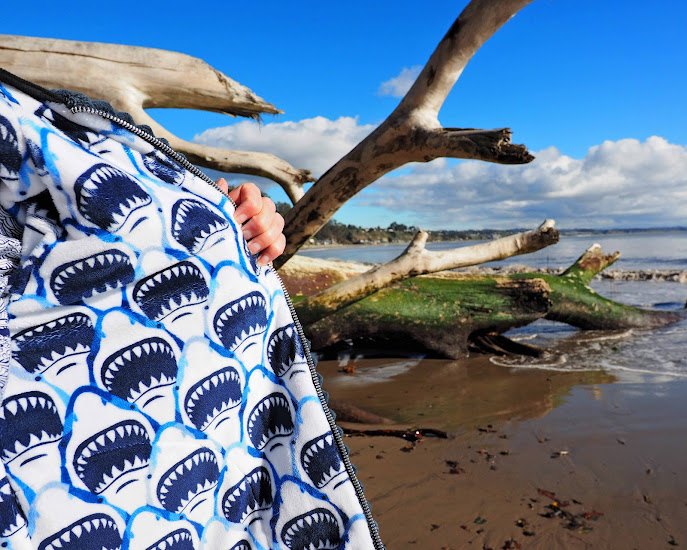
Because it was a 2-yd remnant with a few flaws I wasn't sure I'd have enough for this project, but at about $12 there was no harm in trying. And while the outer layer was cheap, I spent another $30 on minky lining and nearly another $30 (!) on ribbing. But look at that shark lining! Isn't it perfect? I may have a new obsession. 


Aside from getting fuzzy fabric everywhere, it actually wasn't that difficult to sew with. I made sure to match the ribs where it mattered but otherwise it came together just fine. I even accidentally placed the flaw (a big hole!) in the middle of one of my sleeves but was able to sew it shut by hand and it completely disappeared. It did help that the whole thing was lined - imagine trying to finish those bulky seams! 

The ribbing is fancy Merchant and Mills ribbing that sells for $14 a yard. It is admittedly a bit lightweight for this project (would be better on a t-shirt of light sweatshirt) but it's really hard to get ribbing, especially locally. 

The pattern is Simplicity which I bought because it includes instructions for lining. I then of course promptly ignored all the instructions, but it was nice to know that I had all the pattern pieces I needed. I also wanted a raglan sleeve as I already have similar jackets with a set-in sleeve. 

Unlike my parklet jacket, this one is a bit more snug and feels a bit bulky in all the layers. But it is delightfully warm and good enough for dinner or a drink out. Now I just might need fuzzy pants and I'd be all set. 


I'll leave you this parting shot from the beach :) 


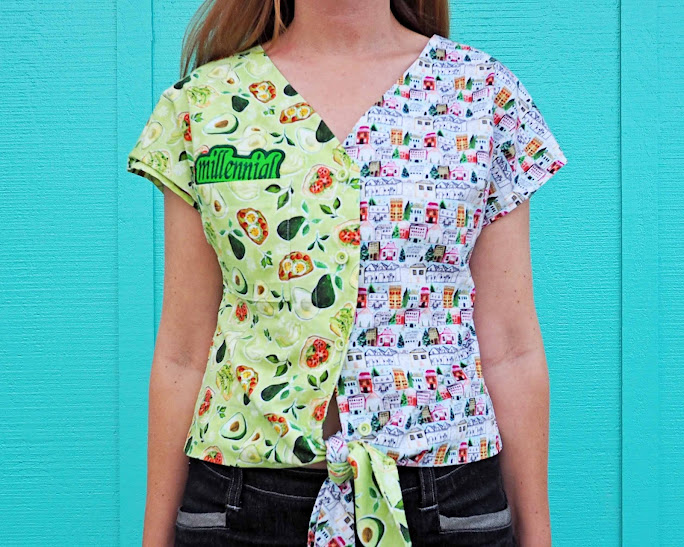
Avocados and Houses

In 2017, an Australian millionaire remarked that many millennials couldn't afford a house because they were spending all their money on avocado toast and expensive lattes. "Shouldn’t they be economizing by eating at home? How often are they eating out? Twenty-two dollars several times a week could go towards a deposit on a house," he opined. These remarks spawned a million memes and, rightfully, some harsh criticism for his words. 

In the United States at least, my generation (currently those between 25 and 40 years old) has faced a stagnating minimum wage, the deterioration of workers' rights through a gig economy, the Great Recession, the rising cost of college (and corresponding rising debt), and continued racial and gender barriers in a system that is decimating the middle class. The idea that small-scale, individual decisions could fix these problems, or that a great many millenials could even buy these small luxuries to begin with, was laughable. While I'm all for smart money decisions and saving, if you're scraping by on a minimum wage job (or jobs), hoarding your pennies will not buy you a house where I live. 

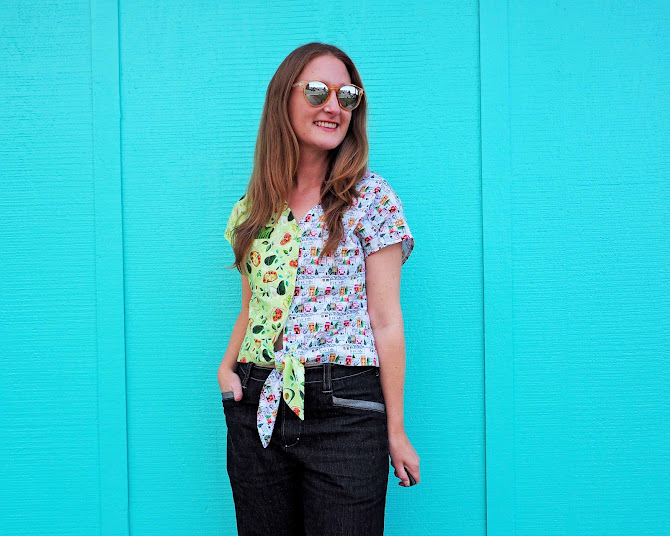
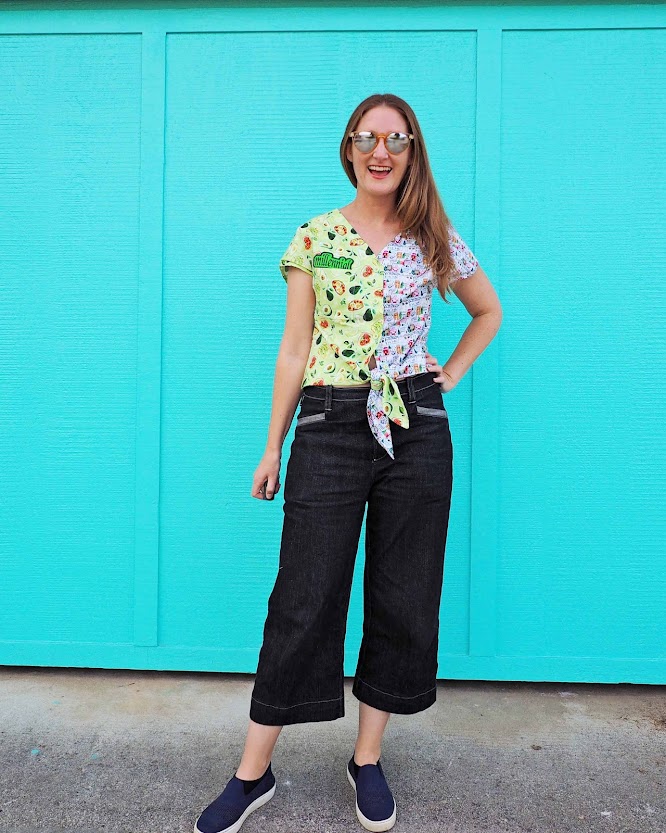
So of course when I saw this avocado toast fabric at Stonemountain I knew what I had to do. A quick search revealed that they sold a houses print from the same company, and my 'avocados and houses' shirt was born. I'm not sure everyone will get it, but it's funny and just a little bit snide. 

Pattern: McCalls Misses' Dresses #7920 as a top with ties
Fabric:1 yd each of Dear Stella in Avocado Toast and Holiday Village
Cost: $30

It took me a while to decide the best way to combine these two fabrics into one shirt, but I eventually settled on a simple button-up shirt. The pattern is McCall's #7920 (originally a dress pattern) that I've made before and like the fit of. I added the ties from McCall's #7976, which on its surface appears to be a very similar top but is much more over-sized. 

The darts give it a nice shaping in the back and the front. 

The patch I ordered from Etsy full the full millennial effect. 


Admittedly it's a very bright shirt in a novelty print. But I finally wore it out today and got compliments at both the yarn shop and fabric store, so I think it will be a fun one to wear. Maybe I'll find a good outdoor brunch spot and can get some avocado toast. ;)


Made It Through 2021!

This is my tenth sewing year in review. It's become somewhat of a tradition--a little something I do in that lazy time between Christmas and New Year's to reflect on what I've been making. In some years I've run the stats; in others I try to learn something from my mistakes. But as the years go on I'm also just content to make things as my heart desires. Last year I made a lot. This past year I made less. I like to just make things as the mood strikes. If I wear it, that's great. And if I don't, hopefully it at least makes me smile or challenges me in some new way.

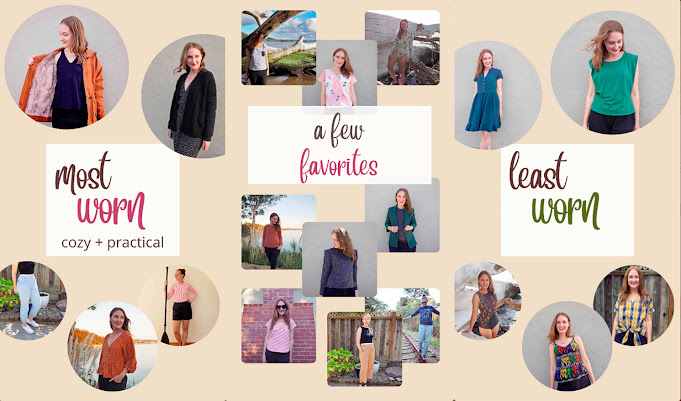
One big difference from ten years ago has been the rise of social media, especially Instagram. It seems hardly anyone reads blogs anymore. But I've been doing this so long I'd hate to part with it. So below is a little roundup story I made for Instagram along with some notes about where you can find each project. It's a nice little index of the year. And if you want to watch the video, I'll add it below. 


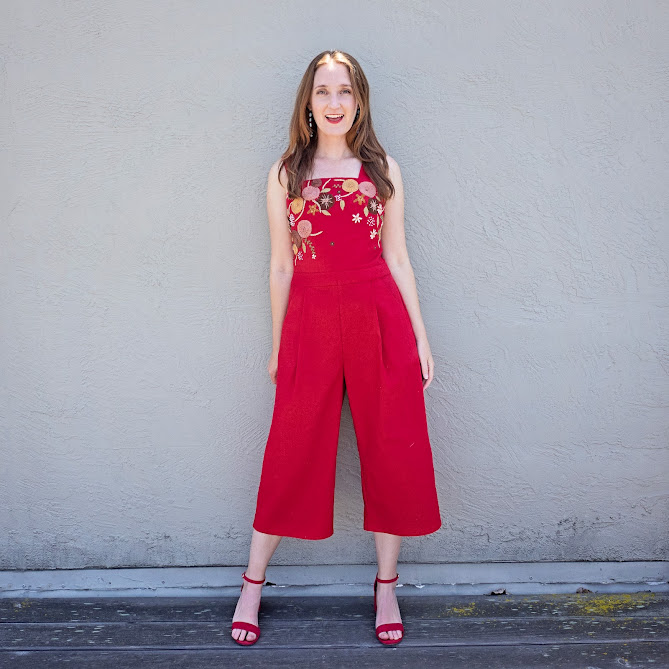
My favorite project of the year was this embroidered jumpsuit. It was a technically interesting project with lots of fitting and time spent learning new embroidery skills. It used fabric from my stash. And it was a celebration of sorts for getting vaccinated and being able to see more friends, mostly outside in the warm, welcomed days of summer. I loved making it and I loved wearing it, and if there's one memory I want to hold on to from this year it's this one. 


Many of the other things I made this year were well-worn, made me smile, or both! They include:

Most Worn:
Other Favorites:
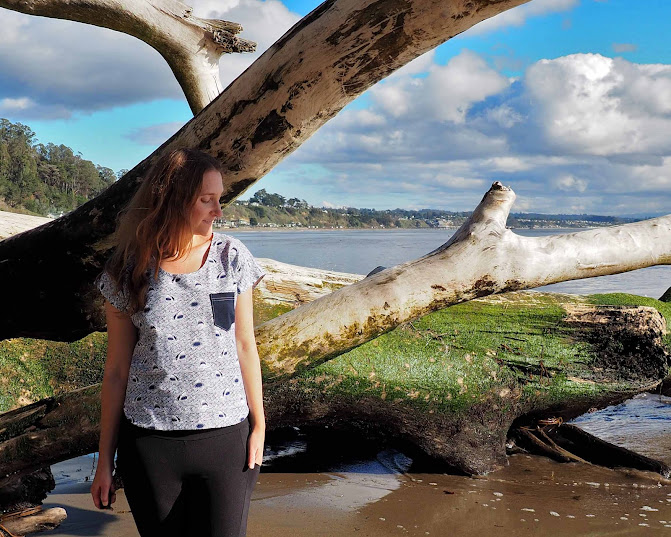
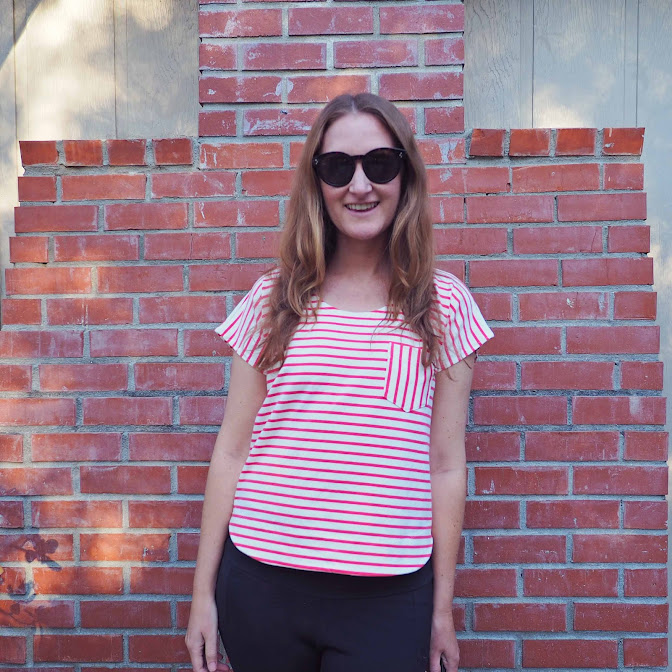
  • My Perfect T-Shirt pattern, sewed up in two new prints - sharks and stripes
  • Women Shirt - there's just something about this top that feels right - it's fun, put together, easy, and I wore it to get my vaccine!
  • Seabright Swimmers were a fun one-piece suit with great sun protection for kayaking
  • October Days Sweater was a real triumph for me in knitting a beautiful, complicated light-weight sweater that I actually wear
  • Exaggerated shoulders were a new look this year and made both my favorite and least-worn lists
  • The Green Blazer was something I didn't wear at all, but I still like it! Maybe there will be more opportunities this year? (probably not)
  • Railroad Denim - the jury's still out on this particular pair of pants, but I really loved trying out the custom fit of Fayma patterns
There are also a few things that probably won't make the cut
  • My Myosotis dress fit better than the last version, but has gotten a lot less wear. Maybe it just feels too prairie? 
  • Lawren Bathing Suit - despite having a lot of fun choosing the fabrics and loving the cut of this suit, it was still a bit short on me and the neckline was too high. I may try this again with a few adjustements
  • Party Cami was an experiment in converting an old thrifted Halloween Costume into something wearable, but I'm not sure it's made the cut
  • McCall's #7976 Tie-Front Top - this was an interesting experiment in buying two nearly identical-looking McCall's patterns with very different fits. I like the #7920 better


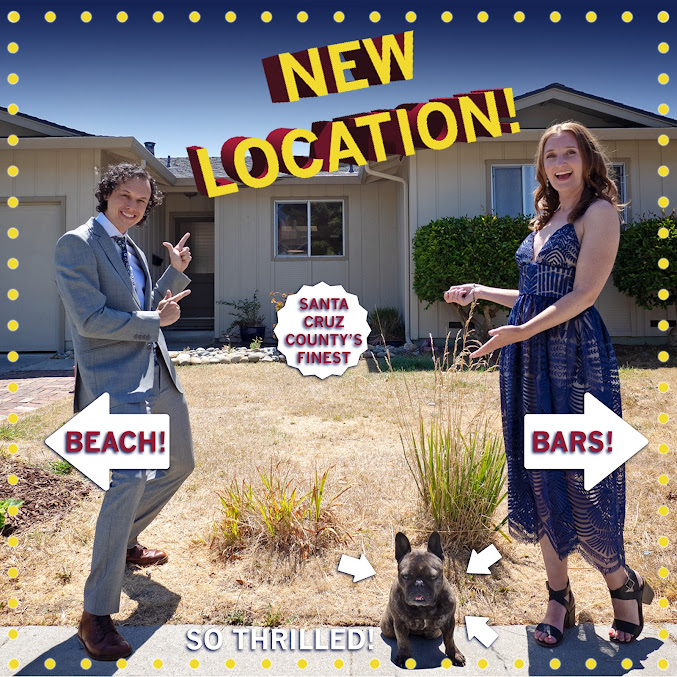
By far my biggest project this year was moving in June. After feeling a bit priced out of the SF bay area, we took advantage of an opportunity to move a few hours south to Santa Cruz County to a new (old) house and closer to family. The change of scenery has brought me a lot of joy, and I'm also trying my hand at seeing how far some paint and a screwdriver can take me in fixing up our place. It's been fun to balance these new skills with sewing projects. 

I hope the new year has something bright in store for you! I don't know where this year will take me, but I'm so ready to be done with 2021!


My Perfect T-Shirt

Probably more than a decade ago, I bought a cute striped shirt with cut-on sleeves. I wore it all the time (still do) and eventually decided I needed to make myself a pattern. I sewed myself one and wore that one all the time. So I guess it was time to make two more. 


Pattern: self drafted t-shirt with cut-on sleeves 
Cost: sponsored

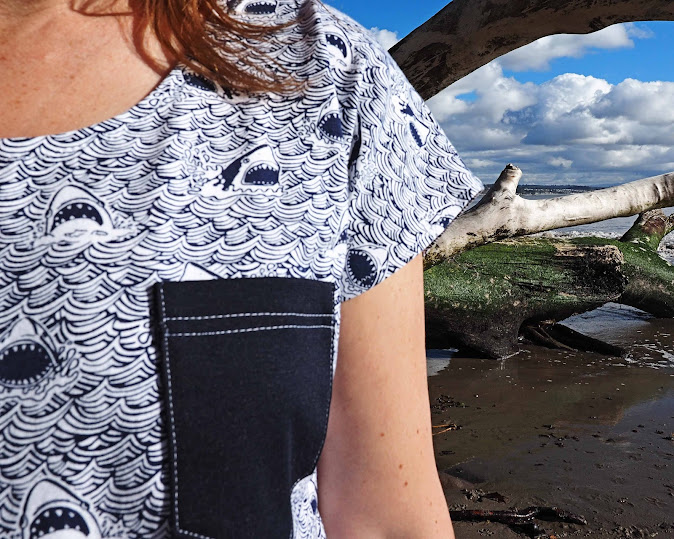
One of the best parts about making your own t-shirt is picking out a fun fabric. As opposed to a coat or a special occasion dress, I feel like I can be a little bit more playful with a t-shirt. Modes4U, who specializes in cute prints, was nice enough to send me a yard each from two brands I'm obsessed with: a Dear Stella shark knit and an Art Gallery coral stripe knit

How great is this shark print!?! Fun fact: that ocean behind me is VERY sharky. 


This top has some nice features that I think make it a favorite. For one, the cut-on sleeves are easy to wear and make it very fast to sew. I also make it with a hem facing that gives the top a nice weight and prevents any curling hems. The hems of the sleeves and neckline are serged to give them a bit of weight, too, and then just folded under and stitched with a zig-zag stitch. 

I've always loved Art Gallery knits because they have a nice weight without being too bulky, and they're buttery soft. The Dear Stella print has a bit less stretch and feels more like a traditional t-shirt weight, which also works well for this top. 

If you'd like to make your own, this is probably the most common shirt pattern I've seen on the internet, so choose your favorite pattern brand and see if they make one. And check out the Modes4U knits to get yourself something fun. 

Happy holidays everyone!

Ruby Star's Warp and Weft

I'm currently obsessed with Ruby Star Society's Warp and Weft Fabric. To my count, I've made at least four things with it this year, including this latest project. Designed by Alexia Marcelle Abegg, I love these soft and drapey fabrics, with yarn-dyed flats creating beautiful geometric designs.


Pattern: McCall's Misses' Dresses #7969
Fabric: 2yds Ruby Star Society Warp & Weft Wovens in Parade Lavender
Cost: $30

The pattern for this is McCall's 7969, which has to be one of their most popular of the year. Honestly, I passed it over the first time I saw as a somewhat boring, loose-fitting dress. However, it's Instagram fame was such that you keep seeing more beautiful and beautiful versions until it slowly wears you down and you're hoping over to the site to buy it at full price. Ok I probably bought it on sale. 

You'll notice that this is, in fact, a top and not a dress. Something that is much more likely to get worn by me. And while I long ago tried to stop by quilting cottons for garments, I have more recently learned that I do like the occasional button-up and wrap top, so I think this will be ok for me. Lord knows I have worn it a lot already this fall. 


Its best feature is definitely those sleeves. The opening is slightly tilted at the cuff and they have beautiful full gathers at both the cuff and the shoulder. The neckline sits nice and wide on the shoulders but somehow stays in place. Of course, I had to reinsert my neckline binding after I stretched in out, but the second (third?) time worked well. As others have done, I sewed a few stitches at the bust to keep the wrap in place. And next time I may cut it a tad longer but even with two yards I barely squeezed this out of my fabric. Those sleeves are a beast. 


Anyway, I think it looks nice with my new backdrop. And also for pumpkin carving. And Thanksgiving. I may have worn this to every occasion since I made it in late October. 


Railroaded

I think I've wanted a pair of railroad stripe denim pants for nearly as long as I've been making pants. This past weekend, I finally did the thing. Photographed on a railroad track, naturally.


Pattern: Fayma's Nightly Walk Pants
Cost: sponsored

The impetus for these pants came about when an online fabric shop, Modes4U - a company now based in Singapore that sells everything cute and kawaii, reached out to offer some fabric. Even if cutesy prints aren't your thing, I found they had a wide range of fabrics in my style, from Kaufman denim to Art Gallery knits. And, of course, the fabric I have had in and out of my shopping cart for ages - this amazing railroad stripe denim

I typically sew with stretch denim (10% or more) so was a little wary of using something more rigid. However, this denim is only 6 oz and feels very soft. The pants sewed up beautifully and are really easy to wear. They even have a little spandex in them. I actually ended up walking a few miles to take photos (and go on a dog walk) and they felt great. 

To get that comfy faded look, I used the "wrong" side, which has the appearance of a lighter wash. I did an extra wide hem (4") so they would work folded at the cuff as well. And stripes are always fun to play with, so these pants utilize the stripes vertically in the legs, horizontally on the waistband, and diagonally on the back pockets. They have double belt loops in the front and crossed loops in the back. 


For these pants, I also had the opportunity to try out Fayma Patterns, who reached out around the same time to offer me one of their custom patterns. This is my first time using Fayma, and what's interesting about this company is that each pattern is uniquely fitted to you. To get your pattern, you submit 35 (!!) measurements and two photographs (front and side) and they generate something just to your measurements.

I was honestly a bit skeptical about how well this would work. If you've followed my blog for a while, you know that I love pants and find them equal parts fun and challenging to fit. The idea that a company could produce something for all my unique fitting challenges was intriguing, but I didn't really think it would work. 

However, I was pleasantly surprised by the results. My muslin was really well balanced, with the side seam hanging straight down my leg. There were no odd wrinkles at the front or back crotch, which is a common problem area for me. And they fit my legs well, from the curves of my hips, thighs, and calves. It does help that this is a less-fitted design, but really it hung very nicely. 

The one problem area, which you can see on the models on their website, is that the crotch is drafted to be a bit low. This probably makes the pattern fit on a wider range of bodies, but it's lower than it should be. I raised mine at least an inch, but probably need to fiddle with it a bit more. So it doesn't hang as nicely there on me as it should. For my final version, I also ended up reducing the wearing ease and tapering the legs somewhat, but those are more about my personal preference for the pants I wanted to make rather than fit issues. Next time I will probably also lower the rise, as these sit at my actual waist - something few patterns usually do as I'm really long-waisted! I really am quite happy with how these fit right out of the printer and definitely plan to use this pattern again. 


All the kids tell me that skinny jeans are out, so I hope this looser style will serve me well. And damn are they comfy. 
Related Posts Plugin for WordPress, Blogger...